Mordecai Amigurumi: A Professional Crochet Recipe
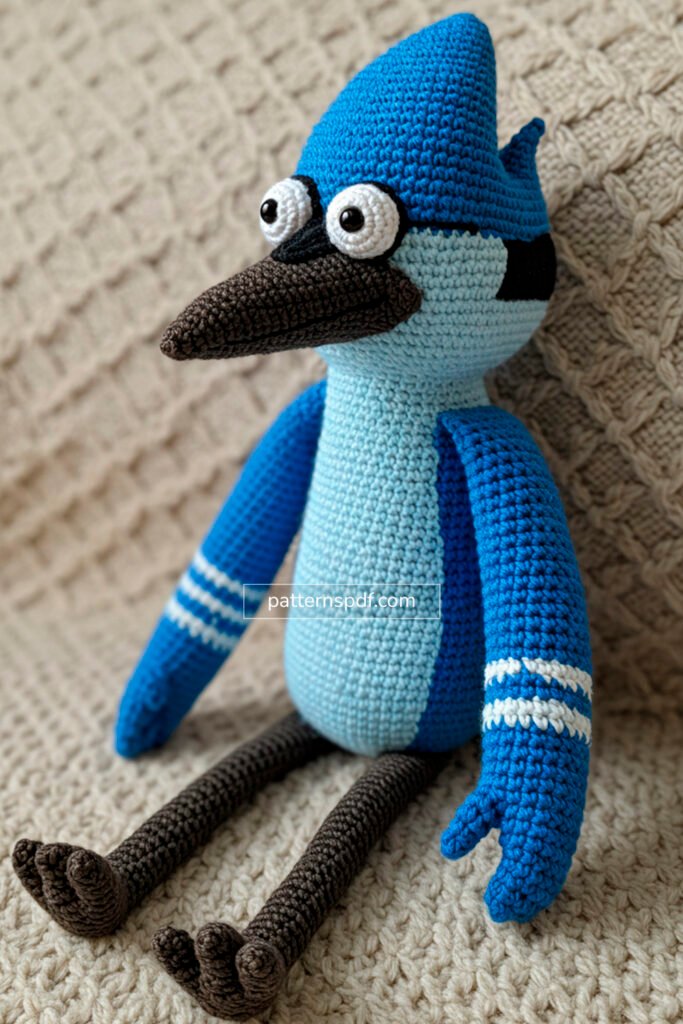
This detailed pattern is designed for intermediate crocheters to recreate the iconic blue jay, Mordecai, from Regular Show. This recipe meticulously follows the proportions and details of the provided image, resulting in a high-quality, professional-grade collectible.
Finished Size: Approximately 12-14 inches (30-35 cm) tall, depending on yarn and tension.
Materials & Tools
- Yarn: Worsted Weight (Aran, 10 ply)
- Royal Blue (A): ~150g
- Light Blue (B): ~50g
- Black (C): ~80g
- White (D): ~20g
- Dark Gray (E): ~30g
- Crochet Hook: 3.5mm (E-4)
- Safety Eyes: 12mm black, round
- Stuffing: Polyester Fiberfill
- Yarn Needle: For assembly and weaving in ends
- Scissors
- Stitch Markers
Abbreviations (US Terminology)
- ch: chain
- st(s): stitch(es)
- sl st: slip stitch
- sc: single crochet
- inc: increase (2 sc in one st)
- dec: invisible decrease (sc 2 sts together through front loops)
- MR: magic ring
- Rnd(s): round(s)
- […] x…: repeat instructions in brackets … times
- (…): stitch count at the end of a round
Instructions
Head
Start with Royal Blue (A). The head is worked from the top down, incorporating the crest.
Rnd 1: 6 sc in MR (6) Rnd 2: [inc] x6 (12) Rnd 3: [sc 1, inc] x6 (18) Rnd 4: sc 2, inc, [sc 4, inc] x2, sc 2 (21) – This creates a slight point for the back of the head. Rnd 5-7 (3 rnds): sc in each st around (21)
Begin Crest Shaping (worked in rows, then continue in rounds): Row 8: sc 7, ch 1, turn (leave remaining sts unworked) (7) Row 9: dec, sc 3, dec, ch 1, turn (5) Row 10: dec, sc 1, dec, ch 1, turn (3) Row 11: sc3tog (make 1 sc over all 3 sts) (1) Do not fasten off. Now continue working around the entire head opening.
Rnd 12: Ch 1. Work 4 sc down the side of the crest rows. sc in the 14 unworked sts from Rnd 7. Work 4 sc up the other side of the crest rows. Join with a sl st to the first sc. (22 + tip of crest) Rnd 13: sc in each st around the base of the head (approx. 22) Rnd 14: [sc 10, inc] x2 (24) Rnd 15: [sc 3, inc] x6 (30) Rnd 16: [sc 4, inc] x6 (36) Rnd 17: [sc 5, inc] x6 (42)
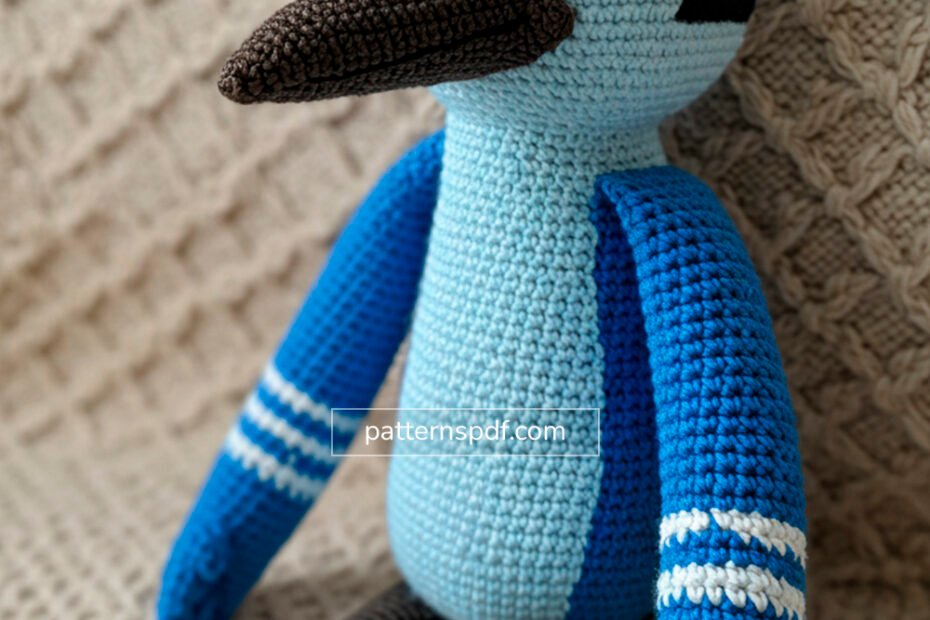
Change to Light Blue (B) for the face panel. Rnd 18: With B, sc 18. With A, sc 24. (42) Rnd 19: With B, sc 19. With A, sc 23. (42) Rnd 20-22 (3 rnds): With B, sc 20. With A, sc 22. (42) Rnd 23: With B, sc 21. With A, sc 21. (42)
Begin decrease for neck. Rnd 24: With B, [sc 5, dec] x3. With A, [sc 5, dec] x3. (36) Rnd 25: With B, sc 18. With A, sc 18. (36) Rnd 26: With B, [sc 4, dec] x3. With A, [sc 4, dec] x3. (30)
Insert safety eyes between Rnds 19 and 20, spaced about 8-9 stitches apart within the Light Blue section. Begin stuffing the head firmly.
Rnd 27: [sc 3, dec] x6 (24) Rnd 28: [sc 2, dec] x6 (18) Fasten off, leaving a long tail for sewing. Finish stuffing the head.
Black Head Stripe
With Black (C). Ch 31. Row 1: Starting in 2nd ch from hook, sc 30. Fasten off, leaving a long tail for sewing.
White Eye Circles (Make 2)
With White (D). Rnd 1: 6 sc in MR (6) Rnd 2: [inc] x6 (12) Rnd 3: [sc 1, inc] x6 (18) Sl st to first sc. Fasten off, leaving a tail for sewing.
Beak
With Dark Gray (E). Rnd 1: 4 sc in MR (4) Rnd 2: [sc 1, inc] x2 (6) Rnd 3: sc in each st around (6) Rnd 4: [sc 2, inc] x2 (8) Rnd 5: sc in each st around (8) Rnd 6: [sc 3, inc] x2 (10) Rnd 7: sc in each st around (10) Rnd 8: [sc 4, inc] x2 (12) Rnd 9: [sc 5, inc] x2 (14) Fasten off, leaving a long tail for sewing. Stuff lightly, keeping the shape defined.
Torso
Start with Light Blue (B). Rnd 1: 6 sc in MR (6) Rnd 2: [inc] x6 (12) Rnd 3: [sc 1, inc] x6 (18) Rnd 4: [sc 2, inc] x6 (24) Rnd 5: [sc 3, inc] x6 (30) Rnd 6: [sc 4, inc] x6 (36) Rnd 7: [sc 5, inc] x6 (42) Rnd 8-12 (5 rnds): sc in each st around (42)
You will now create the color block for the chest and back. Place a stitch marker on the first and 21st stitch to mark the sides. Rnd 13-20 (8 rnds): With B, sc 20. Change to Royal Blue (A), sc 22. (42) Rnd 21: With B, [sc 5, dec] x2, sc 6. Change to A, [sc 5, dec] x2, sc 6. (38) Rnd 22: With B, sc 18. With A, sc 20. (38) Rnd 23: With B, [sc 4, dec] x3. With A, sc 20. (35) Rnd 24: With B, sc 15. With A, [sc 4, dec] x2, sc 6. (33) Start stuffing the torso. Rnd 25: With B, [sc 3, dec] x3. With A, [sc 3, dec] x3. (27) Rnd 26: [sc 2, dec] across the round, managing color changes as they appear. (Approx. 20) Rnd 27: [sc 2, dec] around. (18) Fasten off. Finish stuffing firmly.
Arms (Make 2)
Start with Royal Blue (A). Rnd 1: 6 sc in MR (6) Rnd 2: [sc 1, inc] x3 (9) Rnd 3-10 (8 rnds): sc in each st around (9) Change to Black (C). Rnd 11-12: sc in each st around (9) Change to White (D). Rnd 13-14: sc in each st around (9) Change to Black (C). Rnd 15-16: sc in each st around (9) Change to Royal Blue (A). Rnd 17-18: sc in each st around (9) Stuff the hand part lightly, leaving the rest of the arm unstuffed. Press the opening flat and sc across to close (4 sc). Fasten off, leaving a tail for sewing.
Legs & Feet (Make 2)
Start with Black (C). Foot – make 3 toes first. Toe (Make 6 total – 3 per foot): Rnd 1: 4 sc in MR (4) Rnd 2-4 (3 rnds): sc in each st around (4) Fasten off on 4 toes. On the 2 remaining toes (one for each foot), do not fasten off.
Join Toes: Rnd 5: Take the toe on your hook, sc 2. Take a second toe, sc 2. Take the third toe, sc 4 around. sc 2 on the second toe. sc 2 on the first toe. (12) Rnd 6: [dec] x6 (6)
Leg: Rnd 7-25 (19 rnds): sc in each st around (6) Do not stuff the legs. Fasten off, leaving a very long tail for sewing.
Tail (Make 2 parts)
With Royal Blue (A). Part 1 (Shorter): Ch 7. Row 1: sc in 2nd ch from hook and next 5 chs (6) Row 2-3: ch 1, turn, sc 6 Row 4: ch 1, turn, dec, sc 2, dec (4) Row 5: ch 1, turn, sc 4 Row 6: ch 1, turn, [dec] x2 (2) Row 7: ch 1, turn, sc 2. Fasten off.
With Black (C). Part 2 (Longer): Ch 9. Row 1: sc in 2nd ch from hook and next 7 chs (8) Row 2-4: ch 1, turn, sc 8 Row 5: ch 1, turn, dec, sc 4, dec (6) Row 6: ch 1, turn, sc 6 Row 7: ch 1, turn, dec, sc 2, dec (4) Row 8: ch 1, turn, sc 4 Fasten off.
Assembly
- Face: Sew the White Eye Circles onto the head, just above the beak area. Sew the black safety eye through the center of the white circle and the head.
- Beak: Sew the beak centered on the face, right below and between the eyes, over Rnds 20-24.
- Head Stripe: Wrap the Black Head Stripe around the head, starting from the back-center, going under the crest, and angling down towards the front on either side of the Light Blue face panel, mimicking a “V” shape at the back. Pin in place and sew securely.
- Attach Head to Torso: Use the long tail from the head to sew it securely to the opening of the torso. Ensure it’s centered and straight.
- Arms: Sew the closed end of each arm to the sides of the torso, around Rnd 23-24.
- Tail: Place the shorter blue tail piece on top of the longer black one. Sew them together at the base. Attach the combined tail to the lower back of the torso.
- Legs: Using the long tails, sew the open end of the legs to the bottom of the torso. For stability, you can run the yarn through the body from one leg to the other a few times to pull them slightly together and secure them. Position them so he can stand with support or sit properly.