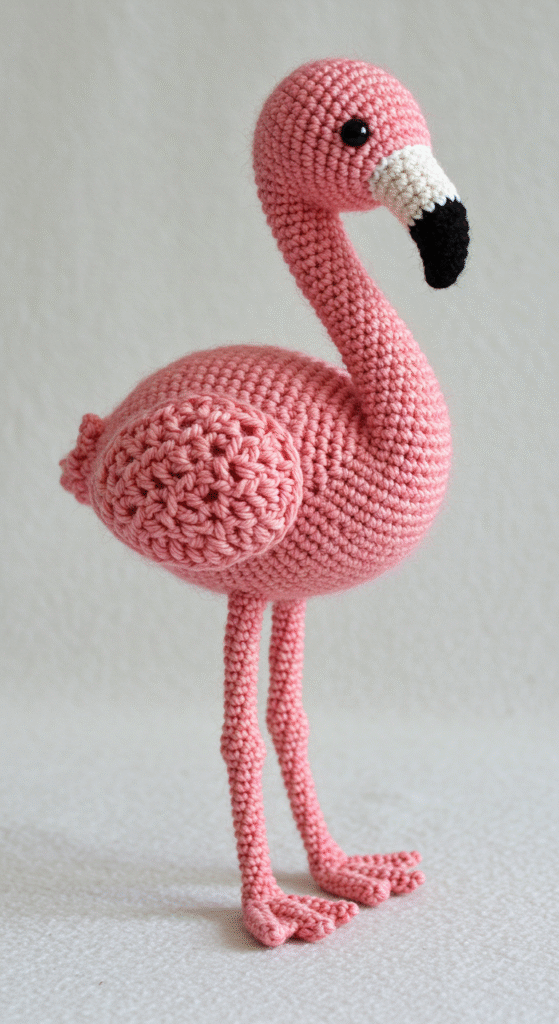
Flamingo Crochet Amigurumi perfectly captures the graceful beauty of this iconic bird in a delightful, handcrafted form. This stunning crocheted rendition features the flamingo’s signature vibrant pink hue, meticulously stitched to create its slender, elegant neck and full, round body. The attention to detail extends to its distinctive hooked beak, rendered in white and black, and its long, delicate legs with webbed feet, all designed to allow it to stand tall. This charming flamingo amigurumi is more than just a decorative piece; it’s a testament to the artisan’s skill, making it an ideal gift for bird lovers, collectors of unique amigurumi, or anyone looking to add a touch of tropical elegance to their decor.
Crafting Your Own Flamingo Crochet Amigurumi
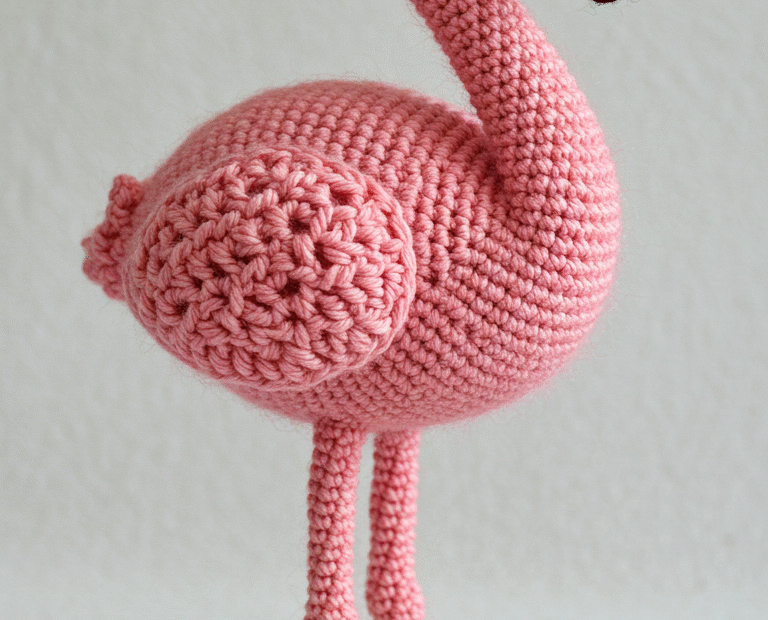
For those eager to recreate this elegant avian, embarking on a Flamingo Amigurumi project offers a rewarding and fun challenge. While a specific pattern isn’t provided, observing the image reveals the intricate shaping involved. The long neck is likely a tube of single crochet, gradually increasing in width to form the head and then smoothly transitioning into the rounded body. The realistic wing texture on the body suggests advanced techniques like post stitches or strategically placed increases/decreases. The slender legs require careful stuffing and potentially wire reinforcement to allow the flamingo to stand independently, while the distinctive beak involves precise color changes. With patience and a keen eye for detail, crocheters can bring this beautiful pink bird to life, stitch by graceful stitch.
Elegant Flamingo Amigurumi Pattern: Crochet a Touch of Tropical Charm!
Skill Level: Intermediate to Advanced (due to wire work and shaping)
Finished Size: Approximately [X] inches / [Y] cm tall (when made with specified yarn and hook).
Materials:
Worsted weight yarn in:
Bright Pink (main body, neck, legs, feet, wings)
White (beak)
Black (beak tip, eye)
Crochet hook: [Hook Size, e.g., 2.5mm (C) or 3.0mm (D)] – use a smaller hook for tighter stitches.
Stitch marker
Tapestry needle
Polyester fiberfill for stuffing
Floral wire or craft wire (approx. 18-20 gauge): [Length for 2 legs + head/neck support, e.g., 2 x 18 inches]
Pliers (for bending wire)
Small black bead or safety eye (e.g., 5-6mm) OR Black embroidery floss for embroidered eye
Scissors
Optional: Wire cutters
Abbreviations (US Crochet Terms):
MR: Magic Ring
ch: chain
sc: single crochet
hdc: half double crochet
dc: double crochet
inc: single crochet increase (2 sc in one stitch)
dec: single crochet decrease (sc2tog)
sl st: slip stitch
FO: Fasten off
st(s): stitch(es)
[…] : repeat instructions in brackets
(…) : stitch count at the end of the round/row
BLO: Back Loop Only
FLO: Front Loop Only
Important Notes:
This pattern is worked in continuous rounds unless otherwise specified. Use a stitch marker to mark the first stitch of each round.
Stuff pieces firmly as you go, especially the body and head. The neck needs to be firm enough to support.
Wire Reinforcement is Crucial: For the neck and legs to hold shape and allow the flamingo to stand, wire reinforcement is essential. Ensure wire ends are bent into small loops and covered with tape for safety before inserting into stuffing.
Gauge is not critical for this project, but consistent tension will ensure a neat finish and good proportions.
FO, leaving a long tail for sewing. Continue stuffing to finish body.
Neck and Head (Bright Pink Yarn)
Round 1: 6 sc in MR. (6)
Round 2: [Inc] x6. (12)
Round 3: [Sc, inc] x6. (18)
Round 4: [2 sc, inc] x6. (24)
Rounds 5-8: Sc in each st around. (24)
Round 9: [2 sc, dec] x6. (18)
Round 10: [Sc, dec] x6. (12) – Start stuffing head. Insert a piece of wire for neck support. Bend one end into a small loop, wrap with tape. Push it through the head down into the neck, ensuring it’s centered and long enough to extend into the body.
Rounds 11-30: Sc in each st around. (12) – Continue stuffing neck firmly around the wire as you go. Adjust number of rounds for desired neck length.
Round 31: [Sc, dec] x4. (8)
Round 32: Sc in each st around. (8)
FO, leaving a long tail for sewing.
Beak (Start with Bright Pink Yarn)
Chain 4.
Round 1: Sc in 2nd ch from hook, sc, 3 sc in last ch. Working down other side of ch: 2 sc. (8)
Round 2: Sc, inc, sc, inc x2, sc, inc. (12)
Rounds 3-4: Sc in each st around. (12)
Change to White Yarn.
Round 5: Sc in each st around. (12)
Change to Black Yarn.
Round 6: Sc in each st around. (12)
Round 7: [Sc, dec] x4. (8)
Round 8: [Dec] x4. (4)
FO, leaving a long tail for sewing. Stuff lightly.
Wings (Make 2 – Bright Pink Yarn)
Round 1: 6 sc in MR. (6)
Round 2: [Inc] x6. (12)
Round 3: [Sc, inc] x6. (18)
Round 4: [2 sc, inc] x6. (24)
Rounds 5-6: Sc in each st around. (24)
Round 7: [2 sc, dec] x6. (18)
Round 8: [Sc, dec] x6. (12)
FO, leaving a long tail for sewing. Lightly stuff and flatten.
Legs (Make 2 – Bright Pink Yarn)
Prepare Wire: Take a long piece of wire (e.g., 18 inches). Bend one end into a small loop and wrap with tape securely.
Round 1: 6 sc in MR. (6)
Round 2: Sc in each st around. (6)
Rounds 3-40: Sc in each st around. (6) – Adjust number of rounds for desired leg length. As you crochet, insert the prepared wire into the center of the leg, pushing stuffing around it to make it firm. Ensure the looped end is at the bottom.
FO, leaving a long tail.
Feet (Make 2 – Bright Pink Yarn)
Toes (Make 3 per foot): Ch 4, starting in 2nd ch from hook, 3 sl st. FO. (Leave a tail for sewing for only one toe per foot).
Foot Base:
Chain 5.
Round 1: Sc in 2nd ch from hook, 2 sc, 3 sc in last ch. Working down other side of ch: 3 sc. (9)
Round 2: Inc, 2 sc, inc x2, 3 sc, inc. (13)
Rounds 3-4: Sc in each st around. (13)
FO, leaving a long tail for sewing.
Assembly:
Attach Beak to Head: Sew the beak to the tip of the head.
Embroider Eye: Embroider a small black eye directly onto the head using black embroidery floss, or sew on a black bead.
Attach Neck/Head to Body: Insert the wire from the neck deep into the body, centering it. Use the tail from the neck to sew the neck securely to the top of the body. Ensure it stands upright.
Attach Wings: Pin the two wings to the sides of the body, slightly towards the back, as seen in the image. Sew securely.
Attach Legs to Body: Insert the wired legs into the bottom of the body, positioning them so the flamingo can balance. Use the tails from the legs to sew them securely to the body.
Assemble Feet:
Take the foot base. Sew the three crocheted toes to the front edge of the foot base.
Use the wire from the leg, push it through the middle of the foot base, and bend it to match the shape of the foot. Secure the wire in place (e.g., by sewing over it with pink yarn or by bending it into the base).
Sew the foot securely to the end of the leg.
Weave in all remaining loose ends securely. Bend the legs and feet slightly to achieve a stable standing pose.
Copyright and Selling:
This pattern is for personal use only.
Please do not sell, distribute, or reproduce this pattern in any form, in whole or in part.
You may sell finished items made from this pattern, but please give credit to [Your Name/Pattern Name] as the designer.