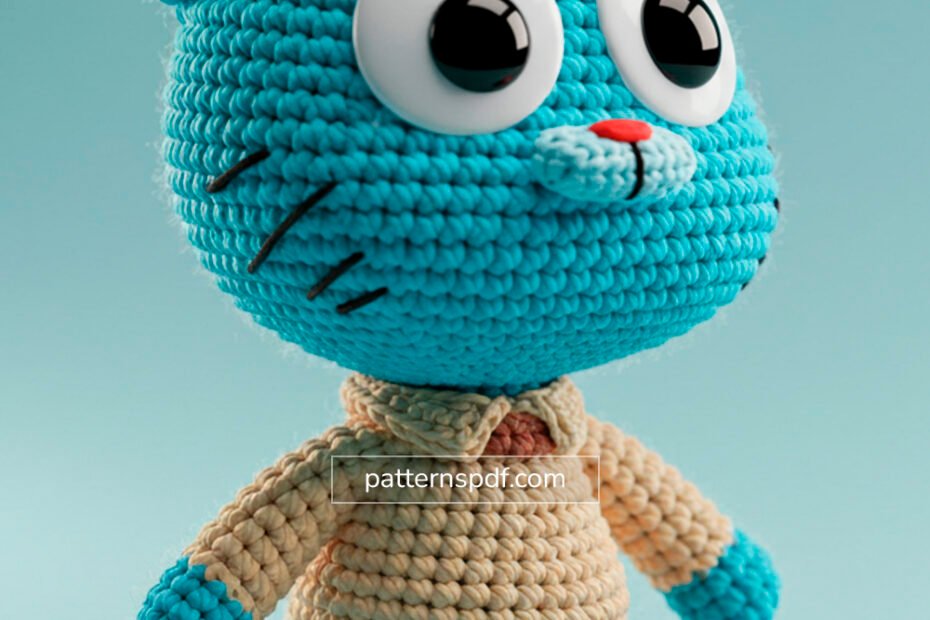
Gumball Watterson Amigurumi perfectly captures the charmingly mischievous star of The Amazing World of Gumball in a delightful, handcrafted form. This crocheted rendition features Gumball’s signature bright blue fur, his large, expressive eyes with prominent black pupils, and that adorable little red nose. Dressed in his classic beige sweater with a brown collar and grey pants, every detail, down to his signature whiskers, is meticulously replicated. This charming Gumball amigurumi is more than just a toy; it’s a testament to the artisan’s skill and a wonderful piece of fan art, ideal for display or gifting to a fellow enthusiast of the beloved cartoon.
Crafting Your Gumball Watterson Amigurumi
For those eager to recreate this lovable character, embarking on a Gumball Watterson Amigurumi project offers a rewarding and fun challenge. While a specific pattern isn’t provided, observing the image reveals the intricate shaping and color work involved. The head and body are likely worked in continuous rounds of single crochet, forming his distinct cartoonish proportions. The appeal lies in perfecting his unique features: the prominent ears, the large, wide-set eyes (possibly large safety eyes or crocheted whites with embroidered pupils), and the color changes required for his sweater and pants. Adding the small red nose and embroidered whiskers will truly bring Gumball’s expressive face to life, allowing crocheters to stitch their way into the amazing world of Elmore.
Gumball Watterson Amigurumi Pattern: Bring Elmore’s Star Home!
Skill Level: Intermediate
Finished Size: Approximately [X] inches / [Y] cm tall (when made with specified yarn and hook).
Materials:
Worsted weight yarn in:
Bright Blue (head, ears, arms, legs/feet)
Beige/Light Tan (sweater)
Brown (sweater collar)
Grey (pants)
Red (nose)
Black (pupils, smile, whiskers, eyebrows)
Crochet hook: [Hook Size, e.g., 3.0mm (D) or 3.5mm (E)] – adjust as needed to achieve tight stitches without gaps.
Stitch marker
Tapestry needle
Polyester fiberfill for stuffing
Safety eyes: [Size, e.g., 18mm or 20mm large round white safety eyes with black pupils as pictured]
Scissors
Pins for assembly
Abbreviations (US Crochet Terms):
MR: Magic Ring
ch: chain
sc: single crochet
inc: single crochet increase (2 sc in one stitch)
dec: single crochet decrease (sc2tog)
sl st: slip stitch
FO: Fasten off
st(s): stitch(es)
[…] : repeat instructions in brackets
(…) : stitch count at the end of the round/row
Important Notes:
This pattern is worked in continuous rounds unless otherwise specified. Use a stitch marker to mark the first stitch of each round.
Stuff pieces firmly as you go, unless stated otherwise, to maintain shape.
Gauge is not critical for this project, but consistent tension will ensure a neat finish and good proportions.
Color changes should be made on the last pull-through of the previous stitch for a cleaner transition.
PATTERN INSTRUCTIONS
Head (Bright Blue Yarn)
Round 1: 6 sc in MR. (6)
Round 2: [Inc] x6. (12)
Round 3: [Sc, inc] x6. (18)
Round 4: [2 sc, inc] x6. (24)
Round 5: [3 sc, inc] x6. (30)
Round 6: [4 sc, inc] x6. (36)
Round 7: [5 sc, inc] x6. (42)
Round 8: [6 sc, inc] x6. (48)
Rounds 9-16: Sc in each st around. (48)
Round 17: [6 sc, dec] x6. (42)
Round 18: [5 sc, dec] x6. (36) – Insert safety eyes between Rounds [14 and 15], approximately [6-8] stitches apart. The eyes are quite large, so position them closer to the center of the face.
FO, leaving a long tail. Weave the tail through the front loops of the remaining 6 stitches and pull tight to close. Weave in end.
Ears (Make 2 – Bright Blue Yarn)
Round 1: 6 sc in MR. (6)
Round 2: [Inc] x6. (12)
Round 3: [Sc, inc] x6. (18)
Rounds 4-5: Sc in each st around. (18)
FO, leaving a long tail for sewing. Pinch flat and do not stuff.
Body / Sweater / Pants (Start with Grey Yarn for Pants)
Make 2 Legs first:
Round 1: 6 sc in MR. (6)
Round 2: [Inc] x6. (12)
Rounds 3-6: Sc in each st around. (12) – Adjust for desired leg/foot length.
FO for first leg. Do NOT FO for second leg.
Join Legs:
Round 7: Ch 2 from second leg, join with sl st to any stitch on first leg. Sc in 12 st on first leg, sc in 2 ch, sc in 12 st on second leg, sc in 2 ch. (28)
Rounds 8-10: Sc in each st around. (28) – Adjust for pant height.
Change to Beige/Light Tan Yarn (for Sweater).
Round 11: Sc in each st around. (28)
Rounds 12-18: Sc in each st around. (28) – Adjust for sweater length.