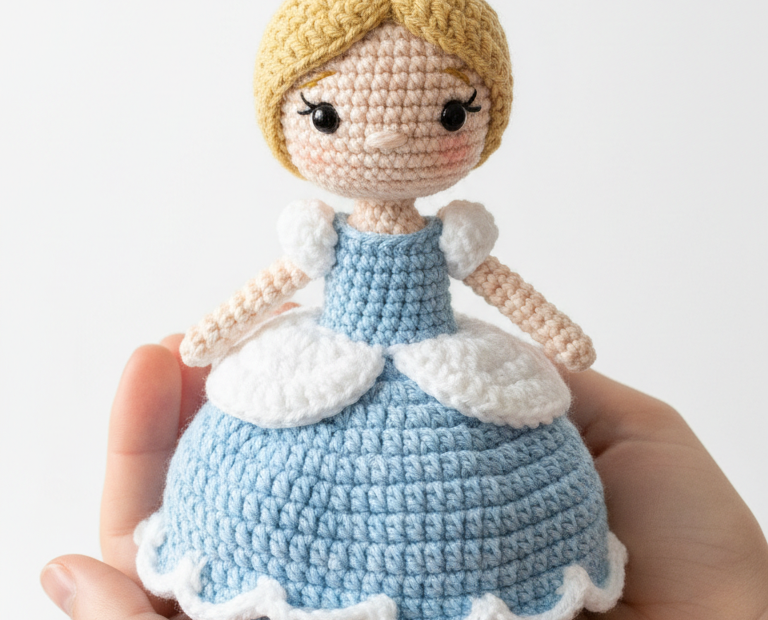
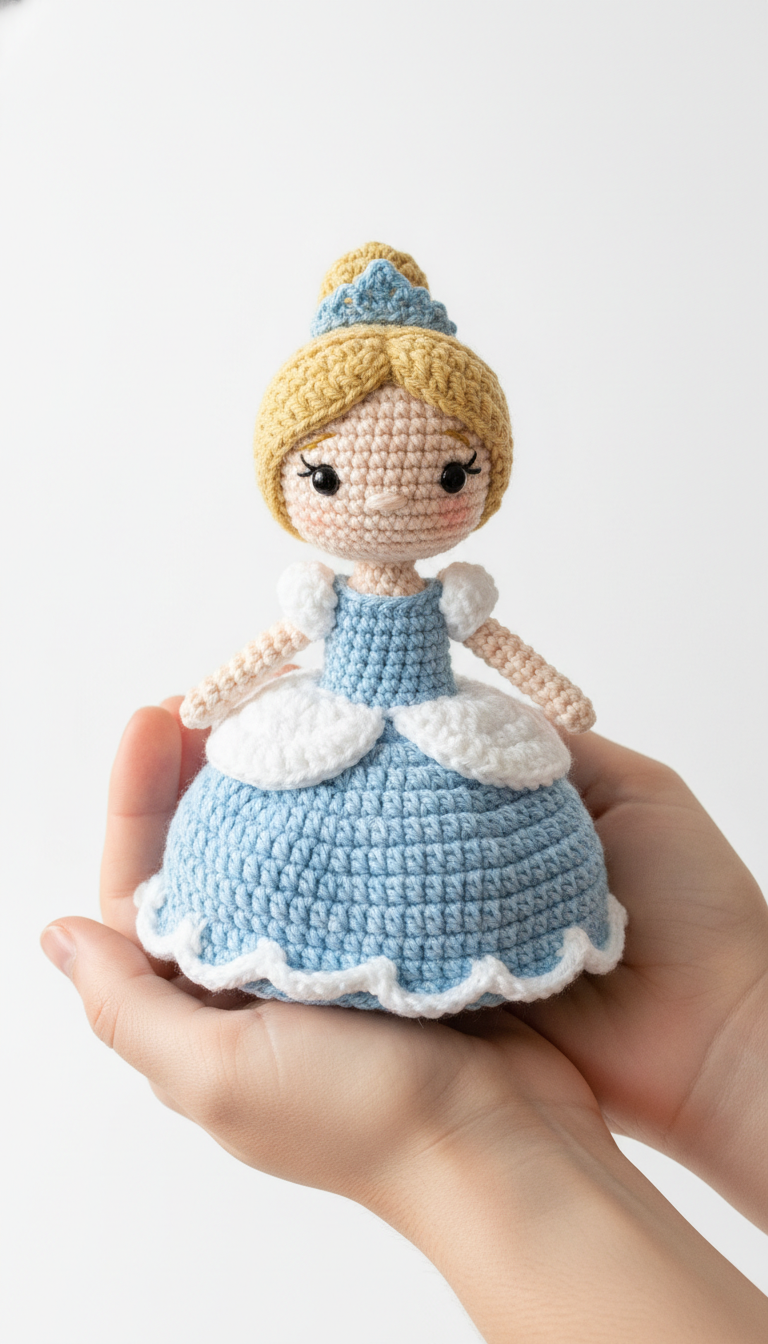
Step into a fairy tale with this enchanting Amigurumi Cinderella Princess Doll! Perfect for little dreamers or collectors, this crochet pattern guides you through creating a charming doll, complete with her iconic blue ball gown and sparkling tiara. Handcraft a magical companion that brings beloved stories to life, making it a truly special gift or a delightful addition to your own collection.
Craft a Timeless Keepsake: The Magic of Handmade Amigurumi Princesses
There’s something uniquely special about a handmade gift, especially when it captures the spirit of a beloved character. This Amigurumi Cinderella doll is not just a toy; it’s a tangible piece of imagination, a future heirloom, and a testament to your crafting passion. Each stitch weaves in love and dedication, creating a cherished treasure that will spark joy for years to come.
Worsted weight yarn in: Light Blue, Skin Tone, Golden Yellow, White, small amount of Dark Blue (for tiara detail)
Crochet hook: 2.5mm (or size suitable for your yarn to achieve a tight fabric)
Safety eyes: 6mm black
Polyester fiberfill for stuffing
Tapestry needle
Stitch markers
Optional: Pink blush makeup and brush for cheeks
Abbreviations
MR: Magic Ring
ch: chain
sc: single crochet
inc: increase (2 sc in one stitch)
dec: decrease (single crochet two stitches together)
sl st: slip stitch
FO: Fasten off
( ): repeat instructions in parentheses
[ ]: total number of stitches at end of round
Instructions
Head (Skin Tone Yarn):
R1: Start with a MR, sc 6. [6]
R2: Inc in each st around. [12]
R3: (Sc 1, inc) x6. [18]
R4: (Sc 2, inc) x6. [24]
R5: (Sc 3, inc) x6. [30]
R6-R10: Sc in each st around. [30] (5 rounds)
Insert safety eyes between R8 and R9, approximately 6-7 stitches apart.
R11: (Sc 3, dec) x6. [24]
R12: (Sc 2, dec) x6. [18]
Begin stuffing firmly.
R13: (Sc 1, dec) x6. [12]
R14: Dec x6. [6]
FO, leaving a long tail to close the opening and weave in.
Hair Cap (Golden Yellow Yarn):
R1: Start with a MR, sc 6. [6]
R2: Inc in each st around. [12]
R3: (Sc 1, inc) x6. [18]
R4: (Sc 2, inc) x6. [24]
R5: (Sc 3, inc) x6. [30]
R6-R10: Sc in each st around. [30] (5 rounds)
Sl st to the first sc, FO, leaving a long tail for sewing.
Hair Bun (Golden Yellow Yarn):
R1: Start with a MR, sc 6. [6]
R2: Inc in each st around. [12]
R3: Sc in each st around. [12]
R4: Dec x6. [6]
FO, leaving a long tail for sewing. Stuff lightly.
Tiara (Light Blue Yarn):
Ch 15. Join with a sl st to the first ch to form a ring.
R1: Ch 1, sc in each ch around. Sl st to join. [15]
R2: Ch 1, (sl st in next st, ch 2, sl st in the top of the sl st just made (picot), skip 2 sts) x5. Sl st to first sl st to join.
FO, leaving a long tail for sewing.
Body/Dress:
Start with Skin Tone Yarn (Neck):
R1: Start with a MR, sc 6. [6]
R2: Inc in each st around. [12]
R3: (Sc 1, inc) x6. [18]
R4-R5: Sc in each st around. [18] (2 rounds)
Switch to Light Blue Yarn (Bodice):
R6-R8: Sc in each st around. [18] (3 rounds)
Begin stuffing the body as you go.
R9: (Sc 2, inc) x6. [24]
R10: (Sc 3, inc) x6. [30]
R11: Sc in each st around. [30]
R12: (Sc 4, inc) x6. [36]
R13-R14: Sc in each st around. [36] (2 rounds)
R15: (Sc 5, inc) x6. [42]
R16-R17: Sc in each st around. [42] (2 rounds)
R18: (Sc 6, inc) x6. [48]
R19-R20: Sc in each st around. [48] (2 rounds)
FO, leaving a long tail.
Arms (Make 2 – Skin Tone Yarn):
R1: Start with a MR, sc 6. [6]
R2: (Sc 1, inc) x3. [9]
R3-R9: Sc in each st around. [9] (7 rounds)
Stuff lightly. FO, leaving a long tail for sewing.
Puff Sleeves (Make 2 – White Yarn):
R1: Start with a MR, sc 6. [6]
R2: Inc in each st around. [12]
R3: (Sc 1, inc) x6. [18]
R4: (Sc 1, dec) x6. [12]
FO, leaving a long tail for sewing. Stuff lightly.
White Dress Ruffles (Make 2 – White Yarn):
Ch 8.
R1: Sc in 2nd ch from hook, sc in next 5 ch, 3 sc in last ch. Turn to work on the other side of the chain: Sc in next 5 ch, 2 sc in the last ch (same as first sc). Sl st to first sc. [16]
FO, leaving a long tail for sewing.
Assembly:
1. Sew the Hair Cap onto the head. Position the Hair Bun on top of the head/hair cap and sew securely.
2. Sew the Tiara onto the Hair Bun.
3. Using a tapestry needle, embroider eyelashes onto the safety eyes with black yarn. Embroider a small nose between the eyes.
4. Lightly apply pink blush makeup to the doll’s cheeks for a rosy glow.
5. Sew the Arms to the sides of the body, just below the neck (around R5-R6 of the body).
6. Position the Puff Sleeves over the top of the arms and sew them securely.
7. Sew the two White Dress Ruffles onto the blue dress, overlapping slightly, to create the layered effect seen in the image (place them around R12-R14 of the dress).
8. Dress Hem Trim (White Yarn): Join white yarn to the bottom edge of the blue dress (R20). Ch 1, sc in same st. (Sl st in next st, ch 2, sl st in same st, skip 1 st) repeat around for a delicate scalloped edge. Sl st to first sc, FO and weave in ends.