Embrace the dark side with a touch of cuteness by crocheting your very own Darth Vader amigurumi! This detailed pattern will guide you through creating the iconic Sith Lord, complete with his signature helmet, cape, and even a tiny lightsaber. Perfect for Star Wars fans and a rewarding project for crocheters of all levels.
Crafting Your Own Galactic Empire Hero (or Villain!)
There’s nothing quite like the satisfaction of bringing a beloved character to life with your own hands. This Darth Vader amigurumi pattern allows you to do just that, creating a unique, handmade collectible or a thoughtful gift for a fellow Star Wars enthusiast. Get ready to wield your hook and yarn to create a force to be reckoned with!
Crochet Pattern: Unleash the Force: Crochet Your Own Adorable Darth Vader Amigurumi!
Materials
Black worsted weight yarn
Red worsted weight yarn
Silver/Light Grey worsted weight yarn
White worsted weight yarn (small amount for details)
Blue worsted weight yarn (small amount for details)
Green worsted weight yarn (small amount for details)
2.5mm or 3.0mm crochet hook (or hook size suitable for your yarn to achieve a tight fabric)
9mm black safety eyes
Polyester fiberfill for stuffing
Yarn needle (tapestry needle)
Stitch marker
Scissors
Abbreviations
MR: Magic Ring
sc: single crochet
inc: increase (2 sc in one stitch)
dec: decrease (sc 2 together)
sl st: slip stitch
ch: chain
FO: Fasten Off
Rnd: Round
st(s): stitch(es)
Instructions
Get ready to crochet your own miniature Sith Lord! Work in continuous rounds unless otherwise specified. Use a stitch marker to mark the first stitch of each round.
Head and Body (Black Yarn)
Head:
Rnd 1: 6 sc in MR. (6)
Rnd 2: [inc] x6. (12)
Rnd 3: [sc, inc] x6. (18)
Rnd 4: [2 sc, inc] x6. (24)
Rnd 5: [3 sc, inc] x6. (30)
Rnd 6-10: sc in each st around. (30)
Rnd 11: [3 sc, dec] x6. (24)
Rnd 12: [2 sc, dec] x6. (18)
Insert safety eyes between Rnd 8 and 9, about 6-7 stitches apart. Begin stuffing the head firmly.
Body (Continue from Head):
Rnd 13: [2 sc, inc] x6. (24)
Rnd 14: [3 sc, inc] x6. (30)
Rnd 15-20: sc in each st around. (30)
Rnd 21: [3 sc, dec] x6. (24)
Rnd 22: [2 sc, dec] x6. (18)
Continue stuffing the body firmly as you go.
Rnd 23: [sc, dec] x6. (12)
Rnd 24: [dec] x6. (6)
FO, leaving a long tail. Weave the tail through the front loop of the remaining 6 stitches and pull tight to close. Weave in end.
Arms (Make 2 – Black Yarn)
Rnd 1: 6 sc in MR. (6)
Rnd 2-6: sc in each st around. (6)
Slightly stuff the end of the arm.
FO, leaving a long tail for sewing.
Cape (Black Yarn)
ch 16.
Row 1: sc in 2nd ch from hook and in each ch across. (15 sc)
Row 2-8: ch 1, turn, sc in each st across. (15 sc)
FO, leaving a long tail for sewing.
Lightsaber Blade (Red Yarn)
Rnd 1: 4 sc in MR. (4)
Rnd 2-7: sc in each st around. (4)
Stuff lightly.
FO, leaving a short tail to secure later.
Lightsaber Hilt (Silver/Light Grey Yarn)
Rnd 1: 4 sc in MR. (4)
Rnd 2-3: sc in each st around. (4)
FO, leaving a long tail for sewing to the blade and for attachment.
Assembly and Details
1. Assemble Lightsaber: Sew the Red blade onto the Silver/Light Grey hilt. You can embroider a few horizontal lines on the hilt with silver yarn for detail.
2. Attach Arms: Sew the arms to the sides of the body, just below the neck/shoulder area, around Rnd 13-14 of the body.
3. Attach Cape: Position the top edge of the cape across the back of Darth Vader’s neck/shoulders. Sew it securely to the body.
4. Helmet/Faceplate Details:
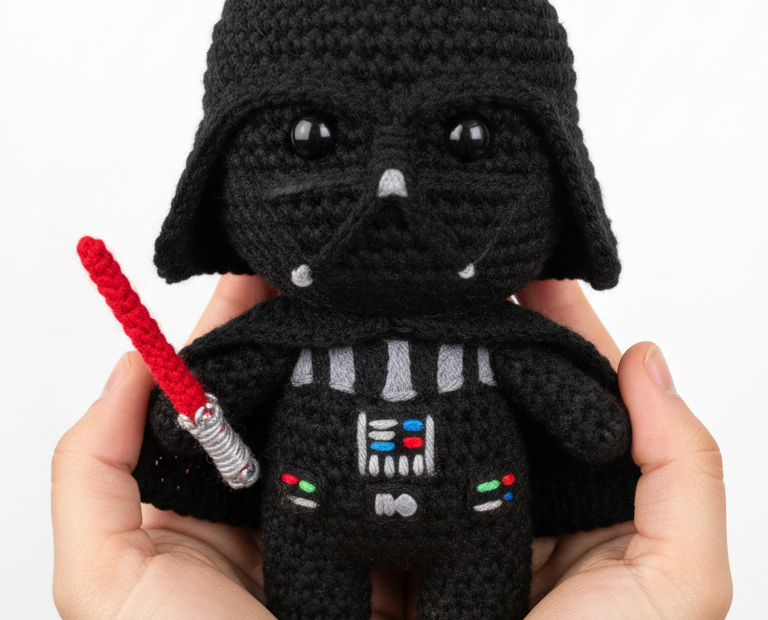
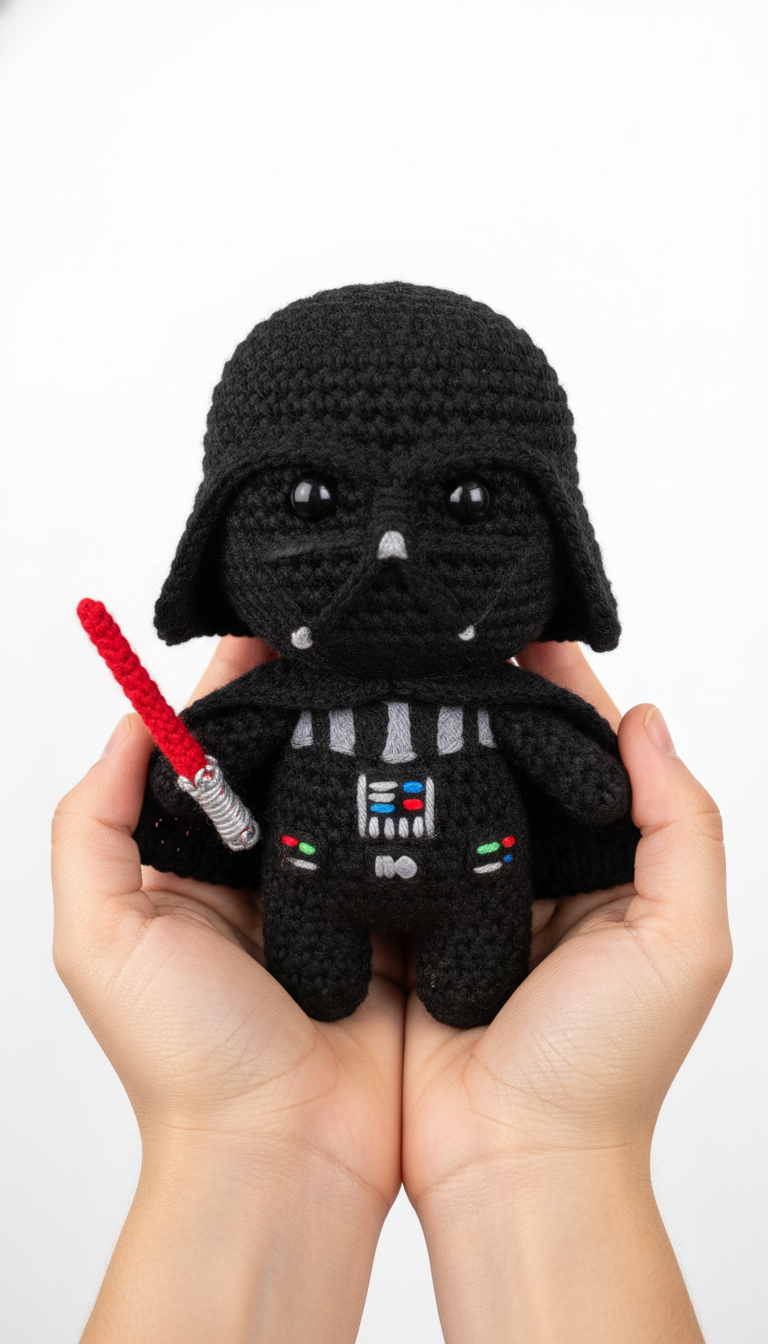
With Black yarn, embroider the distinct lines of the helmet and the eye slits to frame the safety eyes. Refer to the image for placement.
Using White/Light Grey yarn, embroider small horizontal lines for the mouth grille on the lower part of the mask.
Embroider small grey triangles for the nose/breathing apparatus area.
5. Chest Panel Embroidery:
With Silver/Light Grey yarn, embroider a rectangular panel onto the front of the body, just below the head.
Inside this rectangle, using Red, Blue, Green, and White/Light Grey yarns, embroider small squares/rectangles to replicate the control panel buttons. Use the image as a guide for color and placement.
Below the main control panel, embroider two small grey oval/rectangular shapes.
Weave in all remaining ends. Your mini Darth Vader is complete!