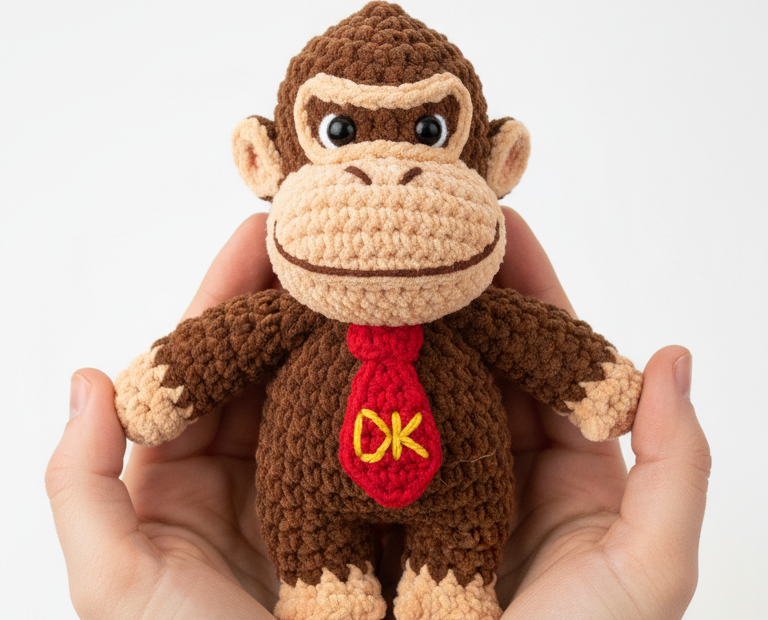
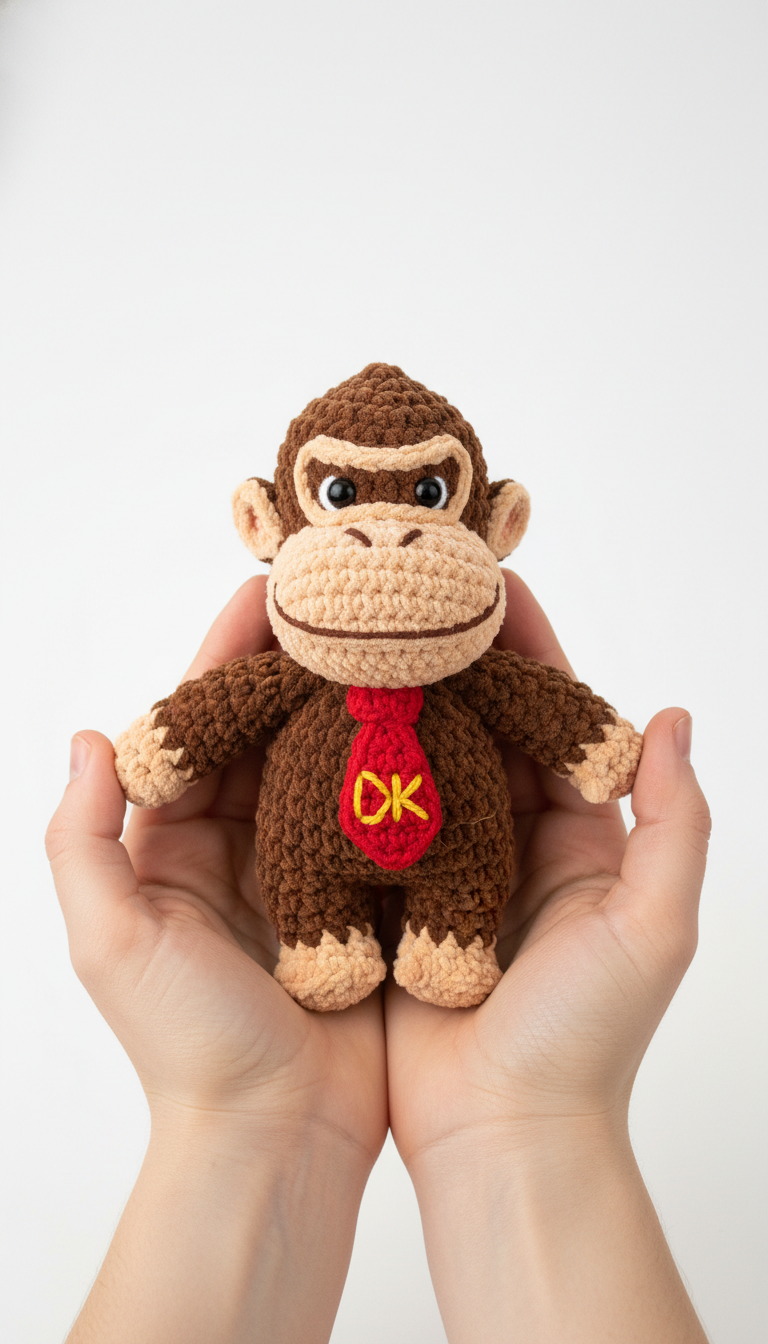
Embark on an epic crafting adventure with our detailed crochet pattern to create your very own Donkey Kong amigurumi! Perfect for fans of the classic Nintendo character, this pattern guides you through bringing the iconic jungle hero to life with your hook and yarn. Get ready to add a legendary touch to your collection or gift a truly unique, handmade treasure.
Craft Your Own Iconic Jungle Companion
There’s immense satisfaction in crafting a beloved character with your own hands. This Donkey Kong amigurumi pattern offers that rewarding experience, allowing you to create a personalized piece of gaming history. Whether for display on your shelf, as a playful gift for a fellow gamer, or simply to enjoy the process of making, your finished DK will be a treasured item.
Crochet Pattern: Swing into Fun: The Ultimate Crochet Donkey Kong Amigurumi Pattern
3.0mm crochet hook (or size suitable for your yarn to achieve tight stitches)
9mm safety eyes (or size appropriate for your amigurumi)
Polyester fiberfill stuffing
Tapestry needle
Stitch markers
Scissors
Abbreviations
MR: Magic Ring
sc: Single Crochet
inc: Increase (2 sc in one stitch)
dec: Decrease (sc2tog)
sl st: Slip Stitch
ch: Chain
FO: Fasten Off
(): Repeat instructions in parentheses
[]: Total number of stitches at the end of the round
Instructions
Work in continuous rounds unless otherwise specified.
Head (Brown & Light Beige)
With Brown yarn:
R1: MR, 6 sc [6]
R2: (inc) x6 [12]
R3: (sc, inc) x6 [18]
R4: (2 sc, inc) x6 [24]
R5: (3 sc, inc) x6 [30]
R6: (4 sc, inc) x6 [36]
R7-R10: sc around (4 rounds) [36]
Switch to Light Beige yarn:
R11-R13: sc around (3 rounds) [36]
Switch back to Brown yarn:
R14: sc around [36]
Insert safety eyes between R11 and R12, approximately 7-8 stitches apart.
R15: (4 sc, dec) x6 [30]
R16: (3 sc, dec) x6 [24]
Start stuffing the head firmly.
R17: (2 sc, dec) x6 [18]
R18: (sc, dec) x6 [12]
R19: (dec) x6 [6]
FO, leave a long tail to close the opening and weave in.
Muzzle (Light Beige)
With Light Beige yarn:
R1: Ch 5, sc in 2nd ch from hook, 2 sc, 3 sc in last ch. Continue on other side of chain: 3 sc, inc in last st [10]
R2: inc, 2 sc, inc x3, 2 sc, inc x2 [16]
R3: sc around [16]
Stuff lightly. FO, leave a long tail for sewing.
Body (Brown)
With Brown yarn:
R1: MR, 6 sc [6]
R2: (inc) x6 [12]
R3: (sc, inc) x6 [18]
R4: (2 sc, inc) x6 [24]
R5: (3 sc, inc) x6 [30]
R6: (4 sc, inc) x6 [36]
R7-R15: sc around (9 rounds) [36]
R16: (4 sc, dec) x6 [30]
Start stuffing the body.
R17: (3 sc, dec) x6 [24]
R18: (2 sc, dec) x6 [18]
FO, leave a long tail for sewing to the head.
Arms (Make 2 – Brown & Light Beige)
With Light Beige yarn:
R1: MR, 6 sc [6]
R2: (sc, inc) x3 [9]
R3: sc around [9]
Switch to Brown yarn:
R4-R9: sc around (6 rounds) [9]
Stuff lightly. Fold opening flat and sc across to close (4 sc).
FO, leave a long tail for sewing.
Legs (Make 2 – Brown & Light Beige)
With Light Beige yarn:
R1: MR, 6 sc [6]
R2: (inc) x6 [12]
R3: (sc, inc) x6 [18]
R4: sc around [18]
R5: (sc, dec) x6 [12]
Stuff the foot part.
Switch to Brown yarn:
R6-R12: sc around (7 rounds) [12]
Stuff the leg part. Fold opening flat and sc across to close (6 sc).
FO, leave a long tail for sewing.
Ears (Make 2 – Brown & Light Beige)
Inner Ear (Light Beige):
Ch 5, sc in 2nd ch from hook, 3 sc. FO.
Outer Ear (Brown):
Ch 6, sc in 2nd ch from hook, 4 sc. DO NOT FO.
Place the Light Beige inner ear on top of the Brown outer ear. Insert hook through both layers and sc around the edge, effectively attaching them and creating a neat border (approx. 8-10 sc).
FO, leave a long tail for sewing.
Tie (Red)
With Red yarn:
R1: Ch 4, sc in 2nd ch from hook, 2 sc [3]
R2: Ch 1, turn, inc, sc, inc [5]
R3-R4: Ch 1, turn, sc across [5]
R5: Ch 1, turn, dec, sc, dec [3]
R6: Ch 1, turn, sc across [3]
R7: Ch 1, turn, dec, sc [2]
R8: Ch 1, turn, sc across [2]
FO, leave a tail.
Using yellow embroidery floss, embroider ‘DK’ onto the widest part of the tie.
Assembly
1. Sew the Body to the bottom of the Head. Ensure it’s centered and secure.
2. Sew the Muzzle to the Light Beige section of the Head, centering it below the eyes.
3. Attach the Arms to the sides of the Body, just below the neck.
4. Attach the Legs to the bottom of the Body.
5. Sew the Ears to the sides of the Head, above the eyes.
6. Sew the Tie to the front of the Body, below the head.
7. Using brown yarn, embroider eyebrows above the safety eyes and a smiling mouth below the muzzle.