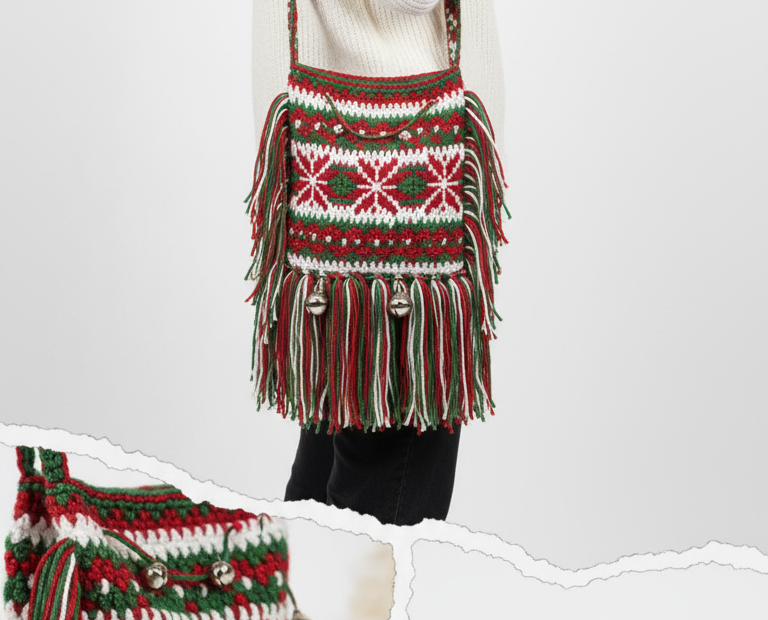
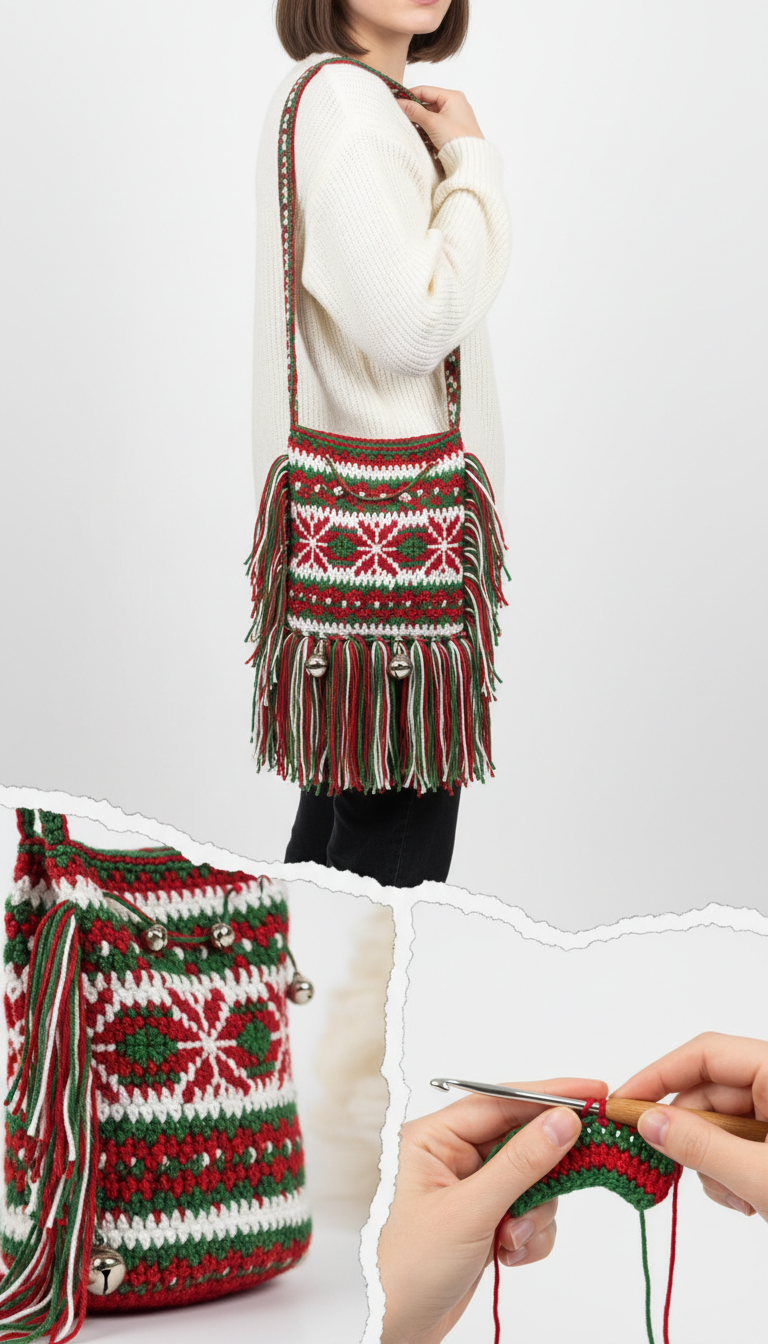
Embrace the festive spirit with this charming Nordic-inspired crocheted crossbody bag! Adorned with a vibrant red, green, and white color scheme, delicate fringe, and cheerful jingle bells, this handmade accessory is perfect for adding a touch of holiday magic to your outfit. It’s a delightful project for those who love tapestry crochet and unique, functional pieces.
Craft a Unique Holiday Statement Piece
Imagine strolling through a winter wonderland, your handmade bag jingling softly, carrying your essentials in style. This project allows you to create a truly one-of-a-kind accessory that reflects the joy and warmth of the holiday season. It’s not just a bag; it’s a conversation starter, a cherished gift, or a festive addition to your own wardrobe, crafted with love and care.
Worsted weight acrylic or cotton yarn in Red (approx. 150g)
Worsted weight acrylic or cotton yarn in Green (approx. 100g)
Worsted weight acrylic or cotton yarn in White (approx. 50g)
Crochet hook (e.g., 3.75mm / US F/5)
Yarn needle
Scissors
3-5 small silver jingle bells
Stitch markers (optional, but recommended for tapestry crochet)
Abbreviations
ch: chain
sc: single crochet
sl st: slip stitch
st(s): stitch(es)
Rnd(s): Round(s)
rep: repeat
MC: Main Color (Red)
CC1: Contrast Color 1 (Green)
CC2: Contrast Color 2 (White)
Instructions
Notes: This pattern uses tapestry crochet for the colorwork. Carry unused yarns loosely behind your work, crocheting over them to hide them. Change colors by pulling through the last two loops of the previous stitch with the new color.
Bag Base (Start with Red yarn)
Rnd 1: Ch 31. Sc in 2nd ch from hook and in next 28 ch, 3 sc in last ch. Turn to work along the other side of the chain. Sc in next 28 ch, 2 sc in last ch. (62 sts) Place marker.
Rnd 2: 2 sc in first st, sc in next 28 sts, 2 sc in next 3 sts, sc in next 28 sts, 2 sc in last 2 sts. (70 sts)
Rnd 3: Sc in each st around. (70 sts)
Bag Body (Work in continuous rounds)
Rnd 4-8: Sc in Red in each st around. (5 Rnds)
Lower Border:
Rnd 9: Sc in Green in each st around.
Rnd 10: Sc in White in each st around.
Rnd 11: Sc in Green in each st around.
Main Motif Section (Approx. 12-14 rounds): This section features a striking Nordic-inspired star pattern in White and Green against a Red background. This is achieved using tapestry crochet. You will carry the unused yarns (Red, Green, White) behind your work and switch colors frequently according to the pattern visible in the image. While a detailed stitch-by-stitch chart is recommended for exact replication, you can achieve a similar effect by interpreting the repeating star/snowflake design, using White for the main star shape and Green for smaller accent diamonds, all within a Red background. Ensure your tension is consistent to prevent puckering.
Upper Border:
Rnd (approx. 24-26): Sc in Green in each st around.
Rnd (approx. 25-27): Sc in White in each st around.
Rnd (approx. 26-28): Sc in Green in each st around.
Top Rounds:
Rnd (approx. 27-29) – (approx. 30-32): Sc in Red in each st around. (4 Rnds)
Fasten off and weave in ends.
Flap (Start with Red yarn)
Row 1: Ch 21. Sc in 2nd ch from hook and across. Turn. (20 sc)
Row 2-10: Ch 1, sc in each st across. Turn. (20 sc for 9 rows)
Row 11: Ch 1, sc in first 8 sts, skip 4 sts (for buttonhole/loop), sc in last 8 sts. Turn. (16 sc, 1 opening)
Row 12: Ch 1, sc in each st across, making 4 sc over the skipped stitches/chain of the previous row to complete the buttonhole/loop. Turn. (20 sc)
Row 13-14: Ch 1, sc in each st across. Turn. (20 sc for 2 rows)
Fasten off, leaving a long tail for sewing.
Strap (Start with Red yarn)
Row 1: Ch 121 (or desired length for crossbody strap). Sc in 2nd ch from hook and across. Turn. (120 sc)
Row 2: Ch 1, sc in each st across in Red. Turn.
Row 3: Ch 1, sc in each st across in White. Turn.
Row 4: Ch 1, sc in each st across in Green. Turn.
Row 5: Ch 1, sc in each st across in Red. Turn.
Row 6: Ch 1, sc in each st across in White. Turn.
Row 7: Ch 1, sc in each st across in Green. Turn.
Row 8: Ch 1, sc in each st across in Red. Fasten off, leaving long tails for sewing.
Fringe
Cut multiple strands of Red, Green, and White yarn, each approximately 8-10 inches long.
Fold 2-3 strands together, insert your hook into a stitch along the bottom edge of the bag and along the sides of the flap. Loop the folded end through, then pull the yarn tails through the loop to create a knot. Pull tight to secure.
Space fringe evenly around the bottom edge of the bag and along the sides of the flap as shown in the image. Trim fringe to desired length.
Assembly
Using the yarn needle and the tail, sew the flap to the back top edge of the bag.
Sew each end of the strap securely to the sides of the bag, approximately 2-3 inches down from the top edge.
Attach 3-5 small silver jingle bells to various strands of fringe on the front of the bag, spaced out as desired.