
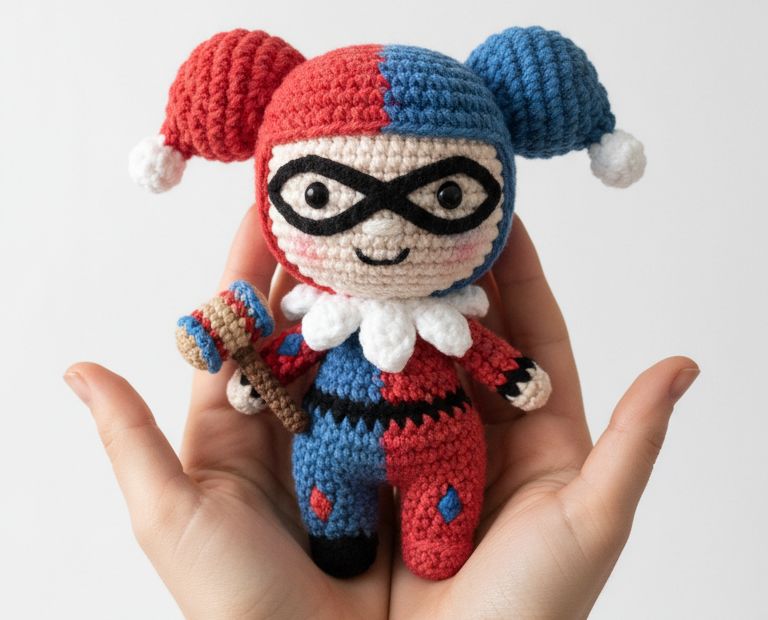
Unleash your inner anti-hero with this adorable crochet Harley Quinn amigurumi pattern! Perfect for fans of the iconic character, this detailed guide will help you create a charming, handmade jester doll. Whether for display, gifting, or just for fun, this project captures Harley’s mischievous spirit in soft, cuddly yarn.
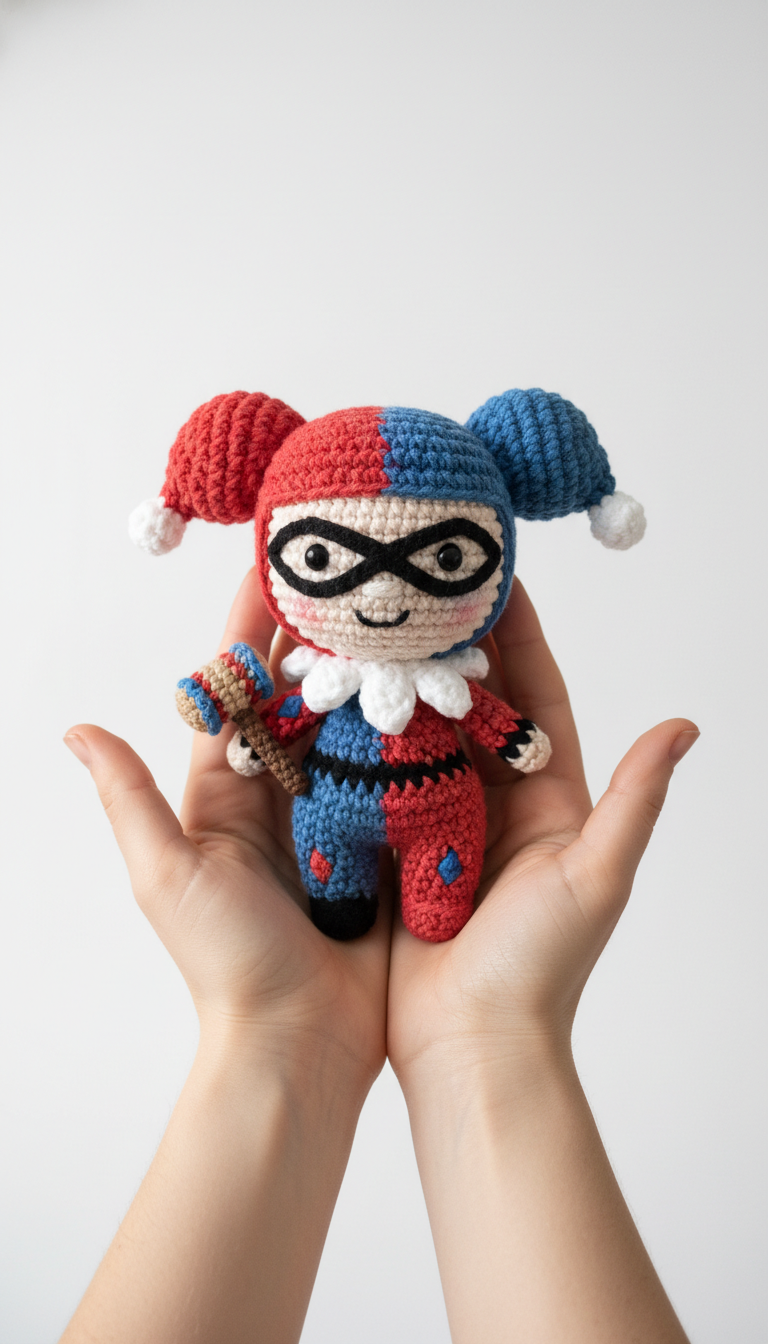
Bring Gotham’s Mischief to Life with Your Own Handmade Harley!
Crafting your own Harley Quinn doll offers immense satisfaction and a unique, personalized collectible. This project allows you to practice color changes, shaping, and small detail work, enhancing your crochet skills. The finished amigurumi makes a fantastic gift for comic book enthusiasts or a vibrant addition to any collection, showcasing your dedication and creativity.
Crochet Pattern: Crochet Harley Quinn Amigurumi Pattern: Craft Your Own Jester Doll!
Materials
- DK weight yarn in Cream/Light Beige
- DK weight yarn in Red
- DK weight yarn in Blue
- DK weight yarn in Black
- DK weight yarn in White
- DK weight yarn in Brown
- 2.5mm crochet hook
- 9mm safety eyes (or embroidery floss for eyes)
- Polyester fiberfill for stuffing
- Tapestry needle
- Stitch markers
- Scissors
Abbreviations
- MR: Magic Ring
- ch: chain
- sc: single crochet
- inc: increase (2 sc in one stitch)
- dec: decrease (sc 2 together)
- sl st: slip stitch
- FO: Fasten off
- BLO: back loop only
- (…) x N: repeat instructions in parentheses N times
- [N]: total number of stitches in the round
Instructions
General Notes: Work in continuous rounds unless otherwise specified. Use a stitch marker to mark the first stitch of each round.
Head (Cream/Light Beige yarn)
- R1: MR, 6 sc [6]
- R2: (inc) x 6 [12]
- R3: (sc, inc) x 6 [18]
- R4: (2 sc, inc) x 6 [24]
- R5: (3 sc, inc) x 6 [30]
- R6: (4 sc, inc) x 6 [36]
- R7-R14: Sc in each stitch around (8 rounds) [36]
- Insert safety eyes between R11 and R12, about 7 stitches apart.
- R15: (4 sc, dec) x 6 [30]
- R16: (3 sc, dec) x 6 [24]
- Start stuffing the head firmly.
- R17: (2 sc, dec) x 6 [18]
- R18: (sc, dec) x 6 [12]
- R19: (dec) x 6 [6]
- FO, leaving a long tail for sewing. Finish stuffing and close the hole.
- Using Black yarn, embroider the eye mask over the safety eyes and a small smile. Using Pink embroidery floss or a small amount of Red yarn, embroider small blush circles on cheeks.
Body (Red & Blue yarn)
- Start with Blue yarn.
- R1: MR, 6 sc [6]
- R2: (inc) x 6 [12]
- R3: (sc, inc) x 6 [18]
- R4: (2 sc, inc) x 6 [24]
- R5: (3 sc, inc) x 6 [30]
- R6: (4 sc, inc) x 6 [36]
- R7: Sc in each stitch around [36]
- R8: Working in BLO, sc in each stitch around [36]
- R9-R12: Sc in each stitch around [36]
- From R13, begin color changes for the split design. Half the stitches will be Red, half will be Blue. Carry yarn not in use loosely inside the work.
- R13-R20: (Sc in next 18 stitches with Blue, change to Red, sc in next 18 stitches with Red, change to Blue) (8 rounds) [36]
- R21: (2 sc, dec) x 3 with Blue, change to Red, (2 sc, dec) x 3 with Red [24]
- R22: (sc, dec) x 3 with Blue, change to Red, (sc, dec) x 3 with Red [18]
- Stuff firmly.
- FO, leaving a long tail for sewing to the head.
Collar (White yarn)
- Ch 24, sl st to first ch to form a ring.
- R1: (sc, ch 2, sc) in each chain around. Join with sl st. [24 sc, 24 ch-2 spaces]
- FO, leaving a long tail for sewing.
Arms (make 2)
- Hand (Cream yarn)
- R1: MR, 6 sc [6]
- R2: (sc, inc) x 3 [9]
- R3-R4: Sc in each stitch around [9]
- Stuff the hand lightly.
- For one arm, switch to Red yarn. For the second arm, switch to Blue yarn.
- R5-R10: Sc in each stitch around [9] (6 rounds)
- Stuff lightly. Sl st to close the opening. FO, leaving a long tail for sewing.
Legs (make 2)
- Foot (Black yarn)
- R1: Ch 5. Sc in 2nd ch from hook, sc in next 2 ch, 3 sc in last ch. Continue on other side of ch: sc in next 2 ch, 2 sc in last ch [10]
- R2: inc, 2 sc, inc x 3, 2 sc, inc x 2 [16]
- R3: Sc in each stitch around [16]
- R4: 4 sc, dec x 4, 4 sc [12]
- R5: 3 sc, dec x 3, 3 sc [9]
- Stuff the foot.
- For one leg, switch to Red yarn. For the second leg, switch to Blue yarn.
- R6-R15: Sc in each stitch around [9] (10 rounds)
- Stuff firmly. Sl st to close the opening. FO, leaving a long tail for sewing.
Hat Pompoms (make 2)
- For one pompom, use Red yarn. For the second, use Blue yarn.
- R1: MR, 6 sc [6]
- R2: (inc) x 6 [12]
- R3-R5: Sc in each stitch around [12]
- R6: (dec) x 6 [6]
- Stuff lightly. FO, leaving a long tail.
- Small White Ball for Pompom Tips (White yarn) (make 2)
- R1: MR, 6 sc [6]
- R2: Sc in each stitch around [6]
- FO, leaving a tail. Stuff lightly and sew to the end of the main pompom.
Mallet Handle (Brown yarn)
- R1: MR, 6 sc [6]
- R2-R8: Sc in each stitch around [6] (7 rounds)
- Sl st to close. FO.
Mallet Head (Red, Blue, Cream yarn)
- Start with Red yarn.
- R1: MR, 6 sc [6]
- R2: (inc) x 6 [12]
- R3: (sc, inc) x 6 [18]
- R4-R5: Sc in each stitch around [18]
- Switch to Blue yarn.
- R6: Sc in each stitch around [18]
- Switch to Cream yarn.
- R7: Sc in each stitch around [18]
- Switch to Red yarn.
- R8-R9: Sc in each stitch around [18]
- Stuff lightly.
- R10: (sc, dec) x 6 [12]
- R11: (dec) x 6 [6]
- FO, leaving a long tail. Finish stuffing and sew closed.
- Sew the mallet head to the brown handle.
Assembly:
- Sew the body to the head securely.
- Sew the white collar around the neck joint.
- Sew the arms to the sides of the body, just below the collar.
- Sew the legs to the bottom of the body.
- Sew the red and blue hat pompoms to the top of the head.
- Using Red yarn, embroider a small diamond shape on the blue side of the body and the blue leg. Using Blue yarn, embroider a small diamond shape on the red side of the body and the red leg.
- Attach the finished mallet to one of Harley’s hands by sewing it in place.