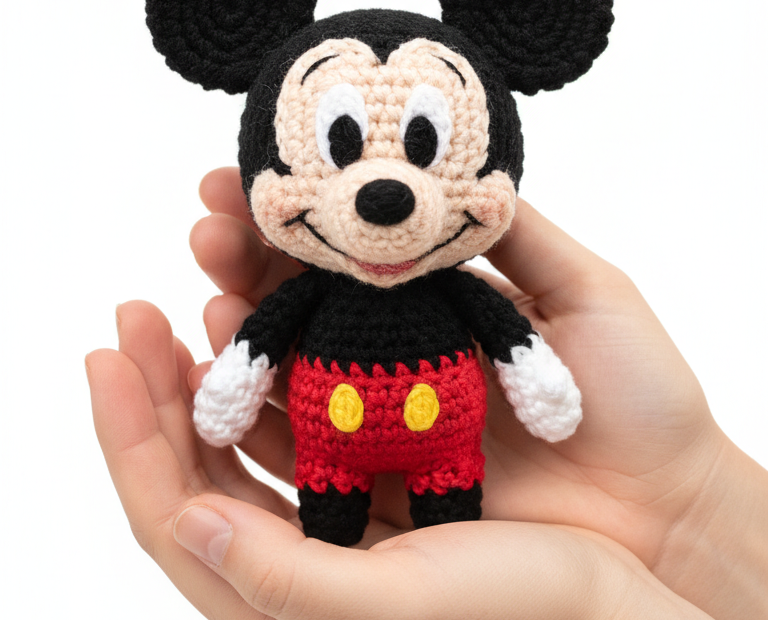
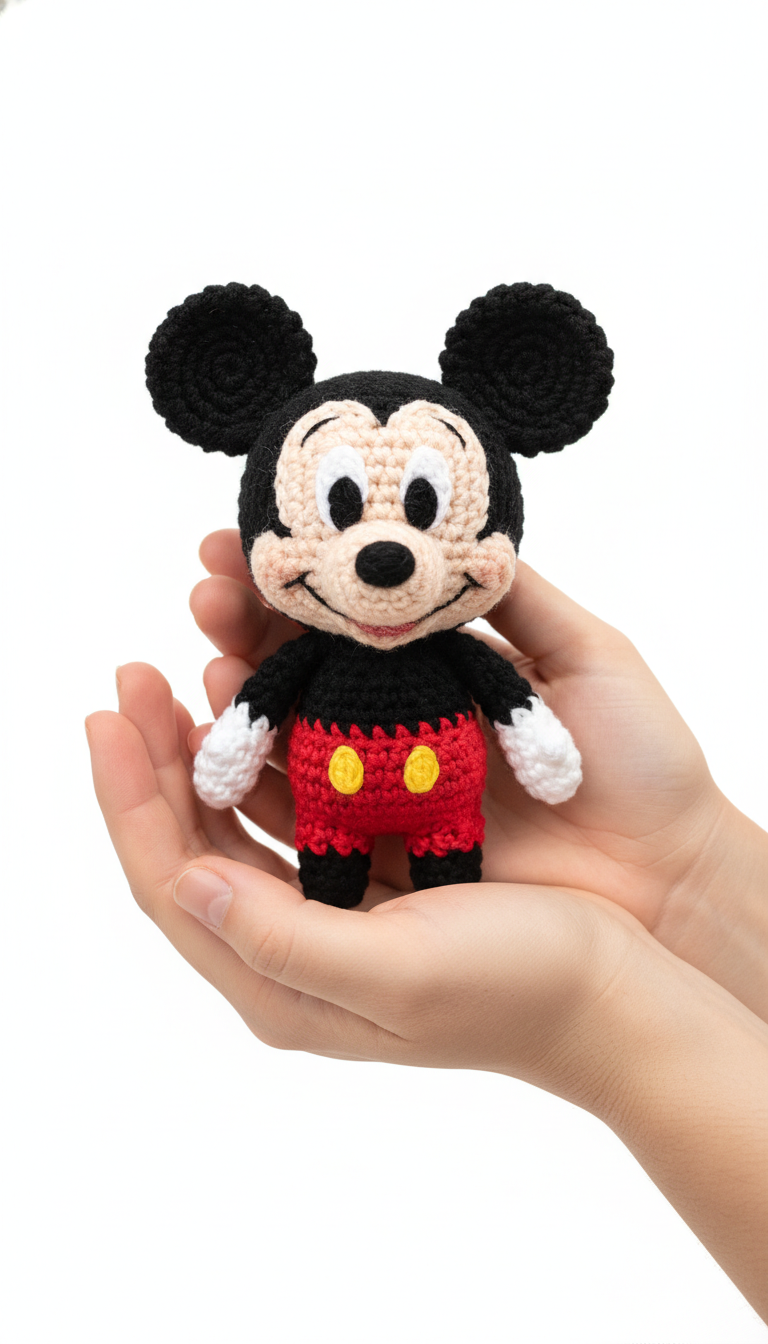
Step into the magical world of Disney with our adorable Mickey Mouse Amigurumi pattern! This beloved character, known for his cheerful personality and iconic design, is now yours to create with yarn and a hook. Perfect for Disney fans of all ages, this pattern guides you through crafting your very own cuddly Mickey.
Bring the Magic of Disney Home: Your Handmade Mickey!
Imagine the joy of gifting a handmade Mickey Mouse or adorning your own space with this timeless icon. Our detailed, easy-to-follow pattern makes it simple for crocheters of all levels to create a charming, durable amigurumi that captures Mickey’s classic appeal. Start your magical crochet adventure today and add a touch of whimsy to your life!
Crochet Pattern: Crochet Your Own Classic Mickey Mouse Amigurumi: A Free Pattern!
Materials
Worsted weight yarn in Black
Worsted weight yarn in Red
Worsted weight yarn in White
Worsted weight yarn in Peach/Light Beige
Worsted weight yarn in Yellow
2.5mm or 3.0mm crochet hook (or size suitable for your yarn)
Small black safety eyes (approx. 6mm)
Tapestry needle
Stuffing material
Stitch marker
Abbreviations
MR: Magic Ring
ch: Chain
sc: Single Crochet
inc: Increase (2 sc in one st)
dec: Decrease (sc two stitches together)
sl st: Slip Stitch
FO: Fasten Off
rnd: Round
st(s): Stitch(es)
BLO: Back Loop Only
Instructions
Important Note: Work in continuous rounds unless otherwise specified. Use a stitch marker to keep track of the first stitch of each round.
Head (Black and Peach)
Start with Black yarn:
Rnd 1: 6 sc in MR (6)
Rnd 2: 6 inc (12)
Rnd 3: (1 sc, inc) x6 (18)
Rnd 4: (2 sc, inc) x6 (24)
Rnd 5: (3 sc, inc) x6 (30)
Rnd 6: (4 sc, inc) x6 (36)
Rnd 7-12: 36 sc (6 rounds)
Rnd 13: (4 sc, dec) x6 (30)
Rnd 14: (3 sc, dec) x6 (24)
Begin stuffing the head firmly.
Rnd 15: (2 sc, dec) x6 (18)
Rnd 16: (1 sc, dec) x6 (12)
Rnd 17: 6 dec (6)
FO, leaving a long tail for sewing. Finish stuffing.
Face Mask (Peach)
This piece will be sewn onto the black head.
Ch 6.
Rnd 1: Sc in 2nd ch from hook, 3 sc, 3 sc in last st. Continue on other side of chain: 3 sc, inc (12)
Sl st, FO, leaving a long tail for sewing. Pin to the head and sew securely.
Snout (Peach)
Rnd 1: 6 sc in MR (6)
Rnd 2: 6 inc (12)
Rnd 3: (1 sc, inc) x6 (18)
Rnd 4-5: 18 sc (2 rounds)
Sl st, FO, leaving a long tail for sewing. Stuff lightly and sew onto the face mask.
Nose (Black)
Rnd 1: 6 sc in MR (6)
Sl st, FO, leaving a tail for sewing. Sew to the top of the snout.
Eye Patches (White, make 2)
Ch 4.
Rnd 1: Sc in 2nd ch from hook, 1 sc, 3 sc in last st. Continue on other side of chain: 1 sc, inc (8)
Sl st, FO, leaving a tail for sewing. Attach safety eyes to the white patches. Position and sew these patches onto the peach face mask, above the snout.
Ears (Black, make 2)
Rnd 1: 6 sc in MR (6)
Rnd 2: 6 inc (12)
Rnd 3: (1 sc, inc) x6 (18)
Rnd 4: 18 sc
Sl st, FO, leaving a long tail for sewing. Flatten the ears and sew them securely to the top/sides of the head.
Mouth (Embroidered)
Using red yarn and a tapestry needle, embroider a curved smile below the snout. Use black yarn to embroider a thin line from the nose to the mouth, and outline the smile.
Body (Black and Red)
Start with Black yarn:
Rnd 1: 6 sc in MR (6)
Rnd 2: 6 inc (12)
Rnd 3: (1 sc, inc) x6 (18)
Rnd 4: (2 sc, inc) x6 (24)
Rnd 5: (3 sc, inc) x6 (30)
Rnd 6-9: 30 sc (4 rounds)
Change to Red yarn.
Rnd 10: 30 sc in BLO (30) This creates a nice edge for the shorts.
Rnd 11-14: 30 sc (4 rounds)
Rnd 15: (3 sc, dec) x6 (24)
Rnd 16: (2 sc, dec) x6 (18)
Begin stuffing the body firmly.
Rnd 17: (1 sc, dec) x6 (12)
FO, leaving a long tail for sewing. Finish stuffing. Sew the head to the body securely.
Arms (Black and White, make 2)
Start with White yarn:
Rnd 1: 6 sc in MR (6)
Rnd 2: 6 inc (12)
Rnd 3-4: 12 sc (2 rounds)
Rnd 5: (2 sc, dec) x3 (9)
Stuff lightly.
Change to Black yarn.
Rnd 6-10: 9 sc (5 rounds)
Flatten the opening and sc through both sides to close (4 sc). FO, leaving a long tail for sewing. Sew arms to the sides of the body.
Legs (Black, make 2)
Rnd 1: 6 sc in MR (6)
Rnd 2: 6 inc (12)
Rnd 3-7: 12 sc (5 rounds)
Flatten the opening and sc through both sides to close (6 sc). FO, leaving a long tail for sewing. Sew legs to the bottom of the body.
Buttons (Yellow, make 2)
Rnd 1: 6 sc in MR (6)
Sl st, FO, leaving a tail for sewing. Sew the yellow buttons onto the front of Mickey’s red shorts.
Finishing
Weave in all remaining ends. Make sure all parts are securely attached and stuffed to your liking. Your classic Mickey Mouse Amigurumi is complete!