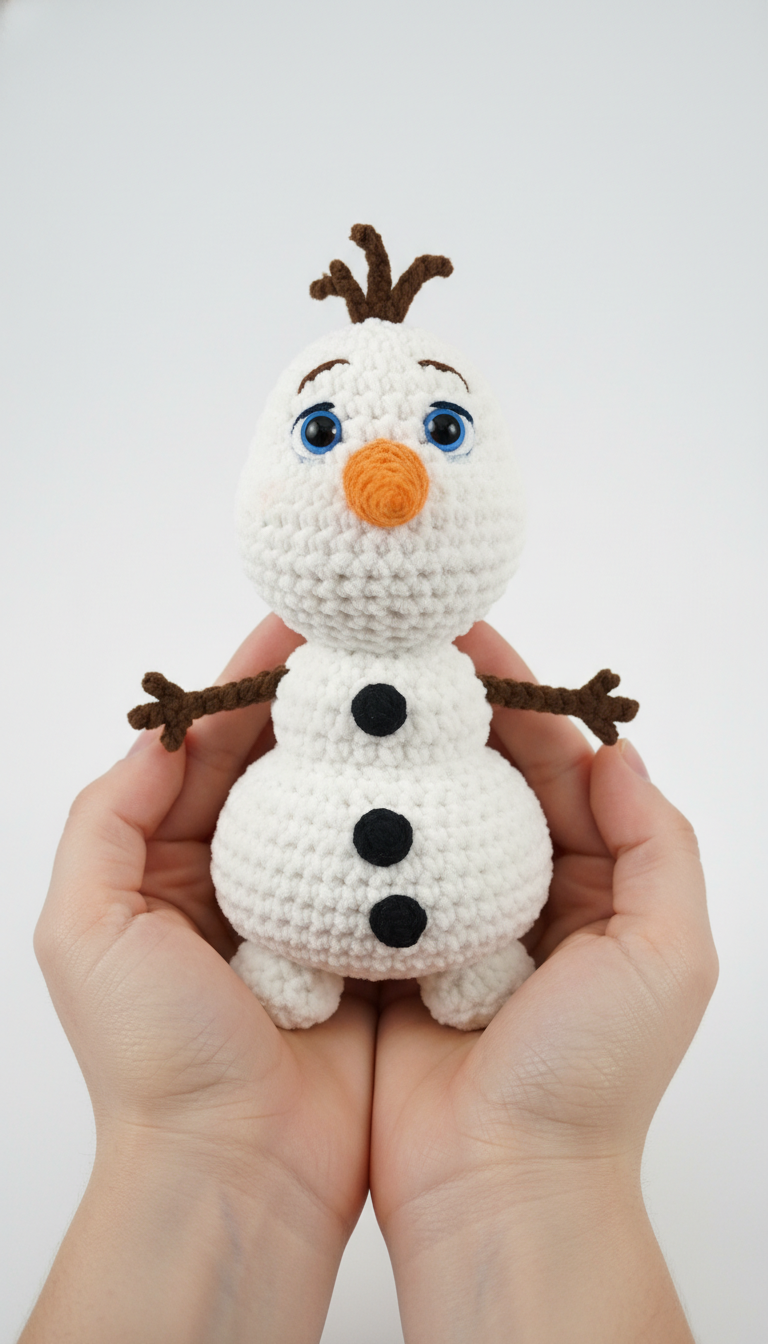
Bring the magic of winter and beloved animated characters to life with this adorable Crochet Snowman Amigurumi pattern! Perfect for fans of all ages, this charming project allows you to create a soft, huggable friend that captures the essence of a favorite frosty companion. Get ready to crochet your way to a heartwarming display!
Craft Your Own Adorable Snowman Friend
There’s something truly special about creating a handmade character, especially one that brings so much joy. This snowman amigurumi makes a fantastic gift for children, a delightful decoration for your home during the winter months, or simply a fun project to unwind with. Its cheerful face and classic design will surely melt hearts wherever it goes.
Crochet Pattern: Crochet Your Own Huggable Snowman Amigurumi – A Frozen Inspired Friend!
Materials
White worsted weight yarn
Orange worsted weight yarn
Black worsted weight yarn
Dark Brown worsted weight yarn
Black safety eyes (approx. 10-12mm)
Blue embroidery floss or small amount of blue yarn (for eye iris)
White embroidery floss or small amount of white yarn (for eye highlight)
3.0mm crochet hook (or size suitable for your yarn)
Polyester fiberfill stuffing
Tapestry needle
Scissors
Stitch markers
Abbreviations
MR: Magic Ring
sc: single crochet
inc: increase (2 sc in one stitch)
dec: decrease (sc two stitches together)
ch: chain
sl st: slip stitch
FO: Fasten off
Instructions
Important Note: This pattern is worked in continuous rounds unless otherwise specified. Use a stitch marker to keep track of your first stitch in each round.
Head (White Yarn)
R1: 6 sc in MR (6)
R2: inc in each stitch around (12)
R3: (sc, inc) x6 (18)
R4: (2 sc, inc) x6 (24)
R5: (3 sc, inc) x6 (30)
R6-R12: sc in each stitch around (30)
Start stuffing the head firmly.
R13: (3 sc, dec) x6 (24)
R14: (2 sc, dec) x6 (18)
R15: (sc, dec) x6 (12)
FO, leaving a long tail for sewing. Finish stuffing.
Nose (Orange Yarn)
R1: 4 sc in MR (4)
R2: (sc, inc) x2 (6)
R3: (2 sc, inc) x2 (8)
R4: (3 sc, inc) x2 (10)
FO, leaving a long tail for sewing. Lightly stuff.
Eye Base (Make 2 – White Yarn)
R1: 6 sc in MR (6)
R2: inc in each stitch around (12)
Sl st to first sc, FO, leaving a long tail for sewing.
Top Body Section (White Yarn)
R1: 6 sc in MR (6)
R2: inc in each stitch around (12)
R3: (sc, inc) x6 (18)
R4-R6: sc in each stitch around (18)
R7: (sc, dec) x6 (12)
FO, leaving a long tail for sewing. Stuff firmly.
Middle Body Section (White Yarn)
R1: 6 sc in MR (6)
R2: inc in each stitch around (12)
R3: (sc, inc) x6 (18)
R4: (2 sc, inc) x6 (24)
R5-R8: sc in each stitch around (24)
R9: (2 sc, dec) x6 (18)
FO, leaving a long tail for sewing. Stuff firmly.
Bottom Body Section (White Yarn)
R1: 6 sc in MR (6)
R2: inc in each stitch around (12)
R3: (sc, inc) x6 (18)
R4: (2 sc, inc) x6 (24)
R5: (3 sc, inc) x6 (30)
R6-R10: sc in each stitch around (30)
R11: (3 sc, dec) x6 (24)
R12: (2 sc, dec) x6 (18)
FO, leaving a long tail for sewing. Stuff firmly.
Arms (Make 2 – Dark Brown Yarn)
Ch 10. Starting in the 2nd ch from hook, sc in next 3 ch, sl st in next 6 ch.
FO, leaving a long tail for sewing. Do not stuff. For a more detailed look, you can make a second smaller branch piece (e.g., Ch 4, sl st back) and attach it to the main branch.
Hair (Make 3 – Dark Brown Yarn)
Ch 5. Starting in the 2nd ch from hook, sl st in next 4 ch.
FO, leaving a short tail for sewing.
Buttons (Make 3 – Black Yarn)
R1: 6 sc in MR (6)
FO, leaving a long tail for sewing.
Assembly
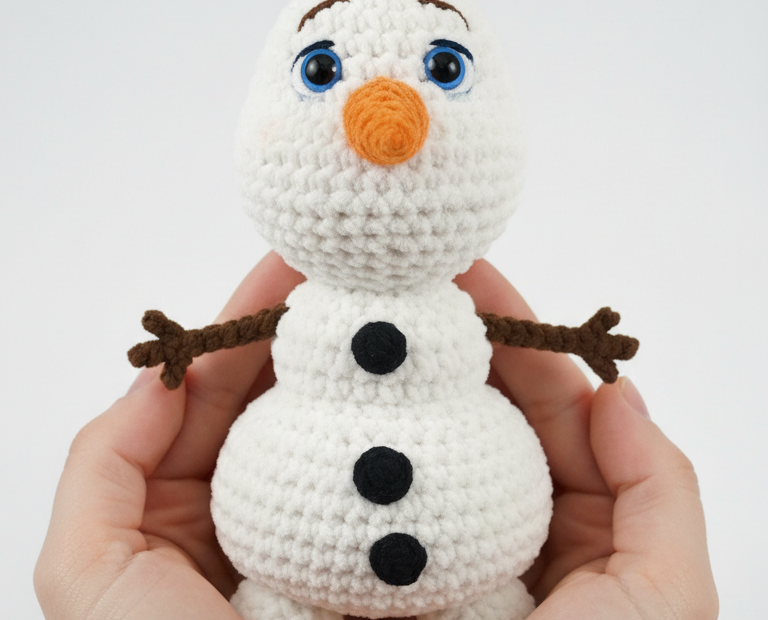
Attach Eyes: Place a black safety eye into the center of each white Eye Base. Secure the washer on the back. Then, sew these finished eye pieces onto the head between R7 and R8 of the head, about 6-7 stitches apart.
Embroider Eye Details: Using blue embroidery floss, embroider a circle around the black pupil on each eye base to create the blue iris. Then, use white embroidery floss to add a small highlight stitch on each eye.
Embroider Eyebrows: Using dark brown yarn or embroidery floss, embroider small arching eyebrows above the eyes.
Attach Nose: Sew the orange nose onto the head, centered below the eyes.
Attach Head to Top Body: Sew the head to the top body section.
Attach Body Sections: Sew the top body section to the middle body section, and then the middle body section to the bottom body section. Ensure they are centered and stacked neatly.
Attach Arms: Sew the dark brown arms to the sides of the middle body section.
Attach Hair: Sew the three dark brown hair pieces to the top of the head, evenly spaced.
Attach Buttons: Sew the three black buttons down the front of the body, centered on the middle and bottom sections.