Bring a smile to someone’s face with this adorable Amigurumi Boy Doll! This pattern guides you through creating a charming, huggable character, perfect for playtime or a delightful gift. With his friendly expression and vibrant outfit, he’s sure to become a cherished companion. Dive into this fun crochet project and watch your little friend come to life.
Handmade Joy: Creating a Personalized Amigurumi Friend
There’s something uniquely special about a handmade gift, and this Amigurumi Boy Doll is no exception. Crafting this little character allows you to infuse each stitch with love and care, creating a truly personalized companion. It’s a wonderful project for both seasoned crocheters and those looking to expand their amigurumi skills, resulting in a treasured keepsake.
Crochet Pattern: Craft Your Own Cheerful Little Amigurumi Boy Doll: Free Crochet Pattern
Materials
Worsted weight yarn in Beige (Skin Tone)
Worsted weight yarn in Olive Green (Shirt)
Worsted weight yarn in Dark Brown (Pants/Shoes)
Worsted weight yarn in Rusty Orange (Hair)
Black embroidery floss
2.5mm or 3.0mm crochet hook (or size suitable for your yarn to achieve tight stitches)
Fiberfill stuffing
Tapestry needle
Stitch markers
Scissors
Abbreviations
MR: Magic Ring
ch: chain
sc: single crochet
inc: increase (2 sc in one stitch)
dec: decrease (sc 2 stitches together)
sl st: slip stitch
FO: Fasten off
st(s): stitch(es)
R: Round
Instructions
This pattern is worked in continuous rounds unless otherwise stated. Use a stitch marker to keep track of the first stitch of each round.
Head (Beige Yarn)
R1: MR, 6 sc (6)
R2: inc in each st around (12)
R3: (sc, inc) x 6 (18)
R4: (2 sc, inc) x 6 (24)
R5: (3 sc, inc) x 6 (30)
R6: (4 sc, inc) x 6 (36)
R7-R13: sc in each st around (36) (7 rounds)
R14: (4 sc, dec) x 6 (30)
R15: (3 sc, dec) x 6 (24)
R16: (2 sc, dec) x 6 (18)
Start stuffing the head firmly.
R17: (sc, dec) x 6 (12)
R18: dec x 6 (6)
FO, leaving a long tail for sewing. Secure the opening and set aside.
Hair (Rusty Orange Yarn)
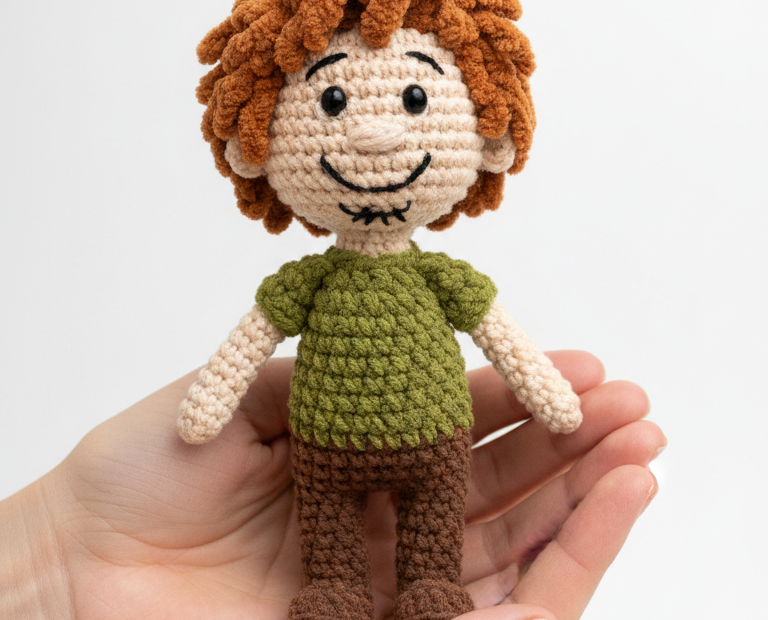
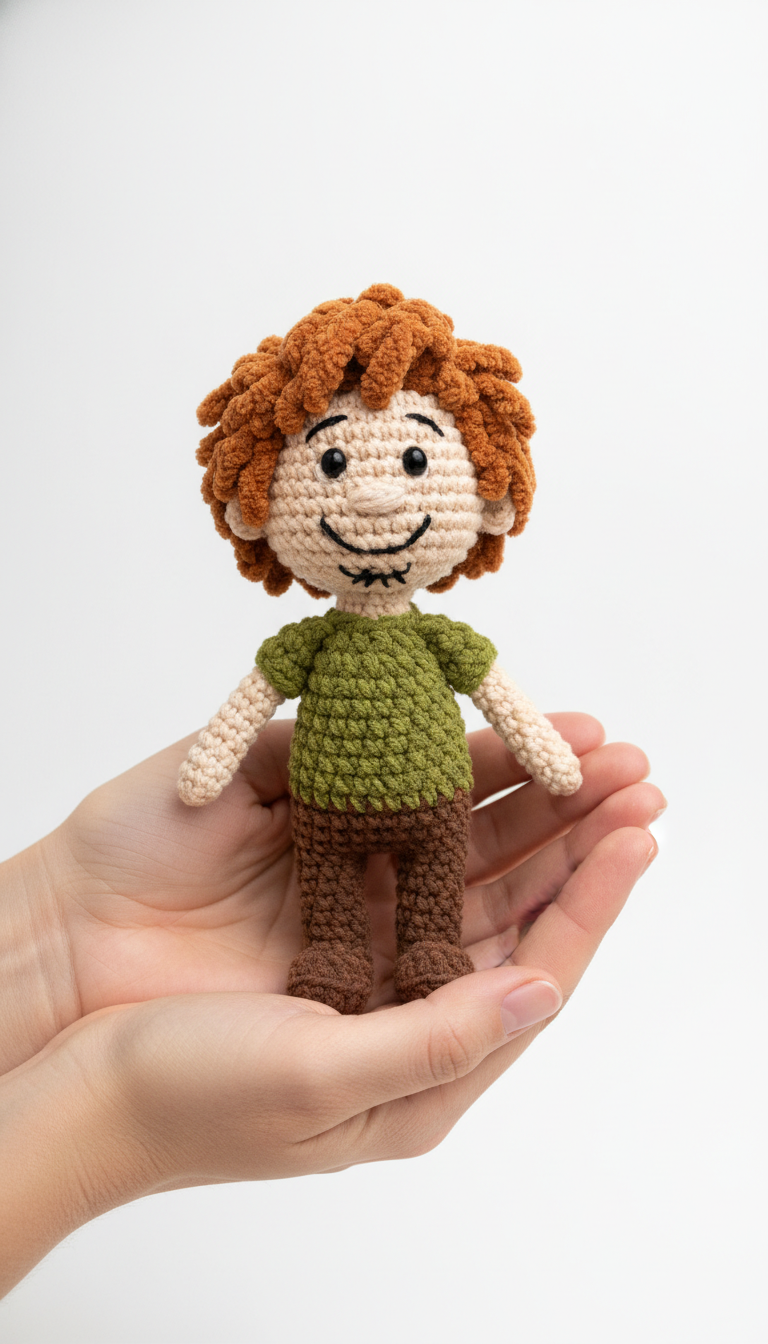
Cut multiple strands of rusty orange yarn, approximately 4-5 inches long. Using your hook or a tapestry needle, attach the strands to the head (starting from the top center and working outwards) by inserting the hook, looping the yarn through, and tying a knot. Continue until the desired shaggy, full hair effect is achieved, similar to the image. Trim and shape as needed.
Body & Pants (Dark Brown & Olive Green Yarn)
Start with Dark Brown yarn for the pants.
R1: MR, 6 sc (6)
R2: inc in each st around (12)
R3: (sc, inc) x 6 (18)
R4: (2 sc, inc) x 6 (24)
R5-R8: sc in each st around (24) (4 rounds for pants)
Switch to Olive Green yarn for the shirt.
R9: sc in each st around (24)
R10: (2 sc, dec) x 6 (18)
R11-R13: sc in each st around (18) (3 rounds)
Stuff the body firmly.
R14: (sc, dec) x 6 (12)
FO, leaving a long tail for sewing.
Arms (Make 2) (Beige Yarn)
R1: MR, 6 sc (6)
R2-R10: sc in each st around (6) (9 rounds)
Stuff very lightly, if at all. Flatten the opening and sc across 3 sts to close.
FO, leaving a long tail for sewing.
Legs (Make 2) (Dark Brown Yarn)
R1: MR, 6 sc (6)
R2: (sc, inc) x 3 (9)
R3-R10: sc in each st around (9) (8 rounds)
Stuff firmly. Flatten the opening and sc across 4 sts to close.
FO, leaving a long tail for sewing.
Assembly
Attach Head to Body: Using the tail from the body, sew the head securely to the top opening of the body.
Attach Arms: Position the arms on either side of the body, just below the neck seam, and sew them firmly in place.
Attach Legs: Sew the legs to the bottom of the body, spaced evenly apart, ensuring the doll can stand or sit as desired.
Embroider Face: Using black embroidery floss, embroider small oval eyes around R10-11 of the head, about 3-4 stitches apart. Create eyebrows just above the eyes. For the nose, use beige yarn to make a small horizontal stitch between the eyes. For the mouth, use black embroidery floss to create a wide, friendly smile, perhaps with a small stitch in the middle for definition, as shown in the image.