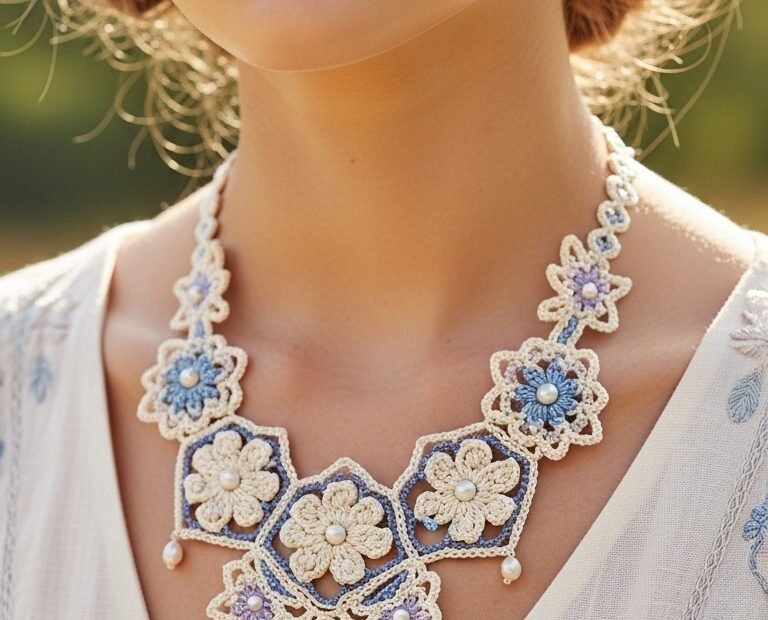
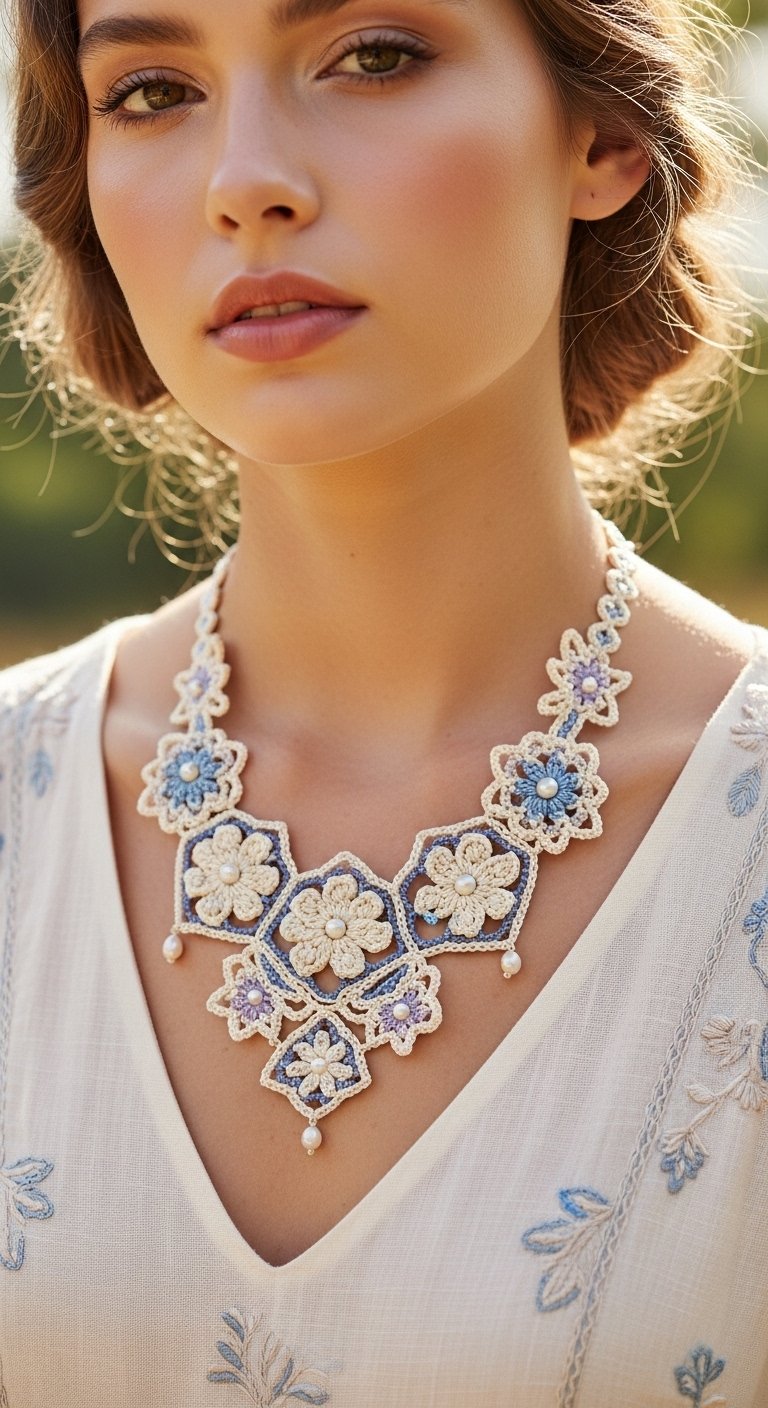
Embrace timeless elegance with our exquisite Blossom Crochet Necklace pattern! This beautiful accessory, inspired by delicate floral motifs and vintage charm, is perfect for adding a touch of handmade sophistication to any outfit. Using soft cotton threads and dainty pearls, you’ll create a statement piece that’s both intricate and graceful. Get ready to crochet your own wearable art!
Why This Floral Crochet Necklace is Your Next Must-Make Project
Crafting this floral crochet necklace offers a unique opportunity to combine traditional techniques with modern style. It’s a rewarding project that allows you to explore intricate lacework and personalize your jewelry. Not only will you enjoy the therapeutic process of crocheting, but you’ll also create a stunning, one-of-a-kind accessory that reflects your personal touch and elevates your handmade wardrobe.
Crochet Thread (Size 10 or similar fine thread) in: Creamy White (Color A), Light Blue (Color B), Pale Lavender (Color C)
Crochet Hook: 1.5mm (or size suitable for your thread)
Small Pearls (approx. 4mm-6mm) for centers and dangling (approx. 10-12 needed)
Tapestry needle
Sewing needle and matching thread (for attaching pearls)
Jewelry clasp (e.g., lobster clasp)
Abbreviations
ch: chain
sl st: slip stitch
sc: single crochet
hdc: half double crochet
dc: double crochet
tr: treble crochet
MR: Magic Ring
picot: ch 3, sl st into first ch
rep: repeat
st(s): stitch(es)
Instructions
Before you begin, please read through the entire pattern. This pattern uses fine crochet thread to achieve a delicate lace look. Adjust hook size if necessary to maintain tension.
Part 1: Crocheting the Motifs
Motif A: Creamy White Flower-within-Hexagonal-Frame (Make 5, using Color A)
Inner Flower:
Using Color A, Ch 4, sl st to first ch to form ring (or use MR).
Rnd 1: Ch 1, 6 sc into ring. Sl st to first sc. (6 sc)
Rnd 2 (Petals): *Ch 2, hdc in next sc, ch 2, sl st in same sc, sl st in next sc* Repeat 6 times. Fasten off.
Attach Pearl: Sew a small pearl securely to the center of this inner flower.
Hexagonal Frame (separate piece):
Using Color A, Ch 6, sl st to first ch to form ring (or use MR).
Rnd 1: Ch 3 (counts as dc), 11 dc into ring. Sl st to top of ch 3. (12 dc)
Rnd 2 (Frame Edging): Ch 1, sc in first st. *Ch 3, skip 1 dc, (dc, ch 2, dc) in next dc (corner), ch 3, skip 1 dc, sc in next dc*. Repeat from * 5 more times, replacing last sc with sl st to first sc. Fasten off. (You should have 6 ‘sc’ stitches and 6 ‘ch 2’ corner spaces).
Assembly of Motif A: Place the Inner Flower centrally on the Hexagonal Frame. Securely sew the petals of the Inner Flower to the ‘sc’ stitches and ch-3 spaces of the Hexagonal Frame’s Rnd 2 to form a single unit.
Motif B: Light Blue Flower (Make 2, using Color B)
Ch 4, sl st to first ch to form ring (or use MR).
Rnd 1: Ch 2 (counts as hdc), 11 hdc into ring. Sl st to top of ch 2. (12 hdc)
Rnd 2 (Petals): *Ch 3, 2 dc in next st, ch 3, sl st in same st, sl st in next st* Repeat 6 times. Fasten off.
Attach Pearl: Sew a small pearl securely to the center.
Motif C: Small Lavender Flower (Make 7-9, using Color C)
Ch 4, sl st to first ch to form ring (or use MR).
Rnd 1: Ch 1, 6 sc into ring. Sl st to first sc. (6 sc)
Rnd 2 (Petals): *Ch 2, hdc in next sc, ch 2, sl st in same sc, sl st in next sc* Repeat 6 times. Fasten off.
Part 2: Assembling the Necklace Base
Refer closely to the image for precise motif placement and joining points. Motifs are joined by slip stitches (sl st) or single crochets (sc) into the ch-spaces or stitches of adjacent motifs.
Row 1 (Bottom Central): Join 3 Motif A’s in a horizontal line, connecting their adjacent hexagonal frame ‘sc’ stitches or ch-3 spaces with sl sts.
Row 2 (Middle Section):
Join 1 Motif B (Light Blue) to the top-center edges of the left and central Motif A from Row 1.
Join 1 Motif B (Light Blue) to the top-center edges of the central and right Motif A from Row 1.
Join 1 Motif C (Lavender) at the top point between the two Motif B’s.
Row 3 (Upper Section):
Join 1 Motif A to the top-outer edge of the left Motif B.
Join 1 Motif A to the top-outer edge of the right Motif B.
Accents:
Join 2 Motif C (Lavender) to the outer, lower points of the central Motif A (Row 1).
Join 2 Motif C (Lavender) to the outer points of the two Row 3 Motif A’s, as shown in the image to start the taper.
Part 3: Creating the Neck Strap
From the top outer points of the two Motif A’s in Row 3, begin crocheting the neck strap.
Side 1 (Right): Using Color A, ch a length of approx. 5-7 chs. Join 1 Motif C (Lavender) to the end of this chain. Ch another 5-7 chs. Create a small picot loop: (ch 3, sl st in 3rd ch from hook). Ch 5-7. Join another Motif C. Continue in this manner (alternating small chain segments, picot loops, and Motif C’s as desired) until the strap reaches half the total desired necklace length.
Side 2 (Left): Repeat the process for Side 1, ensuring symmetry.
Part 4: Final Touches
Dangling Pearls: Attach a short chain (approx. 5-7 ch) from the very bottom-most points of the three Motif A’s in Row 1. Securely attach a small pearl to the end of each chain.
Weave in all loose ends securely using a tapestry needle.
Attach your chosen jewelry clasp to the ends of the neck strap.
Check all pearl attachments and reinforce with sewing thread if needed.
Your stunning floral crochet necklace is now ready to wear!