Embrace the timeless beauty of lace with this exquisite crochet necklace pattern. Inspired by delicate tatting techniques, this project allows you to create a stunning piece of wearable art that adds a touch of vintage elegance to any outfit. Perfect for weddings, special occasions, or simply elevating your everyday style, this necklace will become a cherished heirloom.
Handcrafted Elegance: The Allure of DIY Lace Jewelry
There’s a unique satisfaction in wearing a piece of jewelry crafted with your own hands. This lace crochet necklace offers not only a beautiful accessory but also a testament to your skill and dedication. Its intricate design and delicate pearls will draw admiration, making it a perfect gift or a luxurious treat for yourself.
Crochet Pattern: Tatting-Inspired Elegant Lace Crochet Necklace Pattern: Craft Your Own Heirloom Jewelry
Materials
Crochet Thread, Size 10, in White or Ecru (e.g., Aunt Lydia’s Classic Crochet Thread)
Steel Crochet Hook, 1.5mm (US size 7 or 8 steel)
Small faux pearls (approx. 4mm-6mm, about 10-15 pieces for dangling, and smaller ones for embedding)
Silver-lined glass seed beads (size 11/0), approximately 100-150 beads (optional, for subtle sparkle)
Tapestry needle (for weaving in ends)
Fine sewing needle and matching thread (for attaching pearls and beads)
Jewelry clasp (lobster claw or toggle)
Small pliers (for attaching clasp)
Scissors
Abbreviations
ch: chain
sl st: slip stitch
sc: single crochet
dc: double crochet
tr: treble crochet
picot: ch3, sl st in first ch
sk: skip
st(s): stitch(es)
rnd: round
rep: repeat
Instructions
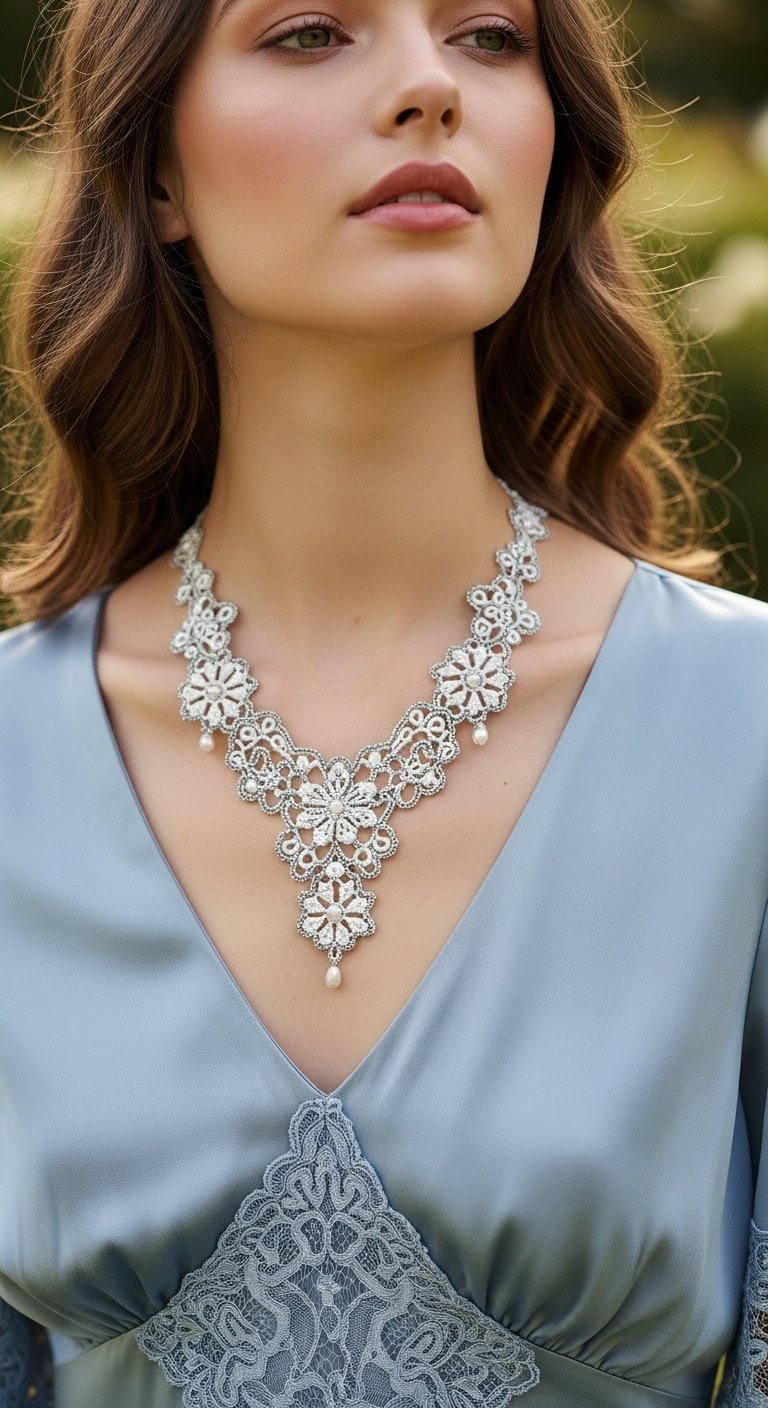
This pattern is designed to mimic the intricate look of the necklace in the image using fine thread crochet, focusing on delicate motifs and connecting elements.
Main Large Flower (Centerpiece – Make 1)
Central Ring: Ch 8, sl st to first ch to form a ring.
Rnd 1: Ch 1, 16 sc in ring, sl st to first sc.
Rnd 2 (Picot Loops): (Ch 4, picot, ch 4, sk next sc, sl st in next sc) 8 times. Fasten off.
Outer Layer (Petal Base): Ch 10, sl st to first ch to form a ring.
Rnd 1: Ch 1, 20 sc in ring, sl st to first sc.
Rnd 2 (Petal Points): (Ch 5, picot, ch 5, sk 2 sc, sl st in next sc) 5 times. Fasten off.
Carefully sew the Outer Layer (Petal Points) onto the Central Ring, positioning it slightly behind the central picot loops so the picoted points overlap elegantly, creating a layered floral effect.
Medium Flower Motif (Make 2 – for sides of centerpiece)
Ch 6, sl st to first ch to form a ring.
Rnd 1: Ch 1, 12 sc in ring, sl st to first sc.
Rnd 2 (Picot Loops): (Ch 3, picot, ch 3, sk next sc, sl st in next sc) 6 times. Fasten off.
Small Flower Motif (Make 4 – for outer sections)
Ch 4, sl st to first ch to form a ring.
Rnd 1: Ch 1, 8 sc in ring, sl st to first sc.
Rnd 2 (Picot Loops): (Ch 2, picot, ch 2, sk next sc, sl st in next sc) 4 times. Fasten off.
Connecting Lace Element (Make approximately 6-8, adjust as needed for length)
Ch 12. Sl st in 3rd ch from hook (forms a small loop). Ch 1, 4 sc in this loop.
(Ch 3, picot, ch 3, sl st in next sc) twice.
Ch 5. Fasten off, leaving long tails for joining.
Assembly
Lay out all your crocheted motifs on a flat surface to visualize the necklace design. Start with the Main Large Flower as the centerpiece.
Attach one Medium Flower Motif to each side of the Main Large Flower. Use sl st or careful sewing through adjacent picots/loops to secure them neatly.
Attach two Small Flower Motifs to each side, further out from the Medium Motifs, creating the cascading effect.
Use the Connecting Lace Elements to bridge the gaps between motifs and to create the intricate web-like structure seen in the image. Attach them by sl st or sewing into the picots or loops of adjacent motifs. Aim for a symmetrical arrangement.
Neckband: Once the decorative portion of the necklace is complete and joined, create a simple chain neckband for each side. Attach your thread to an outermost picot or loop of the final Small Flower Motif on one side. Ch 80 (or desired length for your neck). Fasten off. Repeat for the other side.
Embellishments: Use a fine sewing needle and matching thread to attach the small faux pearls. Place larger pearls as dangling elements from the tips of some motifs, and smaller ones can be sewn directly into the centers of flowers or picots. Sew the silver-lined seed beads onto various picots and connecting elements to add subtle sparkle, following the visual cues from the image.
Closure: Using small pliers, attach your chosen jewelry clasp to the ends of the chain neckbands. If using a toggle clasp, attach one part to each end. For a lobster claw, attach the clasp to one end and a small jump ring to the other.