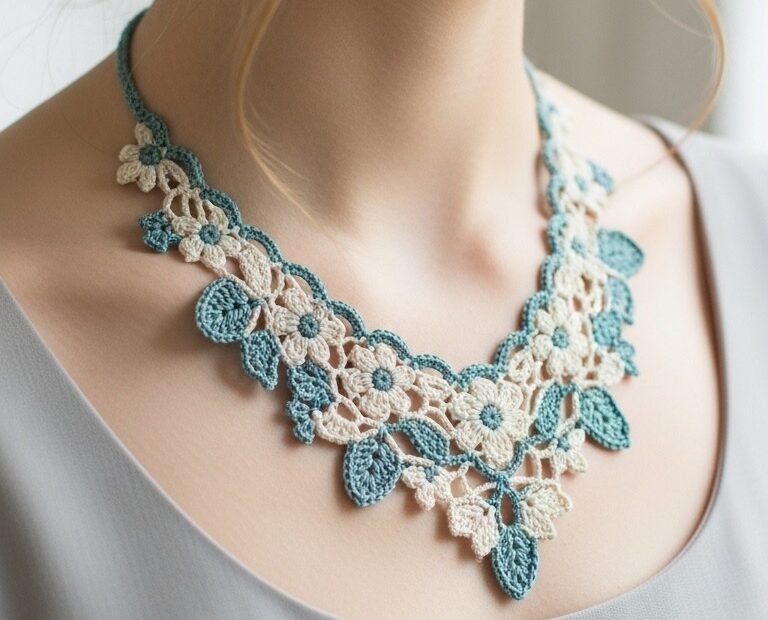
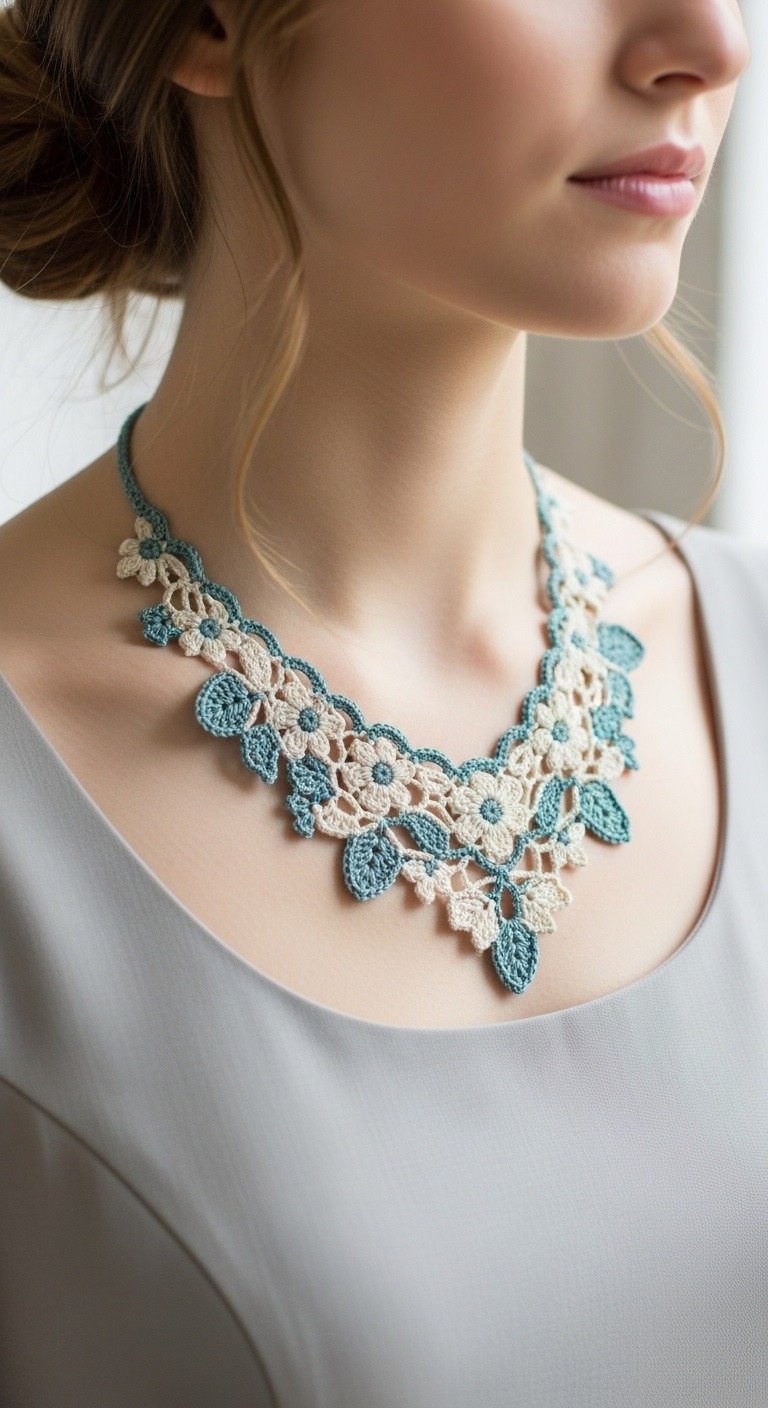
Adorn your neckline with this exquisite handcrafted lace floral necklace, a true statement of elegance and timeless beauty. This pattern guides you through creating delicate cream-colored flowers and dusty blue leaves, intricately joined to form a stunning, wearable art piece. Perfect for adding a touch of sophistication to any outfit, it’s a project that combines charm with classic style.
Craft Your Own Timeless Botanical Statement Piece
There’s immense satisfaction in creating your own unique accessories. This crocheted lace necklace allows you to wear a piece of art made by your own hands, reflecting a love for intricate details and delicate craftsmanship. It makes a thoughtful, personalized gift or a beautiful addition to your own jewelry collection, perfect for special occasions or elevating everyday wear.
Fine cotton yarn, size 10 (or similar thread weight) in Cream (approx. 50g)
Fine cotton yarn, size 10 (or similar thread weight) in Dusty Blue (approx. 30g)
Crochet hook 1.5mm (or size to achieve desired gauge)
Tapestry needle
Scissors
Small jewelry clasp (e.g., lobster clasp or button)
Abbreviations
ch – chain
sl st – slip stitch
sc – single crochet
hdc – half double crochet
dc – double crochet
tr – treble crochet
MR – magic ring (or adjustable ring)
Instructions
This pattern creates a delicate lace necklace. Work with light tension for a flowing fabric.
Cream Flower Motif (Make 10-12)
Round 1: Using Cream yarn, make a MR. Ch 1 (does not count as st), 6 sc into MR. Join with sl st to first sc. (6 sc)
Round 2 (Petals): *Ch 2, (1 dc, 1 tr, 1 dc) into the same sc, Ch 2, sl st into the next sc.* Repeat from * to * 6 times around. Join with sl st to the base of the first petal. Fasten off, leaving a 6-inch tail for weaving in.
Dusty Blue Leaf Motif (Make 15-20)
Row 1: Using Dusty Blue yarn, Ch 7. Sl st in 2nd ch from hook, sc in next ch, hdc in next ch, dc in next ch, hdc in next ch, sc in last ch.
Row 2: Ch 1, rotate to work along the other side of the foundation chain. Sc in next st, hdc in next st, dc in next st, hdc in next st, sc in next st, sl st into the first sl st of Row 1 to join. Fasten off, leaving a 6-inch tail for weaving in.
Assembling the Lace Section (Main Necklace Body)
The necklace is assembled by crocheting the motifs together using Dusty Blue yarn, creating a continuous lace fabric. Refer to the image for placement, forming a V-shape.
Start Central: Begin by taking 3 Cream Flowers. Join them side-by-side using short chains (ch 3-5) and sl sts with Dusty Blue yarn, forming the central lower point.
Adding Leaves: Attach 2 Blue Leaves to the outer petals of the central Cream Flower, and between the first 3 joined flowers, using sl sts and short chains (ch 2-3) of Dusty Blue yarn.
Building Outwards: Continue adding Cream Flowers and Blue Leaves, working upwards and outwards from the center. Each new motif should be joined to at least two existing points (either another flower, a leaf, or a connecting chain) using sl sts and short ch spaces (ch 2-5, adjust as needed) in Dusty Blue yarn.
Creating the Shape: Gradually reduce the number of motifs on each side as you work towards the neck, shaping the necklace into an elegant V. The blue yarn will naturally form the connecting network and outline the cream flowers. Ensure the lace section is long enough to cover the desired front area (approx. 6-8 inches wide depending on desired fit).
Weave in Ends: Carefully weave in all remaining yarn tails from the motifs into the back of the lace work.
Crocheting the Neckband
Row 1: With Dusty Blue yarn, attach to the top-leftmost point of your assembled lace section. Ch 1, sc evenly along the top edge of the lace, joining to each top-most motif or connecting chain. Continue with a long chain (approx. 60-80 ch, adjust for desired necklace length) to form the back neckband. Attach to the top-rightmost point of the lace section with a sl st, then sc evenly back across the top edge.
Row 2: Ch 1, turn. Sc in each sc and ch across the entire neckband, ensuring a smooth, even edge.
Row 3 (Optional): Ch 1, turn. Sc in each sc across for a slightly wider band, or if you prefer a thinner band, fasten off after Row 2.
Finishing
Attach a jewelry clasp to one end of the neckband and a small chain or loop to the other end.