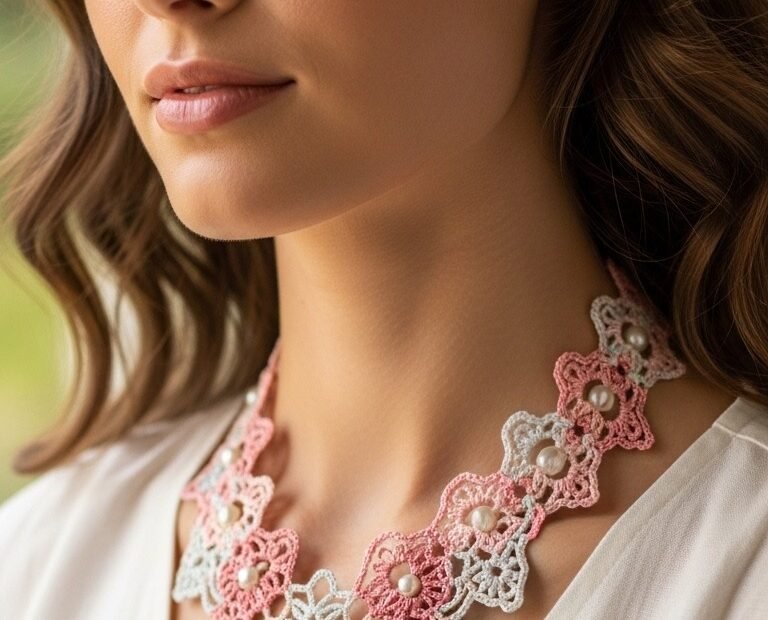
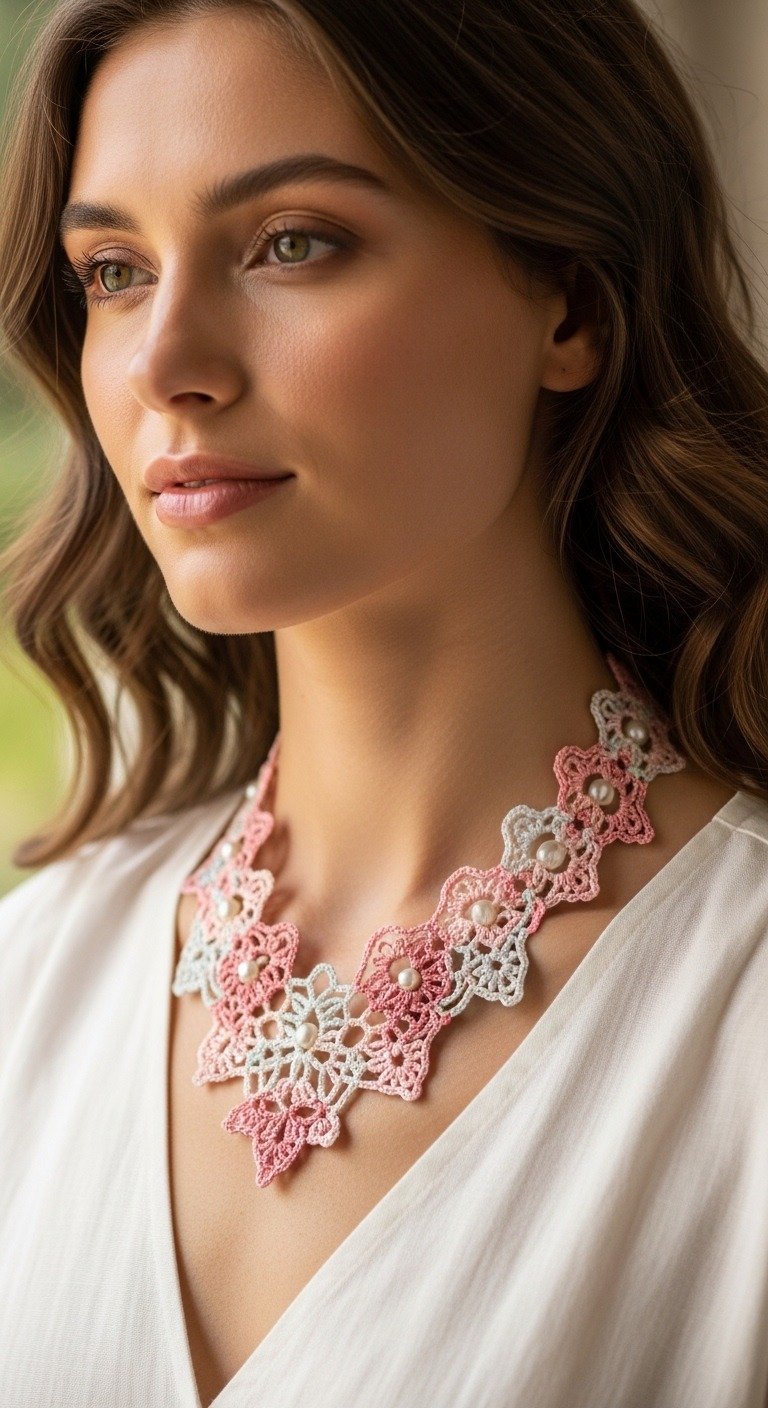
Adorn yourself with timeless elegance with our Radiant Blossom Crochet Lace Necklace. This intricate pattern features delicate floral motifs in soft pink, pale mint, and cream, beautifully embellished with lustrous pearls. Perfect for adding a touch of sophisticated charm to any outfit, this necklace is a rewarding project for intermediate crocheters seeking to create a unique piece of wearable art.
Craft Your Own Statement Piece
This exquisite crochet lace necklace allows you to express your personal style and creativity. Imagine the compliments as you wear a handcrafted accessory that truly reflects your skill and taste. Beyond its beauty, the meditative rhythm of crochet makes this project a delightful journey, culminating in a stunning piece of jewelry you’ll cherish for years.
Approximately 25-30 small pearl beads (4-6mm diameter)
Fine sewing needle
Matching sewing thread
Small jewelry clasp (e.g., lobster claw)
Scissors
Abbreviations
ch: chain
sl st: slip stitch
sc: single crochet
hdc: half double crochet
dc: double crochet
tr: treble crochet
picot: ch 3, sl st in 3rd ch from hook
sp: space
rep: repeat
st(s): stitch(es)
MR: Magic Ring
Instructions
Notes:
This pattern uses US crochet terms.
Each motif is worked individually and then joined.
Colors are indicated by (A) Soft Pink, (B) Pale Mint, (C) Cream.
Motif A: 6-Petal Floral Motif (Make 8 in Soft Pink, 8 in Pale Mint)
Using Color (A) or (B):
Row 1: Start with a MR. Ch 1, 12 sc into MR. Join with sl st to first sc. (12 sc)
Row 2: Ch 1, sc in same st. *Ch 3, sk next st, sc in next st* repeat 5 times, ch 3, sl st to first sc. (6 ch-3 loops)
Row 3: Sl st into first ch-3 sp. Ch 1, (sc, hdc, dc, picot, dc, hdc, sc) in same ch-3 sp. *In next ch-3 sp, work (sc, hdc, dc, picot, dc, hdc, sc)* repeat 5 times. Join with sl st to first sc. (6 petals formed)
Fasten off, weave in ends.
Carefully sew one pearl bead to the center of each Motif A.
Motif B: Lacy Connector Square (Make 6 in Cream)
Using Color (C):
Row 1: Start with a MR. Ch 1, 8 sc into MR. Join with sl st to first sc. (8 sc)
Row 2: Ch 5 (counts as 1st dc + ch 2), dc in same st. *Ch 3, sk 1 sc, (dc, ch 2, dc) in next sc* repeat 3 times. Ch 3, join with sl st to 3rd ch of beg ch 5. (4 (dc, ch 2, dc) clusters, 4 ch-3 sps)
Row 3: Sl st into first ch-2 sp. Ch 1, *(sc, picot, sc) in ch-2 sp. Ch 2, sc in next ch-3 sp, ch 2* repeat 4 times. Join with sl st to first sc. (4 picots, 8 ch-2 sps)
Fasten off, weave in ends.
Carefully sew one pearl bead to the center of each Motif B.
Assembly of Necklace:
The necklace is formed by joining motifs together. Arrange your motifs in a pattern, typically alternating colors and types, to create the desired shape and flow seen in the image. The goal is to create a central ‘V’ shape for the front, fanning out towards the shoulders.
Step 1: Lay out your motifs. Begin with a central Motif B (Cream) at the very bottom point of the ‘V’. Then, position two Motif A’s (one Pink, one Mint) on either side, slightly above the central Motif B. Continue arranging outwards and upwards, using Motif B (Cream) to connect and space out the colored Motif A’s. Refer to the image for the general layout, which shows roughly 3-4 Motif A’s per side, interconnected by Motif B’s.
Step 2: Joining motifs. Using Color (C) and your crochet hook, or a fine sewing needle and matching thread, join the motifs. The key is to create a seamless, lace-like connection.
When joining motifs, use a slip stitch into a corresponding picot or a ch-sp of the adjacent motif.
For connections that span a short distance (e.g., between two petals of adjacent motifs), use Ch 2-3 and sl st into the desired point.
For longer connecting strands, especially along the top edge of the necklace where pearls are visible without a full motif: Ch 5-7. Before completing the chain, thread a pearl bead onto your working thread, then continue chaining and sl st into a picot/ch-sp of the next motif or even back into the same motif for a decorative loop.
Emphasize joining at multiple points (e.g., 2-3 connections) between adjacent motifs to secure them and create the dense lace effect.
Step 3: Neckline strap. Once the main decorative lace section is complete, attach Color (C) yarn to the uppermost outer picot/point of the leftmost and rightmost motifs. Create two simple straps for the back of the neck by chaining. Ch 60-80 (or to desired length to comfortably reach around the back of your neck). Fasten off.
Step 4: Attach clasp. Sew a small jewelry clasp to the ends of these necklace straps.
Step 5: Final embellishments. Review the image carefully. Add any additional small pearl beads by sewing them onto connecting chains or directly onto motif edges where shown, to enhance the delicate, shimmering effect.