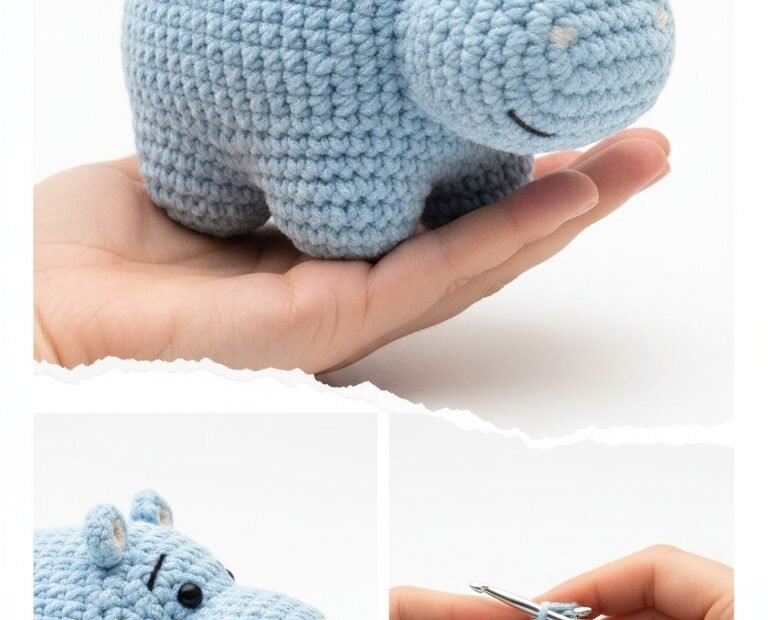
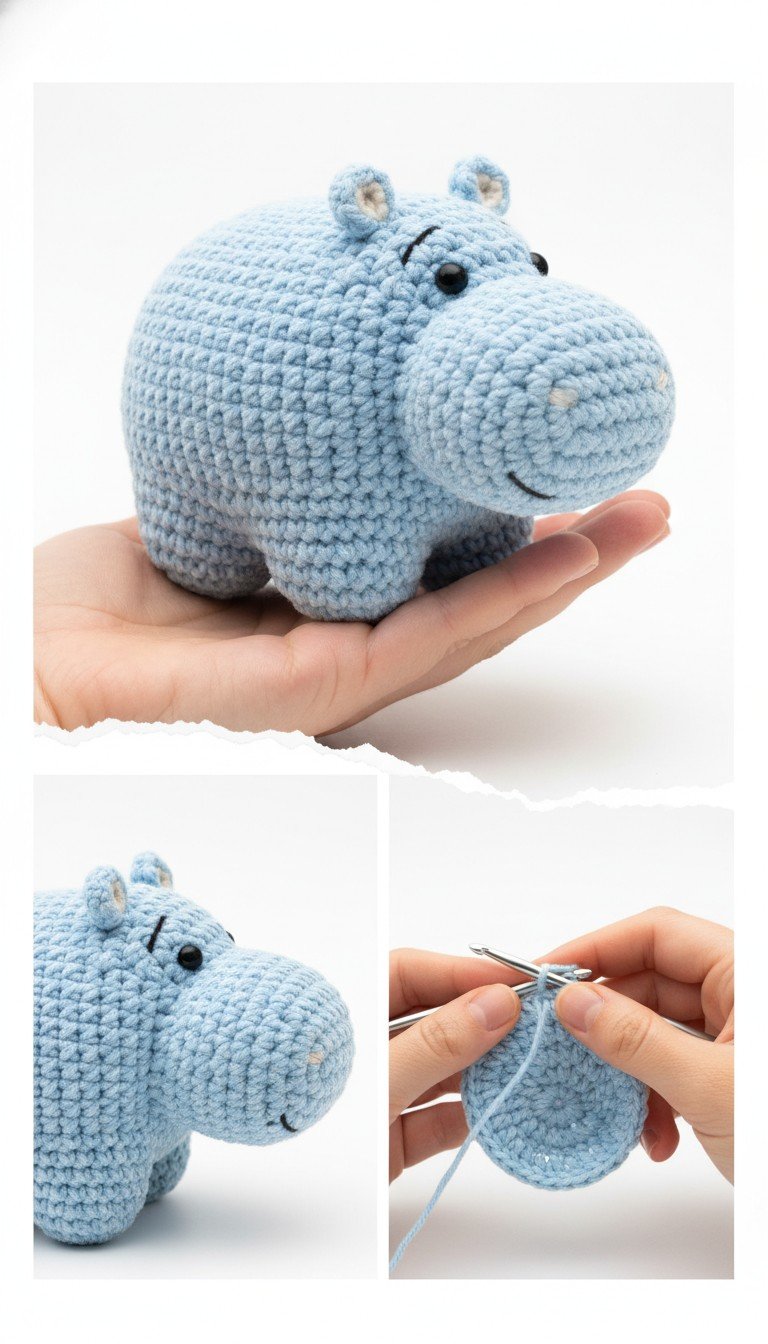
Dive into the enchanting world of amigurumi with this delightful free crochet pattern for a cuddly blue hippo! Perfect for beginners and seasoned crocheters alike, this adorable hippo toy is quick to make and guaranteed to bring a smile. Craft a charming companion for yourself or as a thoughtful handmade gift for a loved one.
Bring a Splash of Joy with Your Handmade Hippo
There’s something uniquely special about a handmade amigurumi toy. This lovable blue hippo isn’t just a pattern; it’s an opportunity to create a cherished friend. Whether gracing a nursery shelf or accompanying a child on adventures, this little hippo embodies warmth and charm, making it a truly heartfelt creation.
Crochet Pattern: Cuddly Blue Hippo Amigurumi: Free Crochet Pattern for Adorable Toys
Materials
Worsted weight yarn in Light Blue (approx. 50g)
Small amount of Worsted weight yarn in Cream or White
Small amount of Worsted weight yarn in Black
3.5mm crochet hook (or size appropriate for your yarn)
6mm or 8mm Black safety eyes
Polyester fiberfill for stuffing
Yarn needle
Stitch marker
Scissors
Abbreviations
MR: Magic Ring
ch: chain
sc: single crochet
inc: increase (2 sc in one stitch)
dec: decrease (sc 2 together)
sl st: slip stitch
FO: Fasten off
(X): stitch count at the end of the round
R: Round
Instructions
Body and Head (Light Blue)
R1: Start with MR, 6 sc (6)
R2: 6 inc (12)
R3: (sc, inc) * 6 (18)
R4: (2 sc, inc) * 6 (24)
R5: (3 sc, inc) * 6 (30)
R6: (4 sc, inc) * 6 (36)
R7-13: sc around (36) (7 rounds)
R14: (4 sc, dec) * 6 (30)
R15-16: sc around (30) (2 rounds)
R17: (3 sc, dec) * 6 (24)
R18-19: sc around (24) (2 rounds)
R20: (2 sc, dec) * 6 (18)
Stuff the body firmly now with polyester fiberfill. Continue stuffing as you go.
R21: sc around (18)
R22: (sc, dec) * 6 (12)
R23: 6 dec (6)
FO, weave in remaining tail to close the hole.
Snout (Light Blue)
R1: Ch 5. Sc in 2nd ch from hook, sc in next 2 ch, 3 sc in last ch. Working on the other side of the chain: sc in next 2 ch, 2 sc in last ch (10)
R2: Inc, sc in next 2, 3 inc, sc in next 2, 2 inc (16)
R3-4: sc around (16) (2 rounds)
Stuff lightly. FO, leave a long tail for sewing. Flatten the piece slightly.
Ears (Make 2)
Outer Ear (Light Blue): Start with MR, 6 sc. Sl st to the first sc to close. FO.
Inner Ear (Cream/White): Start with MR, 4 sc. Sl st to the first sc to close. FO.
Sew the small cream/white inner ear onto the light blue outer ear.
Assembly and Details
Attach the Snout to the front of the head, centered, roughly between R16 and R19 of the Body/Head piece.
Insert the 6mm or 8mm safety eyes above the snout, roughly between R16 and R17 of the Body/Head piece, about 6-7 stitches apart. Secure washers on the inside.
With black yarn, embroider a small smile below the nostrils on the snout.
With white yarn, embroider two small dots on the front of the snout for nostrils.
With black yarn, embroider small, slightly arched lines above each safety eye for eyebrows/eye outlines.
Sew the finished ears to the top of the head, slightly to the sides, folding them gently for a more natural shape.