
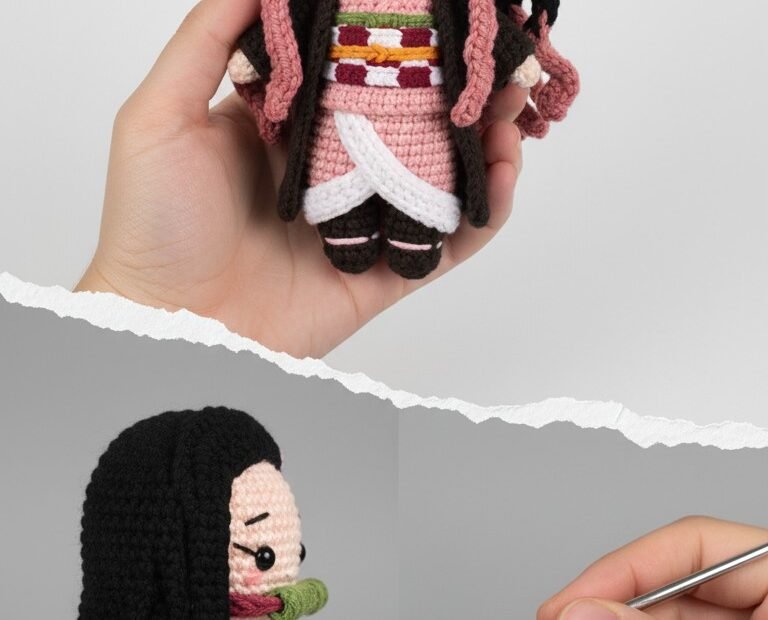
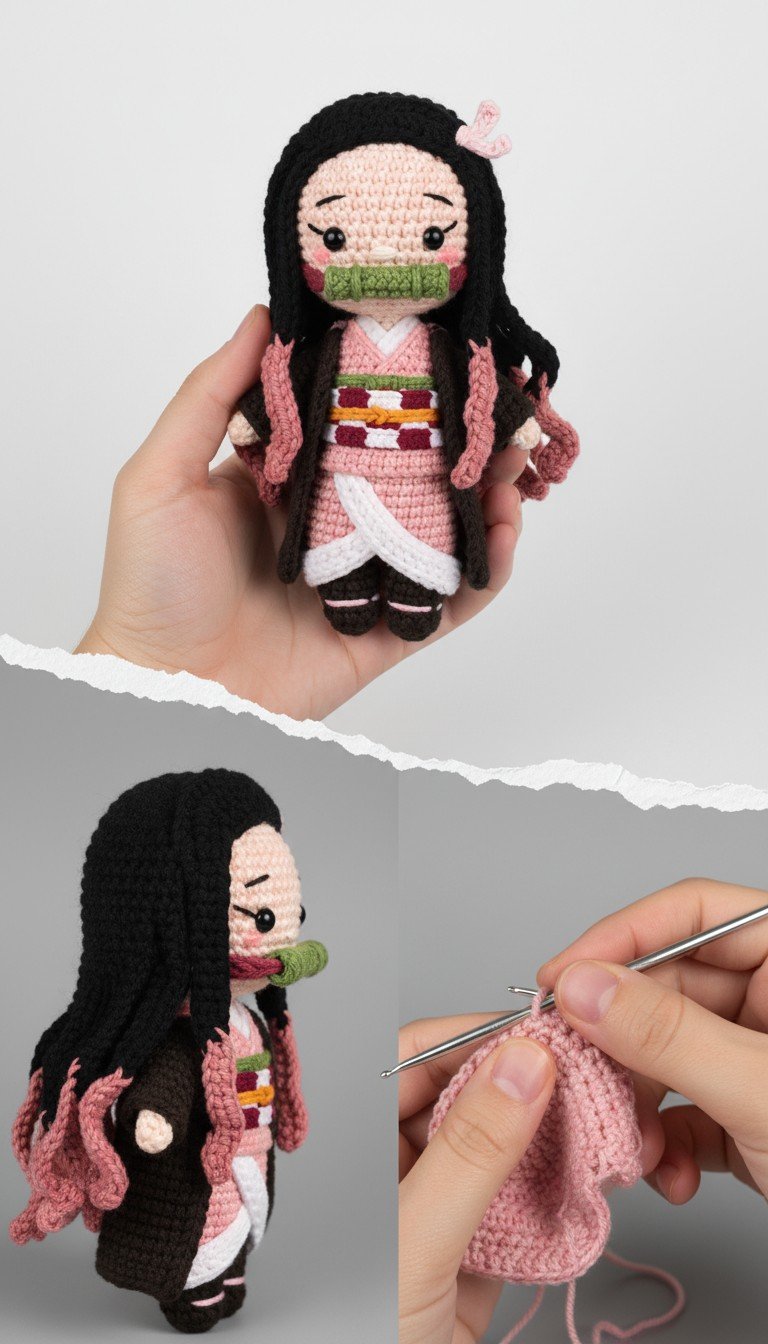
Step into the world of Demon Slayer with this adorable Nezuko Kamado amigurumi pattern! Perfect for fans of the beloved anime, this detailed guide will help you crochet your very own miniature demon girl. With her iconic kimono, bamboo muzzle, and flowing hair, this handmade Nezuko doll makes a fantastic gift or a charming addition to your collection.
Bring Your Favorite Demon Slayer Character to Life with Yarn!
There’s nothing quite like the satisfaction of creating a beloved character with your own hands. This Nezuko amigurumi project allows you to craft a unique, cuddly representation of the courageous demon. Whether for display on a shelf, as a thoughtful gift for an anime enthusiast, or simply to enjoy the process of bringing her to life, this pattern offers a rewarding experience for crocheters of all levels.
Crochet Pattern: Crochet Your Own Adorable Nezuko Kamado Amigurumi: Free Pattern for Demon Slayer Fans!
Materials
- DK weight yarn in Light Peach (Skin Tone)
- DK weight yarn in Black (Hair)
- DK weight yarn in Dark Brown (Haori, Shoes)
- DK weight yarn in Pink (Kimono, Hair Tips, Shoe Details)
- DK weight yarn in Light Green (Bamboo Muzzle)
- DK weight yarn in White (Collar, Leg Wraps, Obi Stripe)
- DK weight yarn in Red (Obi Stripe)
- DK weight yarn in Yellow/Orange (Obi Stripe)
- 2.5mm or 3.0mm crochet hook (adjust to your tension)
- 6mm safety eyes
- Polyester fiberfill for stuffing
- Tapestry needle
- Stitch markers
- Embroidery floss in Black (Eyebrows) and Pink (Blush)
Abbreviations
- MR: Magic Ring
- ch: chain
- sc: single crochet
- inc: increase (2 sc in one stitch)
- dec: decrease (sc 2 together)
- sl st: slip stitch
- FO: Fasten Off
- BLO: Back Loop Only
- FLO: Front Loop Only
- st(s): stitch(es)
- R: Round/Row
Instructions
Head (Light Peach yarn)
- R1: 6 sc in MR (6)
- R2: 6 inc (12)
- R3: (1 sc, 1 inc) x6 (18)
- R4: (2 sc, 1 inc) x6 (24)
- R5: (3 sc, 1 inc) x6 (30)
- R6-R12: sc in each st around (30) – 7 rounds
- Insert safety eyes between R9 and R10, about 6-7 sts apart.
- R13: (3 sc, 1 dec) x6 (24)
- R14: (2 sc, 1 dec) x6 (18)
- Start stuffing firmly.
- R15: (1 sc, 1 dec) x6 (12)
- R16: 6 dec (6)
- FO, leave a long tail for sewing. Finish stuffing and close the hole.
Body (Pink yarn)
- R1: 6 sc in MR (6)
- R2: 6 inc (12)
- R3: (1 sc, 1 inc) x6 (18)
- R4: (2 sc, 1 inc) x6 (24)
- R5: (3 sc, 1 inc) x6 (30)
- R6-R10: sc in each st around (30) – 5 rounds
- R11: (3 sc, 1 dec) x6 (24)
- R12-R14: sc in each st around (24) – 3 rounds
- R15: (2 sc, 1 dec) x6 (18)
- Stuff firmly. FO, leave a long tail for sewing.
Arms (Make 2)
- Start with Light Peach yarn.
- R1: 6 sc in MR (6)
- R2-R4: sc in each st around (6) – 3 rounds
- Change to Pink yarn.
- R5-R7: sc in each st around (6) – 3 rounds
- Change to Dark Brown yarn.
- R8-R10: sc in each st around (6) – 3 rounds
- Stuff lightly. FO, leave a long tail for sewing.
Legs/Feet (Make 2)
- Start with Dark Brown yarn.
- R1: Ch 5, sc in 2nd ch from hook, 2 sc, 3 sc in last ch. Work on other side of chain: 3 sc, 2 sc in last st (10)
- R2: inc, 3 sc, 3 inc, 3 sc, inc (16)
- R3: sc in BLO around (16)
- R4-R5: sc in each st around (16)
- R6: 4 sc, 4 dec, 4 sc (12)
- Stuff foot.
- R7: 4 sc, 2 dec, 4 sc (10)
- Change to White yarn.
- R8-R9: sc in each st around (10) – 2 rounds (leg wraps)
- Change to Pink yarn.
- R10-R11: sc in each st around (10) – 2 rounds
- Stuff firmly. FO, leave a long tail for sewing.
Hair Cap (Black yarn)
- R1: 6 sc in MR (6)
- R2: 6 inc (12)
- R3: (1 sc, 1 inc) x6 (18)
- R4: (2 sc, 1 inc) x6 (24)
- R5: (3 sc, 1 inc) x6 (30)
- R6-R10: sc in each st around (30) – 5 rounds
- FO, leave a long tail for sewing.
Hair Strands (Black yarn, make several, some with pink tips)
- Create various lengths by chaining and then sc back down the chain. For wavy look, use a larger hook for the sc back, or work 2sc in some chains.
- Example: Ch 20, sc in 2nd ch from hook and across (19 sc). FO.
- For pink tips: Ch X, change to Pink for last few stitches and FO.
- Make some shorter side bangs (ch 8-10).
Bamboo Muzzle (Light Green yarn)
- R1: 6 sc in MR (6)
- R2-R5: sc in each st around (6) – 4 rounds
- FO, leave a long tail for sewing.
Haori (Dark Brown yarn, Pink yarn for trim)
- Ch 21.
- R1: Sc in 2nd ch from hook and across (20). Ch 1, turn.
- R2-R12: Sc across (20). Ch 1, turn.
- FO. This forms the back panel.
- For sleeves (make 2): Ch 11.
- R1: Sc in 2nd ch from hook and across (10). Ch 1, turn.
- R2-R6: Sc across (10). Ch 1, turn.
- FO.
- Sew the sleeves to the side edges of the main haori piece. Fold the main haori piece in half lengthwise. Attach Pink yarn to the edges of the sleeves and work sc around for the trim.
Obi (Belt)
- Using Red, Yellow/Orange, and White yarn.
- Ch 30 (or length to fit around Nezuko’s waist).
- R1: Using Red yarn, sc in 2nd ch from hook and across. Ch 1, turn. (29)
- R2: Using Yellow/Orange yarn, sc across. Ch 1, turn.
- R3: Using White yarn, sc across. Ch 1, turn.
- R4: Using Red yarn, sc across. Ch 1, turn.
- FO, leave a tail for sewing.
Kimono Collar (White yarn)
- Ch 15 (or length to fit across neck).
- R1: Sc in 2nd ch from hook and across (14). FO, leave a tail for sewing.
Hair Ornament (Pink yarn)
- Ch 5, sl st into 1st ch to form a loop. Ch 3, (dc, trc, dc) in loop, ch 3, sl st in loop. Repeat for second leaf. FO.
Assembly
- 1. Sew the head to the body.
- 2. Attach the hair cap to the top of the head. Carefully sew or glue the individual hair strands around the head, ensuring the longer ones fall down the back. Sew the pink hair ornament to the side of the hair.
- 3. Sew the arms to the sides of the body, just below the neck.
- 4. Sew the legs to the bottom of the body.
- 5. Wrap the Kimono Collar around the neck opening of the pink body and sew in place.
- 6. Wrap the Obi around the waist and sew securely.
- 7. Place the Haori over Nezuko’s body, aligning the shoulders and sleeves. Sew the edges of the haori to the body or to each other discreetly to create the coat effect.
- 8. Sew the green bamboo muzzle to the face, centered over the mouth area.
- 9. Using black embroidery floss, embroider small eyebrows above the safety eyes.
- 10. Using pink embroidery floss, embroider small blush marks on each cheek.
- 11. For the white criss-cross pattern on the kimono, use white yarn and a tapestry needle to stitch directly onto the pink kimono, near the bottom edge.
- 12. For the pink details on the shoes, embroider small pink lines or shapes onto the dark brown feet.