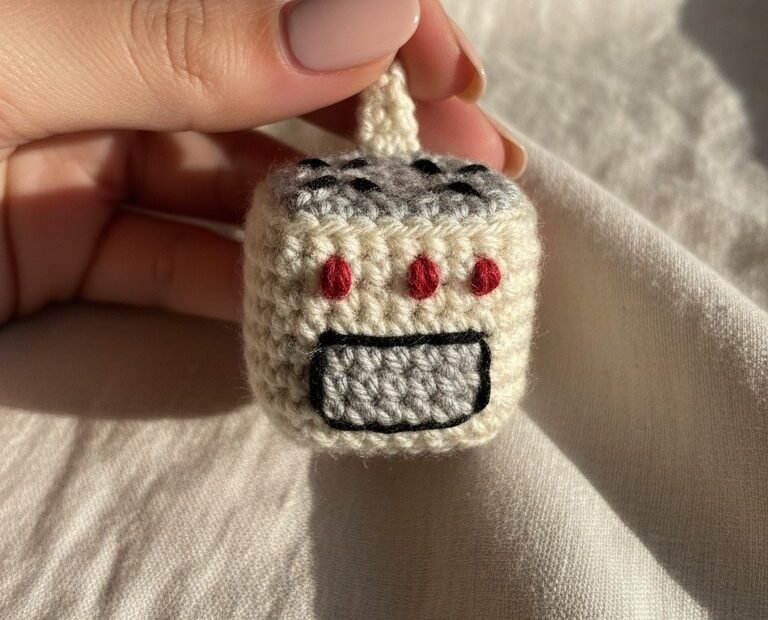
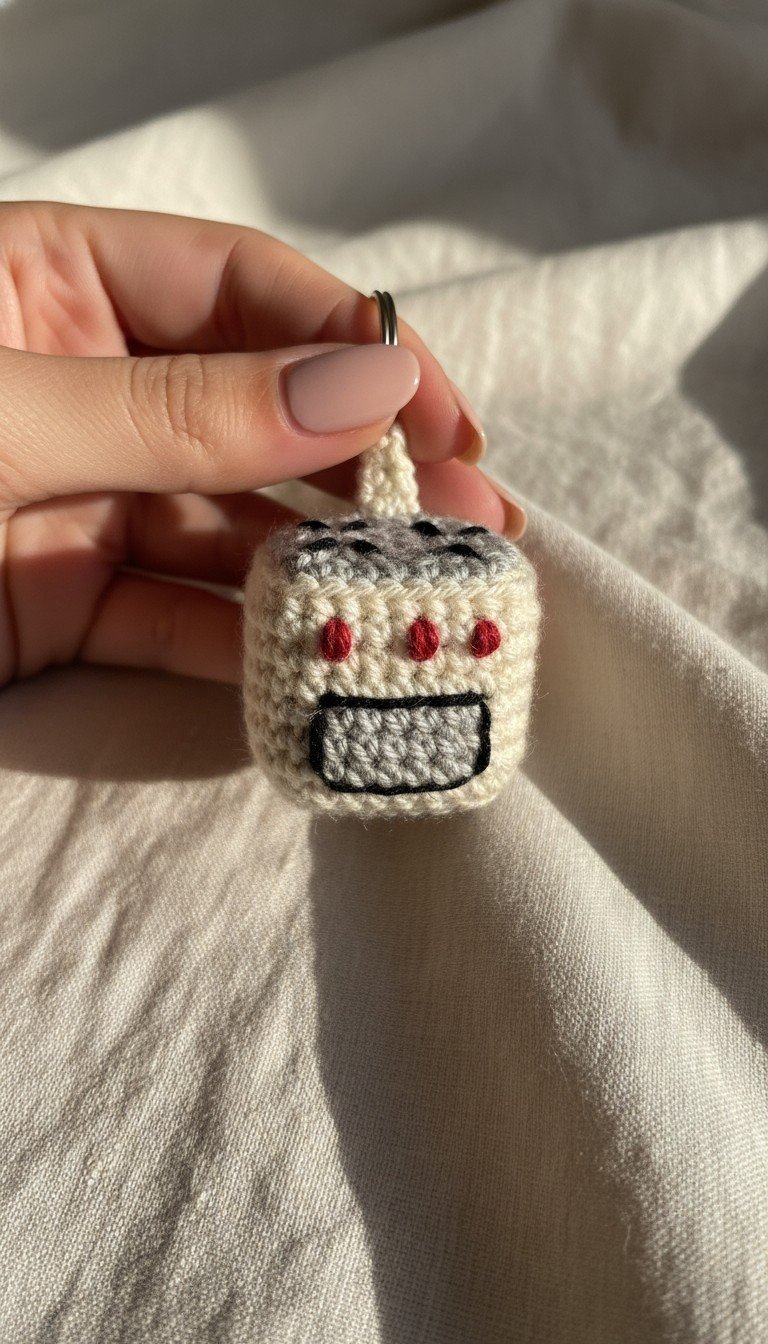
Whip up this adorable Crochet Toaster Oven Keychain with our free amigurumi pattern! Perfect for adding a touch of handmade charm to your keys, bag, or as a thoughtful gift for kitchen lovers. This mini toaster oven is quick to make and uses basic crochet stitches, making it a fun project for all skill levels. Get ready to crochet your own tiny appliance today!
Craft a Unique and Whimsical Accessory
Looking for a unique way to personalize your belongings? This miniature crochet toaster oven is more than just a keychain; it’s a conversation starter! Its charming design and compact size make it an irresistible addition to any collection. Whether you’re a seasoned crocheter or just starting, you’ll love creating this whimsical piece that celebrates your love for both crafting and cute kitchen gadgets.
Crochet Pattern: Cute Crochet Toaster Oven Keychain Pattern: A Mini Amigurumi Delight!
Materials
Worsted weight yarn in Cream (for body)
Worsted weight yarn in Dark Grey (for top)
Worsted weight yarn in Light Grey (for door)
Worsted weight yarn in Red (for knobs)
Worsted weight yarn in Black (for outline)
3.0mm crochet hook (or size to achieve tight stitches)
Poly-fil stuffing
Tapestry needle
Stitch markers
Scissors
Keychain ring
Abbreviations
ch: chain
sc: single crochet
inc: increase (2 sc in one stitch)
sl st: slip stitch
BLO: back loop only
st(s): stitch(es)
R: round/row
FO: fasten off
Instructions
This pattern is worked in continuous rounds unless otherwise specified. Use a stitch marker to keep track of the first stitch of each round.
Main Body (Cream Yarn)
We will start by creating the base of the toaster oven.
R1: Ch 6. Sc in 2nd ch from hook, sc in next 3 ch, 3 sc in last ch. Working along the other side of the chain: sc in next 3 ch, 2 sc in last ch. (12 sts)
R2: [Sc in next 3 sts, inc in next 3 sts] repeat twice. (18 sts)
R3: [Sc in next 3 sts, (sc, inc) x3] repeat twice. (24 sts)
R4: Sc in BLO around. (24 sts) This creates a defined edge for the sides of the oven.
R5-R7: Sc around. (24 sts)
FO, leaving a long tail for sewing. Stuff the body firmly with Poly-fil.
Oven Top (Dark Grey Yarn)
Create a flat square for the top of the toaster oven.
R1: Ch 6. Sc in 2nd ch from hook, sc in next 3 ch, 3 sc in last ch. Working along the other side of the chain: sc in next 3 ch, 2 sc in last ch. (12 sts)
R2: [Sc in next 3 sts, inc in next 3 sts] repeat twice. (18 sts)
R3: [Sc in next 3 sts, (sc, inc) x3] repeat twice. (24 sts)
Sl st into the first sc to close the round. FO, leaving a long tail for sewing.
Carefully sew the Dark Grey top piece onto the open top of the Cream body, aligning the stitches.
Oven Door (Light Grey Yarn)
This piece is worked in rows and then sewn onto the front.
R1: Ch 5. Sc in 2nd ch from hook and in next 3 ch. (4 sts)
R2-R3: Ch 1, turn. Sc in each st across. (4 sts)
FO, leaving a long tail for sewing.
Position the light grey door on the front of the cream body, centered below where the knobs will be. Sew securely.
Finishing Details and Assembly
Embroider Door Outline: Using Black yarn and a tapestry needle, embroider a thin outline around the Light Grey oven door.
Embroider Knobs: Using Red yarn, embroider three small circles or French knots in a horizontal line above the oven door, centered on the cream body.
Embroider Top Details: Using Dark Grey yarn, embroider four small, short horizontal lines evenly spaced on the Dark Grey top piece to represent burner elements or vents.
Keychain Loop: Attach Cream yarn to the center of the Dark Grey top piece. Ch 10. Sl st back into the same stitch to form a loop. Secure the ends.
Attach your keychain ring to the crocheted loop.
Your adorable Crochet Toaster Oven Keychain is now complete!