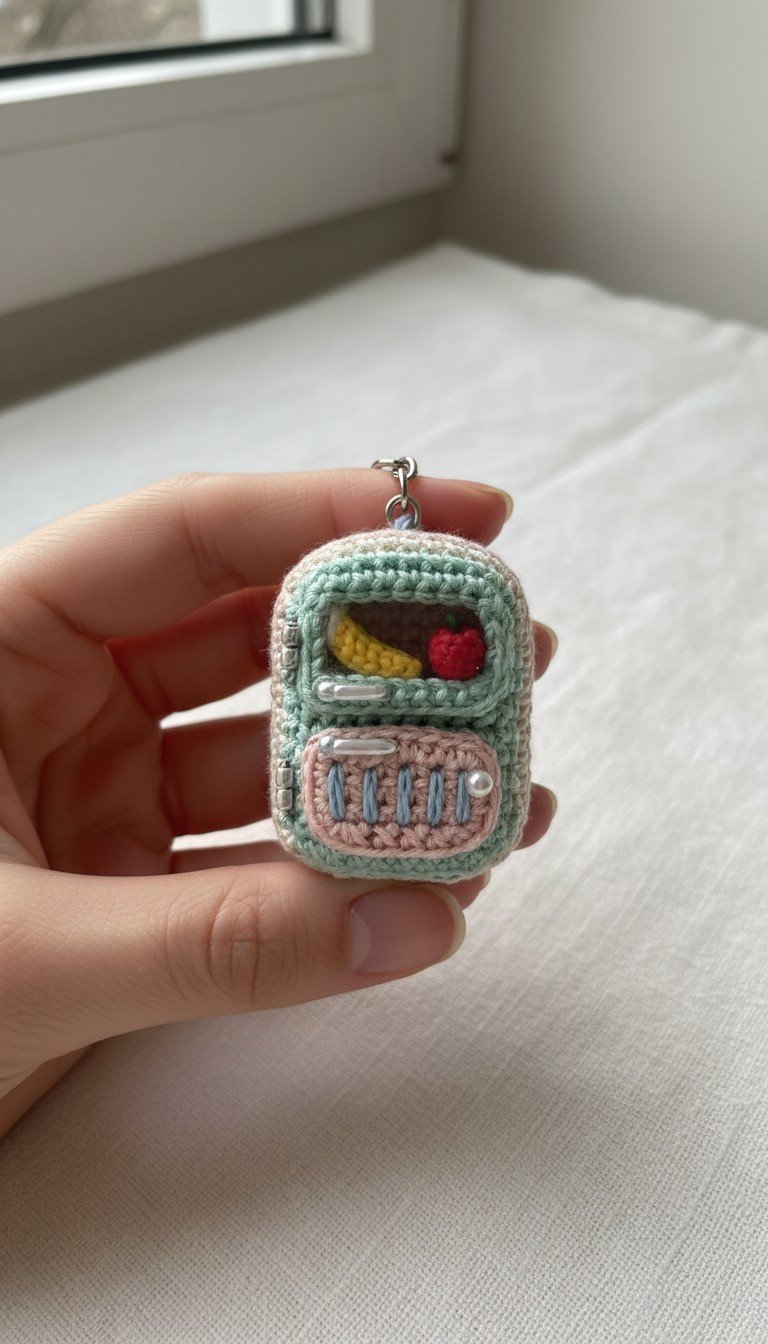
Crochet Pattern: Adorable Mini Fridge Amigurumi Keychain: Your Portable Snack Buddy
Materials
- Light Mint Green Sport/DK weight yarn
- Light Pink Sport/DK weight yarn
- Light Blue Sport/DK weight yarn
- Yellow Sport/DK weight yarn (for banana)
- Red Sport/DK weight yarn (for apple)
- Small amount of Black embroidery floss (for fruit details, optional)
- 2.0mm or 2.25mm crochet hook (or hook size suitable for yarn to create a dense fabric)
- Stuffing (fiberfill)
- Yarn needle
- Scissors
- Keychain ring
- Two small white oblong beads (for fridge handles)
- Approximately 10-12 silver seed beads (for hinge detail)
Abbreviations
- MR: Magic Ring
- ch: chain
- sl st: slip stitch
- sc: single crochet
- inc: increase (2 sc in one stitch)
- dec: decrease (sc two stitches together)
- BLO: back loop only
- FO: Fasten off
- R: Round/Row
Instructions
Gauge: Not critical for this project, but ensure your stitches are tight enough so stuffing does not show through.
Notes: Work in continuous rounds unless otherwise specified. Use a stitch marker to keep track of the first stitch of each round.
Fridge Body (Light Mint Green)
R1: Ch 9. Sc in 2nd ch from hook, sc in next 6 ch, 3 sc in last ch. Continue on other side of chain: sc in next 6 ch, 2 sc in last ch. (18 sts)
R2: Inc, sc in next 6, inc x 3, sc in next 6, inc x 2. (24 sts)
R3: (Sc in next 2, inc) x 8. (32 sts)
R4: Sc in BLO around. (32 sts)
R5-R14: Sc around. (32 sts for 10 rounds)
R15: (Sc in next 6, dec) x 4. (28 sts) Start stuffing lightly.
R16: (Sc in next 5, dec) x 4. (24 sts)
R17: (Sc in next 4, dec) x 4. (20 sts)
R18: (Sc in next 3, dec) x 4. (16 sts) Finish stuffing firmly.
R19: (Sc in next 2, dec) x 4. (12 sts)
R20: (Sc, dec) x 4. (8 sts) FO, leaving a long tail. Weave tail through remaining 8 sts and pull tight to close. Weave in end.
Top Compartment Back Wall (Light Mint Green)
Ch 6. Sc in 2nd ch from hook, sc in next 4. Ch 1, turn. (5 sts)
R1-R3: Sc across. Ch 1, turn. (5 sts)
FO, leaving a long tail for sewing.
Bottom Door Panel (Light Pink & Light Blue)
Using Light Pink:
Ch 8. Sc in 2nd ch from hook, sc in next 6. Ch 1, turn. (7 sts)
R1-R6: Sc across. Ch 1, turn. (7 sts)
FO, leaving a long tail for sewing.
Detailing with Light Blue:
With a yarn needle and light blue yarn, embroider 4-5 vertical lines onto the pink door panel using surface slip stitch or straight stitches. Attach one white oblong bead towards the right side of the door for a handle.
Banana (Yellow)
MR 4 sc. (4 sts)
R1-R3: Sc around. (4 sts)
R4: Sc 2, inc, sc 1. (5 sts)
R5: Sc around. (5 sts)
R6: Dec, sc 3. (4 sts) FO, leaving a tail. Pinch and sew ends slightly to create a curve. Do not stuff.
Apple (Red)
MR 4 sc. (4 sts)
R1: Inc x 4. (8 sts)
R2: (Sc, inc) x 4. (12 sts)
R3: Sc around. (12 sts)
R4: (Sc, dec) x 4. (8 sts) Stuff lightly.
R5: Dec x 4. (4 sts) FO, leaving a tail. Weave tail through remaining 4 sts and pull tight to close. Use black floss to embroider a tiny stem and leaf if desired.
Assembly
- Attach Top Compartment Back Wall: On the front of the fridge body, about 3-4 rounds down from the top, define an opening. Sew the ‘Top Compartment Back Wall’ inside this opening, pushing it slightly back to create depth.
- Place Fruit: Carefully place the banana and apple into the top compartment. You may want to secure them with a tiny dab of fabric glue or a stitch.
- Attach Bottom Door: Sew the finished ‘Bottom Door Panel’ onto the lower front of the fridge body. Ensure it’s centered and straight.
- Add Top Door Handle: Attach the second white oblong bead above the top compartment opening, centered, to act as a handle for the top door.
- Hinge Details: Using a yarn needle and a length of light mint green yarn, string 5-6 silver seed beads along each side of the fridge body where the ‘doors’ would hinge. Secure them firmly.
- Keychain Attachment: Attach the keychain ring to the top center of the fridge. For extra security, you can crochet a small loop (e.g., ch 5, sl st into itself) and attach the ring to that loop, then sew the loop to the fridge.
- Weave in all remaining ends securely.