
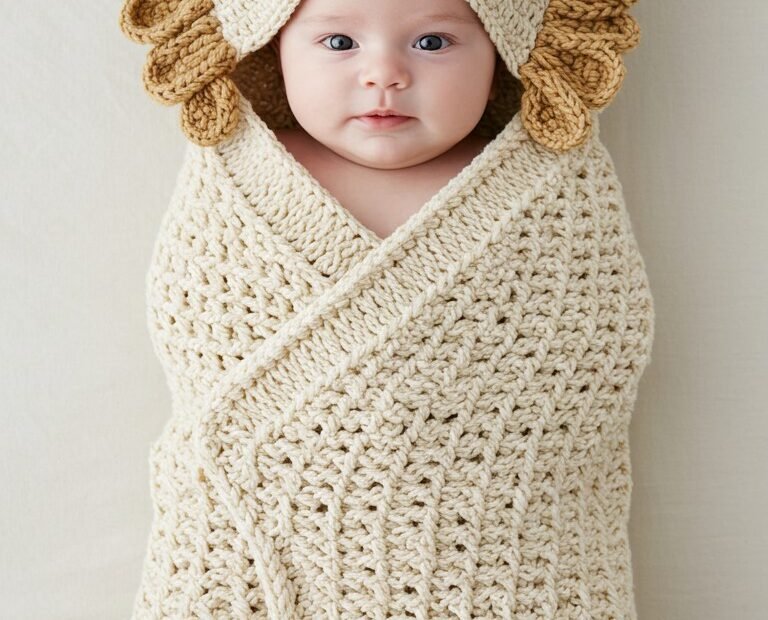
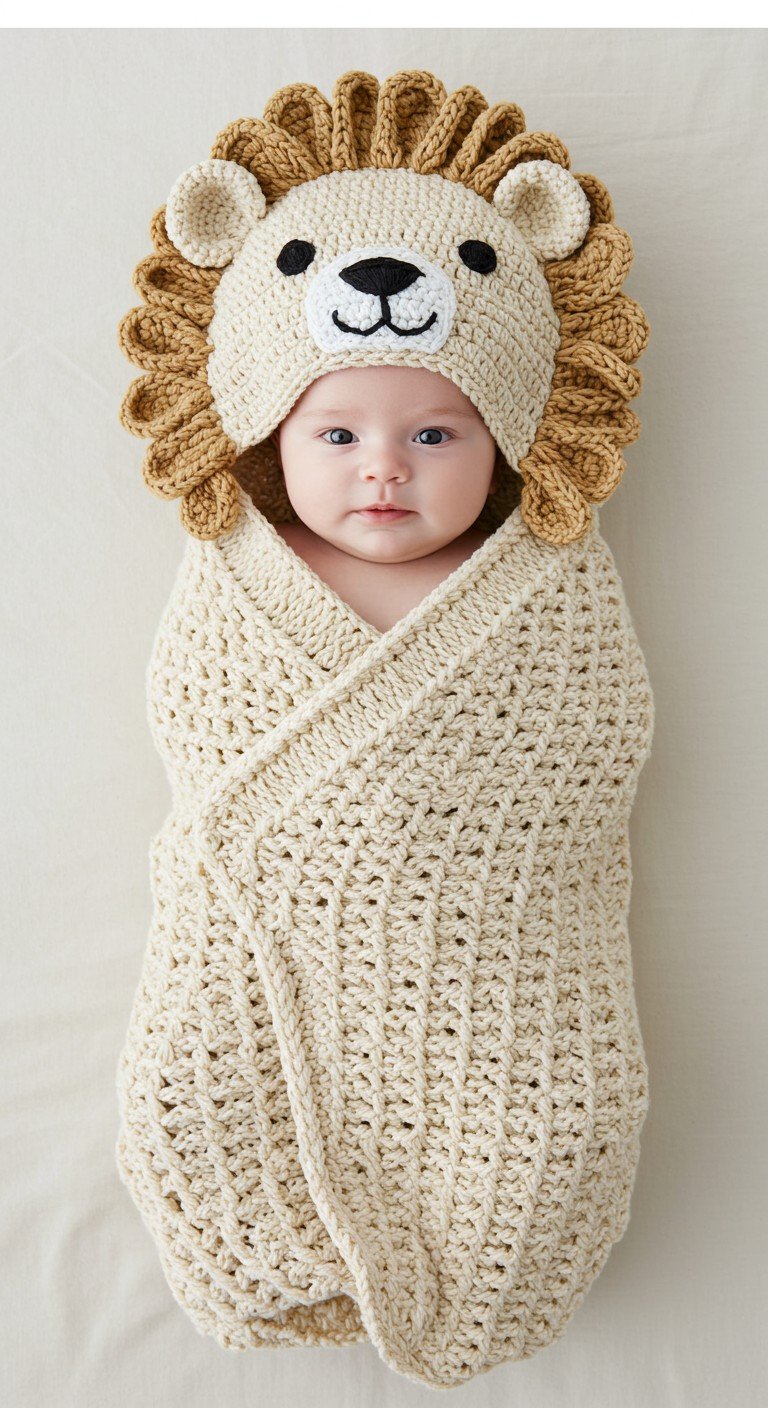
Welcome your little cub to the world with this adorable crochet lion swaddle and hat set! Perfect for newborn photoshoots, a cozy sleep sack, or a cherished baby shower gift, this pattern combines comfort with irresistible cuteness. Imagine your baby snuggled up, looking utterly precious in their handmade lion attire. It’s easier to create than you think!
Craft a Roaringly Sweet Welcome for Your Little One
This Lion Swaddle & Hat isn’t just a pattern; it’s an opportunity to create a memorable keepsake. Handmade with love, it offers warmth and security, making your baby feel safe and snug. Plus, the charming lion details will undoubtedly melt hearts and make for unforgettable photos. It’s the perfect way to add a touch of playful safari charm to your nursery.
Crochet Pattern: Roaringly Cute Newborn Lion Swaddle & Hat Crochet Pattern
Materials
- Worsted weight yarn in Cream/Ecru (MC)
- Worsted weight yarn in Golden Tan/Light Brown (CC1)
- Worsted weight yarn in Black (CC2)
- Worsted weight yarn in White (CC3)
- Crochet hook 5.0mm (H)
- Tapestry needle
- Stitch markers
- Scissors
Abbreviations
- ch – chain
- st(s) – stitch(es)
- sl st – slip stitch
- sc – single crochet
- hdc – half double crochet
- dc – double crochet
- tr – treble crochet
- sk – skip
- MC – Main Color
- CC1 – Contrasting Color 1
- CC2 – Contrasting Color 2
- CC3 – Contrasting Color 3
- inc – increase
- dec – decrease
- FPDC – front post double crochet
- BPDC – back post double crochet
Instructions
Gauge: 14 hdc x 10 rows = 4 inches (10 cm) (or adjust to achieve desired size)
Notes: This pattern is for a newborn size. Adjust hook size or add/subtract rows/stitches for different sizes.
Swaddle Sack (MC)
The swaddle sack is worked flat and then seamed to form the bottom sack and side flaps. The main body stitch will be a textured stitch (similar to Crunch Stitch or Lemon Peel Stitch for density and texture).
- Start: With MC, ch 60.
- Row 1 (Foundation): Hdc in 2nd ch from hook and in each ch across. (59 hdc)
- Row 2: Ch 1, turn. Sc in first st, dc in next st. *Sc in next st, dc in next st.* Repeat from * to * across. (This creates a textured ‘Lemon Peel’ stitch pattern)
- Row 3: Ch 1, turn. Dc in first st, sc in next st. *Dc in next st, sc in next st.* Repeat from * to * across. (Working dc into sc, and sc into dc from previous row)
- Rows 4-70: Repeat Row 2 and Row 3 alternately until piece measures approximately 22 inches (56 cm) or desired length for the body. Fasten off, leaving a long tail for seaming.
Shaping the Swaddle Sack Bottom
- Fold the bottom edge of the rectangle up by about 8 inches (20 cm) to form the foot pocket.
- Using your tapestry needle and the long tail, seam the sides of this folded section together to create the sack. Alternatively, you can use sc to join.
Ribbed Border for Wrap-Around Flaps
- With MC, attach yarn to one long side edge of the swaddle (not the top edge or the seamed bottom).
- Row 1: Ch 2 (counts as hdc), hdc evenly along the side edge. (Approximately 80-90 hdc, ensure an even number of stitches for ribbing)
- Row 2: Ch 2 (does not count as st), turn. FPDC around first hdc, BPDC around next hdc. *FPDC around next hdc, BPDC around next hdc.* Repeat from * to * across.
- Rows 3-5: Repeat Row 2. Fasten off.
- Repeat the ribbed border on the opposite long side edge.
Lion Hood (MC & CC1)
The hood is worked in the round for the main beanie shape, then mane and features are added.
Beanie Base (MC)
- With MC, make a magic ring.
- Round 1: Ch 2 (does not count as st), 10 dc into ring. Join with sl st to first dc. (10 dc)
- Round 2: Ch 2, 2 dc in each st around. Join. (20 dc)
- Round 3: Ch 2, *2 dc in first st, 1 dc in next st.* Repeat from * to * around. Join. (30 dc)
- Round 4: Ch 2, *2 dc in first st, 1 dc in next 2 sts.* Repeat from * to * around. Join. (40 dc)
- Round 5: Ch 2, *2 dc in first st, 1 dc in next 3 sts.* Repeat from * to * around. Join. (50 dc)
- Round 6: Ch 2, *2 dc in first st, 1 dc in next 4 sts.* Repeat from * to * around. Join. (60 dc)
- Rounds 7-12: Ch 2, 1 dc in each st around. Join. (60 dc) (Or continue until hat reaches desired depth for baby’s head)
- Fasten off.
Lion Mane (CC1)
The mane is created by working shell stitches around the last round of the beanie.
- With CC1, attach yarn to any stitch on the last round of the beanie.
- Mane Round: Ch 2 (does not count as st), work [5 dc] into the first st, sk 2 sts. *Work [5 dc] into the next st, sk 2 sts.* Repeat from * to * around. Join with sl st to first dc of the round. (Approximately 20 shells)
- Fasten off, weave in ends.
Ears (make 2, CC1)
- With CC1, ch 2.
- Row 1: 6 hdc in 2nd ch from hook. (6 hdc)
- Row 2: Ch 1, turn. 2 hdc in each st across. (12 hdc)
- Fasten off, leaving a long tail for sewing.
Inner Ears (make 2, MC)
- With MC, ch 2.
- Row 1: 4 hdc in 2nd ch from hook. (4 hdc)
- Row 2: Ch 1, turn. 2 hdc in first st, 1 hdc in next 2 sts, 2 hdc in last st. (6 hdc)
- Fasten off, leaving a long tail for sewing.
Assembly & Facial Features
- Attach Inner Ears: Sew the smaller MC inner ears onto the center of the larger CC1 ears.
- Attach Ears to Hood: Fold the ears slightly at the bottom and sew them securely to the top of the hood, spaced evenly apart.
- Muzzle (CC3): With CC3, make a magic ring. Ch 1, 8 sc into ring. Join with sl st to first sc. Fasten off, leaving a long tail. Sew the muzzle onto the front of the hood below the ears.
- Nose & Mouth (CC2): With CC2 and tapestry needle, embroider an inverted triangle for the nose on the top center of the muzzle. Then, embroider a curved line downwards from the nose, splitting into two curves for the mouth.
- Eyes (CC2): With CC2 and tapestry needle, embroider two small circles (French knots or several stitches to form a dot) for the eyes above the muzzle, evenly spaced.
- Attach Hood to Swaddle: Align the bottom edge of the beanie hood with the top edge of the swaddle blanket (the edge without the ribbed flaps). Sew the hood securely to the swaddle using MC yarn and a tapestry needle.
Weave in all remaining loose ends. Your roaringly cute lion swaddle is complete!