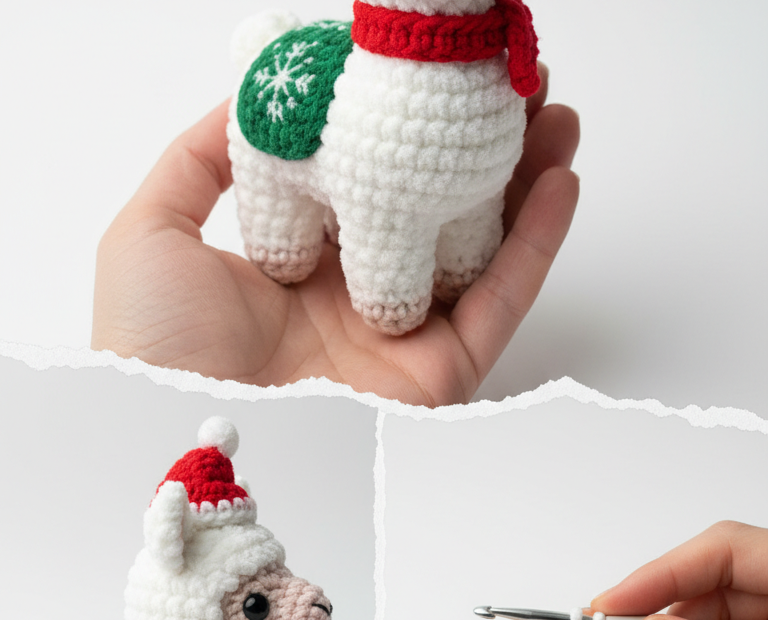
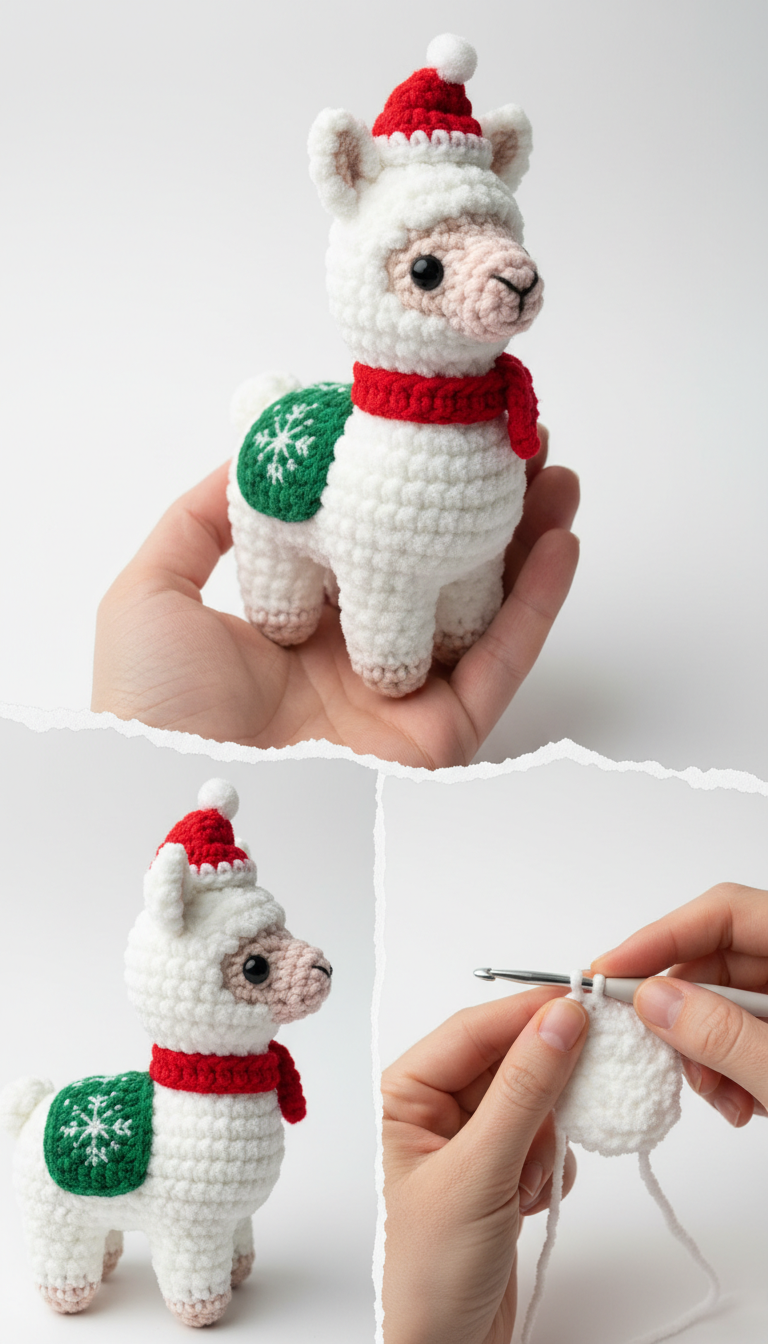
Get ready to spread some festive cheer with this delightful Christmas Llama Amigurumi pattern! This adorable crochet project features a charming llama dressed in a Santa hat, a cozy red scarf, and a festive snowflake blanket. Perfect for holiday decor or as a unique handmade gift, this amigurumi is sure to bring a smile to anyone’s face.
Craft Your Own Festive Friend for the Holidays Imagine this cute little llama gracing your mantelpiece or peeking out from under the Christmas tree! This pattern guides you through creating a sturdy, huggable friend. Its charming details, from the rosy cheeks to the tiny Santa hat, make it a truly special keepsake that captures the joy and warmth of the holiday season.
Pattern Here
Crochet Pattern: Adorable Crochet Christmas Llama Amigurumi Pattern Materials Aran/Worsted weight yarn in White (main color) Aran/Worsted weight yarn in Light Pink (snout, inner ears, hooves) Aran/Worsted weight yarn in Red (Santa hat, scarf) Aran/Worsted weight yarn in Green (saddle blanket) 3.5mm crochet hook (or size suitable for your yarn to achieve tight stitches) Black safety eyes (6mm or 8mm, depending on desired look) Polyester fiberfill for stuffing Yarn needle Stitch marker Scissors Abbreviations MR: Magic Ring ch: chain sc: single crochet inc: increase (2 single crochets in one stitch) dec: decrease (single crochet two stitches together) sl st: slip stitch FO: Fasten off (): Repeat instructions in parentheses []: Total number of stitches at the end of the round Instructions Body (White)
R1: Start with MR, sc 6. [6] R2: Inc in each stitch. [12] R3: (Sc 1, inc) x 6. [18] R4: (Sc 2, inc) x 6. [24] R5: (Sc 3, inc) x 6. [30] R6-12: Sc in each stitch around. (7 rounds) [30] R13: (Sc 3, dec) x 6. [24] R14: (Sc 2, dec) x 6. [18] Start stuffing firmly. R15: (Sc 1, dec) x 6. [12] FO, leaving a long tail for sewing. Continue stuffing to shape. Head (White)
R1: Start with MR, sc 6. [6] R2: Inc in each stitch. [12] R3: (Sc 1, inc) x 6. [18] R4: (Sc 2, inc) x 6. [24] R5: (Sc 3, inc) x 6. [30] R6-10: Sc in each stitch around. (5 rounds) [30] Insert safety eyes between R8 and R9, approximately 6-7 stitches apart. R11: (Sc 3, dec) x 6. [24] R12: (Sc 2, dec) x 6. [18] Start stuffing firmly. R13: (Sc 1, dec) x 6. [12] R14: Dec x 6. [6] FO, leaving a long tail. Weave through remaining stitches and pull to close. Finish stuffing and shape. Snout (Light Pink)
R1: Start with MR, sc 6. [6] R2: (Sc 1, inc) x 3. [9] R3: Sc in each stitch around. [9] FO, leaving a long tail for sewing. Lightly stuff and shape. Embroider nostrils with light pink yarn. Ears (Make 2, White)
R1: Start with MR, sc 6. [6] R2: Sc in each stitch around. [6] Fold flat and sew to the top of the head, slightly to the sides. Legs (Make 4)
Using Light Pink yarn: R1: Start with MR, sc 6. [6] R2: Inc in each stitch. [12] R3: Sc in each stitch around. [12] Change to White yarn: R4-R8: Sc in each stitch around. (5 rounds) [12] FO, leaving a long tail for sewing. Stuff lightly. Tail (White)
R1: Start with MR, sc 4. [4] R2: Sc in each stitch around. [4] FO, leaving a long tail for sewing. This forms a small tuft. Santa Hat (Red and White)
Hat Body (Red): R1: Start with MR, sc 4. [4] R2: (Sc 1, inc) x 2. [6] R3: Sc in each stitch around. [6] R4: (Sc 2, inc) x 2. [8] R5: Sc in each stitch around. [8] R6: (Sc 3, inc) x 2. [10] R7: Sc in each stitch around. [10] R8: (Sc 4, inc) x 2. [12] R9: Sc in each stitch around. [12] R10: (Sc 5, inc) x 2. [14] R11: Sc in each stitch around. [14] R12: (Sc 6, inc) x 2. [16] R13: Sc in each stitch around. [16] White Trim: Join White yarn to the last stitch of R13. Ch 1, sc in each stitch around. [16] Sl st to first sc. FO. Pompom (White): Create a small pompom using yarn or by making a small puffball: In MR, sc 6, sl st to join, pull tight, FO. Attach to the tip of the hat. Scarf (Red)
Ch 35. Row 1: Sc in 2nd ch from hook and in each chain across. [34] Row 2: Ch 1, turn, sc in each stitch across. [34] FO. Saddle Blanket (Green)
Ch 10. Row 1: Sc in 2nd ch from hook and in each chain across. [9] Rows 2-8: Ch 1, turn, sc in each stitch across. (7 rows) [9] Ch 1, sc around the entire rectangle (sc in each stitch along the sides, 3 sc in each corner) to create a neat edge. Sl st to first sc. FO. Snowflake (White): Using white yarn and a yarn needle, embroider a snowflake design onto the center of the green saddle blanket. Assembly
1. Sew the head to the top of the body, ensuring it sits securely. 2. Sew the two ears onto the top of the head, slightly to the sides. 3. Sew the snout onto the face, just below the eyes. 4. Attach the four legs to the underside of the body, ensuring the llama stands balanced. 5. Sew the tail to the back of the body. 6. Sew the finished Santa hat onto the top of the llama’s head. 7. Tie the red scarf around the llama’s neck. 8. Sew the green saddle blanket onto the llama’s back. 9. Weave in all remaining loose ends.