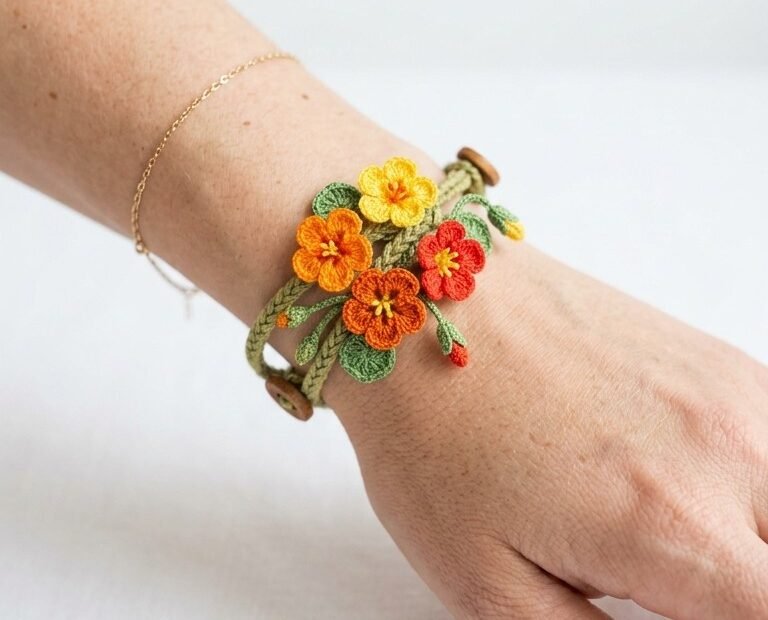
Embrace the freshness of spring with this beautiful Crochet Flower Bracelet! Perfect for adding a touch of handmade charm to any outfit, this pattern guides you through creating delicate blossoms and leaves on a comfortable band. It’s a delightful project for crocheters of all levels looking to craft a unique accessory or a thoughtful gift. Wear a garden on your wrist!
Craft Your Own Wearable Garden
Imagine the joy of showcasing a piece of jewelry made entirely by your hands. This floral bracelet allows for endless color combinations, making each piece truly unique. It’s not just an accessory; it’s a statement of your creativity and love for handmade crafts. A perfect way to brighten your day or share a touch of spring with a loved one.
Crochet Pattern: Bloom Your Style: Easy Crochet Flower Bracelet Pattern
Materials
Fine cotton yarn or crochet thread (size 10 or similar) in: Light Olive Green, Bright Yellow, Bright Orange, Red-Orange, Medium Green
1.75mm or 2.0mm crochet hook (adjust to yarn weight)
Two small wooden buttons (approx. 10-12mm)
Tapestry needle
Scissors
Abbreviations
ch: chain
sl st: slip stitch
sc: single crochet
hdc: half double crochet
dc: double crochet
MR: magic ring
st(s): stitch(es)
rep: repeat
Instructions
This pattern creates a delicate floral bracelet with a charming, multi-strand look for the band.
Part 1: The Bracelet Band (Light Olive Green)
Make Two Slip Stitch Cords: Using Light Olive Green yarn and 1.75mm hook, ch 3. Sl st in 2nd ch from hook. Insert hook into the left vertical bar of the slip stitch just made, yo, pull through both loops. Continue by inserting your hook into the left vertical bar of the previous slip stitch, yo, pull through both loops. Rep this process until the cord measures approximately 8 inches (20 cm) long. Fasten off. Make a second identical cord.
Integrate Buttons into the Band: Lay your two cords parallel. Using your tapestry needle, thread one end of the first cord through a hole of a wooden button. Thread one end of the second cord through an adjacent hole of the same button. Position this button roughly 1-2 inches from the end of the cords. Secure the ends by making a small knot on the back or by weaving the tails through the stitches to secure the button in place. Rep with the second button, placing it about 0.5-1 inch away from the first button along the cords.
Create Button Loop: At the opposite end of the cords (the end without the buttons), bring the two cords together. Sl st across both cords for about 0.5 inch (approximately 5-7 sl sts). From this joined point, ch 8-10 (adjust chain length to fit your buttons). Sl st back into the joined section to form a loop. Fasten off and weave in all remaining ends.
Part 2: The Flowers (Yellow, Orange, Red-Orange)
Make 2-3 flowers in each desired color (e.g., 2 yellow, 3 orange, 2 red-orange, for a total of 7 flowers).
Start with a MR (Magic Ring).
Ch 1 (does not count as a st).
Petal 1: (Sc, ch 2, sc) into the MR.
Petals 2-5: (Sl st, sc, ch 2, sc) into the MR. (You should have 5 petals total).
Sl st into the first sc to close the round. Pull the tail to tighten the MR. Fasten off, leaving a tail for sewing.
Part 3: The Leaves (Medium Green)
Make 5-7 leaves using Medium Green yarn.
Ch 5.
Sl st in 2nd ch from hook.
Sc in next ch.
Hdc in next ch.
Dc in last ch.
Ch 1, turn.
Dc in first st.
Hdc in next st.
Sc in next st.
Sl st in last st. Fasten off, leaving a tail for sewing.
Part 4: Small Buds (Red-Orange)
Make 2-3 buds using Red-Orange yarn.
Ch 3. Sl st in first ch to form a tiny ring/loop. Fasten off, leaving a tail for sewing.
Part 5: Connecting Stems (Light Olive Green)
These are short chains that give a vine-like appearance. Make about 5-8 short chains of varying lengths (e.g., ch 3 to ch 7). Fasten off each, leaving tails for sewing.
Part 6: Assembly
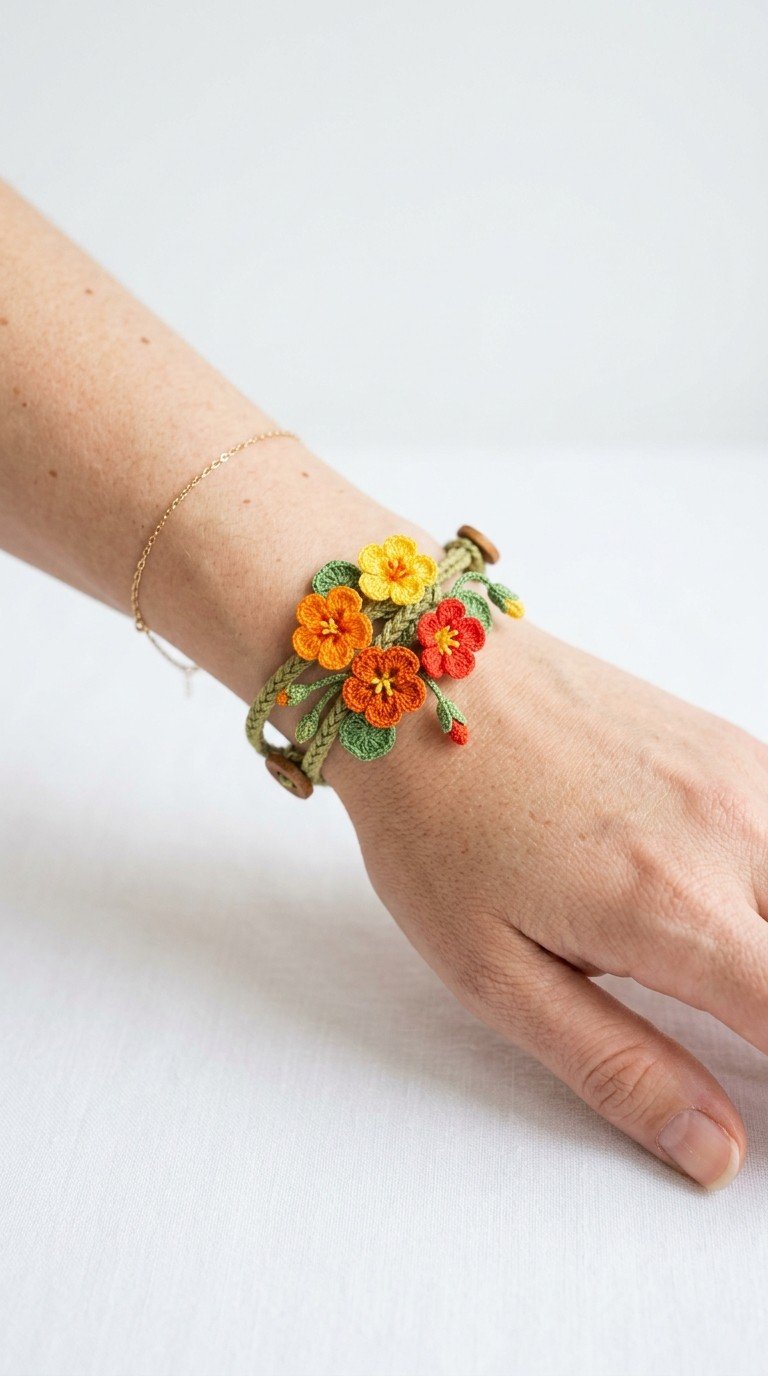
Position your crocheted flowers, leaves, and buds onto the bracelet band as desired. Refer to the original image for inspiration on clustering and placement.
Using your tapestry needle and the yarn tails, carefully sew each flower, leaf, and bud securely onto the bracelet band. Arrange them closely together for a full, blooming effect.
Attach the small connecting stems (chains) between the bracelet band and the bases of some flowers and leaves to enhance the natural, vine-like look.