
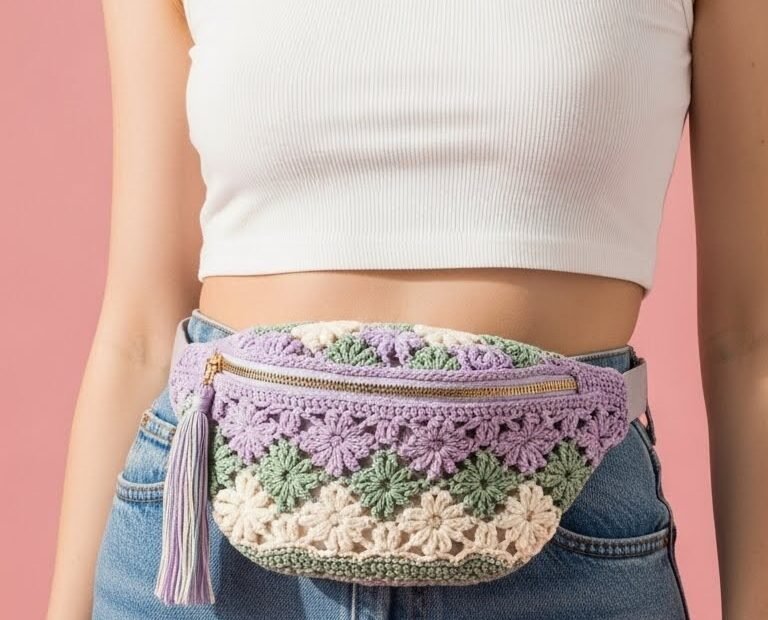
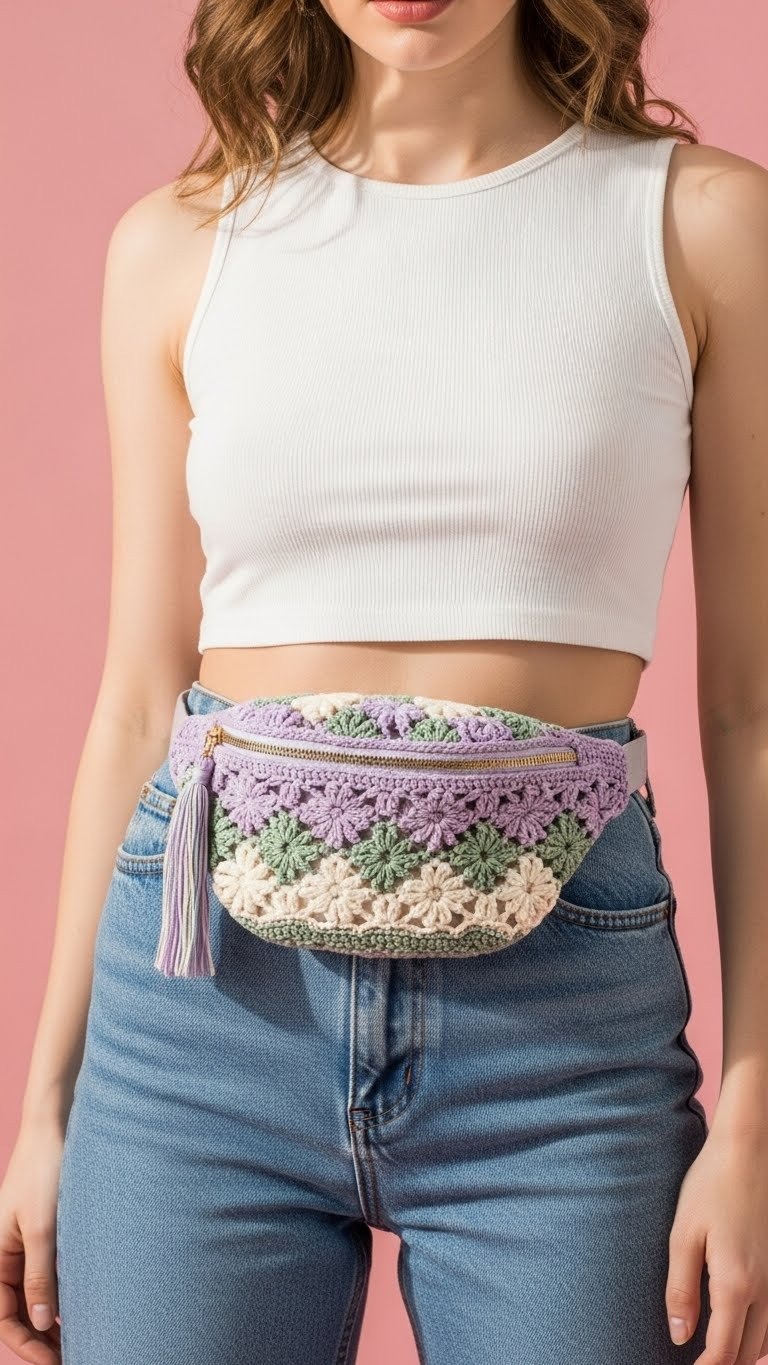
Step out in style with your very own Blossom Belt Bag! This chic crochet fanny pack features delicate floral motifs in lovely pastel shades, making it the perfect accessory for festivals, walks, or everyday errands. Handmade with love, it adds a unique touch to any outfit while keeping your essentials close at hand.
Craft Your Own Trendy Floral Belt Bag
Embrace the joy of handmade fashion with this beautiful floral fanny pack. Not only is it a practical accessory for carrying your phone, wallet, and keys, but its intricate daisy-like pattern also makes a charming statement. Personalize it with your favorite color combinations to create a one-of-a-kind bag that reflects your unique style.
Crochet Pattern: Blossom Belt Bag: A Stylish Floral Crochet Fanny Pack Pattern
Materials
- Worsted weight cotton yarn (e.g., Paintbox Cotton DK or similar) in: Olive Green (A), Cream (B), Sage Green (C), Lavender (D)
- 3.5mm (E) crochet hook
- 7-inch zipper (gold/brass preferred)
- Fabric lining (optional, but recommended for durability)
- Strap hardware (2 D-rings or a buckle set)
- Matching fabric or pre-made strap in grey-purple
- Yarn needle
- Scissors
- Sewing needle and thread (for zipper/lining)
Abbreviations
- ch: chain
- sc: single crochet
- dc: double crochet
- sl st: slip stitch
- yo: yarn over
- st(s): stitch(es)
- sk: skip
- sp: space
- CL: Cluster Stitch (see special stitches)
- FO: fasten off
Instructions
Special Stitch: Cluster (CL)
- [Yo, insert hook, pull up loop, yo, pull through 2 loops] 3 times in the same st/sp. You will have 4 loops on your hook. Yo, pull through all 4 loops on hook.
Notes:
- This pattern creates a front panel with the floral design and a solid back panel.
- Gauge is not crucial, but consistent tension is recommended for a neat finish.
- Finished size approx. 10.5 inches wide x 6 inches tall (when laid flat).
Front Panel (Floral Design)
With Yarn A (Olive Green):
- Row 1: Ch 44. Sc in 2nd ch from hook and in each ch across. (43 sc). Cut Yarn A, FO.
With Yarn B (Cream):
- Row 2 (Setup for Flowers): Attach Yarn B with a sl st to the first sc of Row 1. Ch 1, sc in same st. *Ch 2, sk next 2 sts, sc in next st.* Repeat from * across. (14 sc, 13 ch-2 spaces).
- Row 3 (Daisy Cluster Row): Ch 1, sc in first sc. *In next ch-2 sp, work [CL, ch 1, CL, ch 1, CL]. Sc in next sc.* Repeat from * across. (13 daisy clusters). Cut Yarn B, FO.
With Yarn C (Sage Green):
- Row 4 (Solid Row): Attach Yarn C with a sl st to the first sc of Row 3. Ch 1, sc in same st. Sc in each ch-1 sp and each st across. (43 sc).
- Row 5 (Setup for Flowers): Ch 1, sc in first sc. *Ch 2, sk next 2 sts, sc in next st.* Repeat from * across. (14 sc, 13 ch-2 spaces).
- Row 6 (Daisy Cluster Row): Ch 1, sc in first sc. *In next ch-2 sp, work [CL, ch 1, CL, ch 1, CL]. Sc in next sc.* Repeat from * across. (13 daisy clusters). Cut Yarn C, FO.
With Yarn D (Lavender):
- Row 7 (Solid Row): Attach Yarn D with a sl st to the first sc of Row 6. Ch 1, sc in same st. Sc in each ch-1 sp and each st across. (43 sc).
- Row 8 (Setup for Flowers): Ch 1, sc in first sc. *Ch 2, sk next 2 sts, sc in next st.* Repeat from * across. (14 sc, 13 ch-2 spaces).
- Row 9 (Daisy Cluster Row): Ch 1, sc in first sc. *In next ch-2 sp, work [CL, ch 1, CL, ch 1, CL]. Sc in next sc.* Repeat from * across. (13 daisy clusters). Cut Yarn D, FO.
With Yarn B (Cream):
- Row 10 (Top Solid Row): Attach Yarn B with a sl st to the first sc of Row 9. Ch 1, sc in same st. Sc in each ch-1 sp and each st across. (43 sc). Cut Yarn B, FO, weave in all ends.
Back Panel (Solid)
With Yarn B (Cream):
- Row 1: Ch 44. Sc in 2nd ch from hook and in each ch across. (43 sc).
- Rows 2-10: Ch 1, turn, sc in each st across. (43 sc). Cut Yarn B, FO, weave in ends.
Assembly
- Shape and Seam: Lay the front and back panels together, wrong sides facing (or right sides facing if you prefer an invisible seam). Using a sl st or sc seam, join the bottom edge and curve up each side, stopping approximately 1 inch from the top corners to create the curved fanny pack shape. The top section remains open for the zipper.
- Insert Zipper: Pin the zipper to the top opening of the bag. Using a sewing needle and matching thread, hand-sew the zipper securely into place. Alternatively, machine sew if you have a sewing machine.
- Add Lining (Optional): Cut two pieces of fabric lining slightly larger than your crocheted panels. Sew them together in the same shape as your bag, leaving the top open. Insert the lining into the bag and hand-sew it to the zipper tape, covering any raw edges.
- Attach Strap Hardware: Create small loops from your Grey-Purple strap material or crochet two small tabs in Yarn D. Sew these tabs/loops to the sides of the bag near the zipper. Attach D-rings or buckle hardware to these loops.
- Prepare Strap: Attach your Grey-Purple strap to the D-rings/buckle hardware. Adjust the length as desired.
- Make Tassel: Cut multiple strands of Yarn B, C, and D (approx 8-10 inches long) to create a tassel. Fold the strands in half, tie a loop around the fold, and wrap a smaller piece of yarn around the top to secure the tassel head. Trim the ends evenly. Attach the tassel to the zipper pull or one of the side loops.