Embrace the timeless beauty of nature with this exquisite crochet floral pearl necklace pattern. Delicate blossoms, intertwined with shimmering pearls and gemstone beads, create a stunning piece of wearable art that adds a touch of vintage elegance to any outfit. Perfect for gifting or treating yourself, this project invites you to craft a unique accessory that truly shines.
Crafting Timeless Elegance: Your Own Floral Pearl Necklace
There’s a special joy in creating jewelry that reflects your personal style, and this floral pearl necklace offers just that. Each meticulously crocheted flower and leaf, combined with lustrous pearls and sparkling gems, contributes to a piece of unparalleled charm. It’s more than just an accessory; it’s a statement of handcrafted beauty, designed to be cherished for years to come.
Small 5-Petal Flower (Make 3 Pink, 2 Blue, 2 Pale Yellow/Gold)
Using chosen flower color thread:
Round 1: Ch 4, join with sl st to form a ring. (Alternately, use a magic ring).
Round 2: Ch 2 (counts as 1st dc), 9 dc into the ring. Join with sl st to top of ch 2. (10 dc)
Round 3 (Petals): *Ch 2, (dc, tr, dc) into next st, ch 2, sl st into next st.* Repeat from * to * 5 times total around the circle, creating 5 petals. Sl st to first ch 2 base. FO, leaving a long tail for sewing.
Small Leaf (Make 6 Light Sage Green, 6 Pale Yellow/Gold)
Using chosen leaf color thread:
Ch 7.
Row 1: Sc in 2nd ch from hook, hdc in next ch, dc in next 2 ch, hdc in next ch, sc in last ch. (You are now at the tip of the leaf).
Row 2 (Other side of chain): Ch 1, turn. Work down the other side of the initial chain: sc in the side of the last sc, hdc in the side of the next hdc, dc in the side of the next 2 dc, hdc in the side of the next hdc, sc in the side of the first sc. Sl st into the base of the leaf to close. FO, leaving a long tail.
Assembly Instructions:
Step 1: Prepare Crochet Motifs
Weave in all loose ends on your crocheted flowers and leaves.
For each flower, gently shape the petals.
Step 2: Attach Pearls to Flowers
Using a headpin, thread one small pearl. Create a simple loop at the top of the headpin using round-nose pliers.
Using the long tail of the flower, center the pearl on the flower, pushing the tail through the center of the pearl’s loop, and secure the pearl to the center of each crocheted flower with a few stitches, then weave in the tail.
Step 3: Prepare Gemstone Beads
For each gemstone chip bead, thread it onto a headpin. Create a simple loop at the top of the headpin. (You will need approximately 15-20 prepared gemstone beads, varying colors.)
Step 4: Layout and Plan the Necklace Design
Lay out your gold chain on a flat surface.
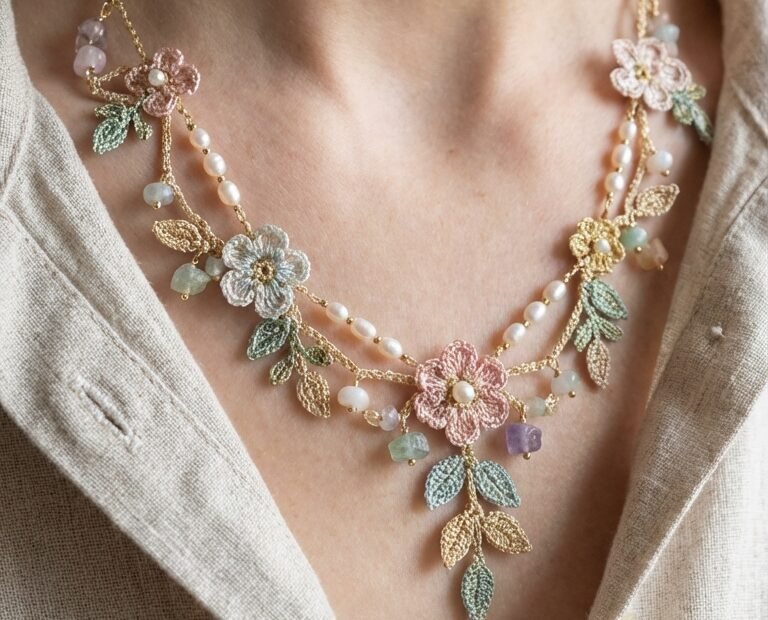
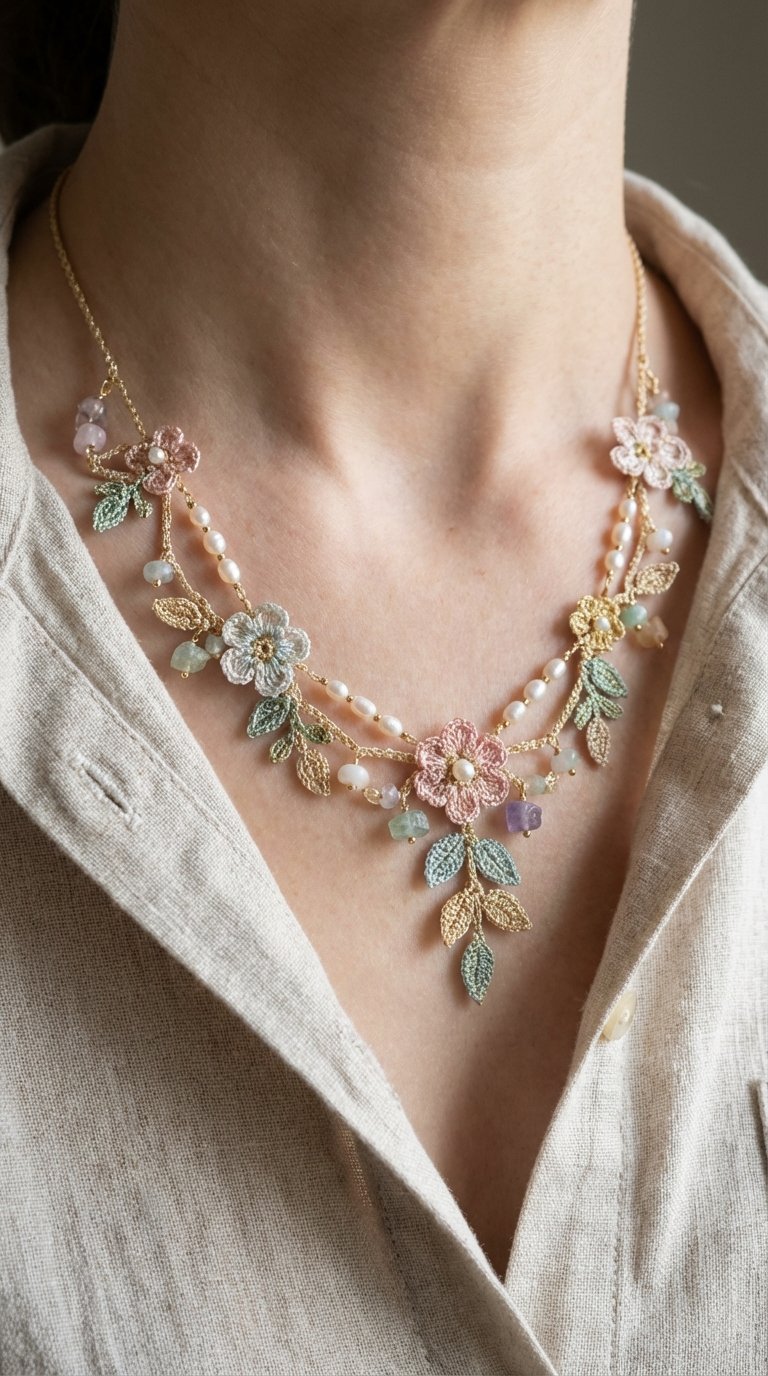
Arrange the crocheted flowers, leaves, pearl-on-headpin drops, and gemstone-on-headpin drops along the length of the chain, envisioning the final design. The image shows clusters of flowers and leaves, interspersed with pearls and gemstones, often with a double strand of pearls in certain sections.
Step 5: Attach Main Components to Chain
Using small jump rings, attach the crocheted flowers and leaves to the main gold chain at your planned intervals. For the flowers, attach them via the loop created by the pearl’s headpin. For leaves, you can either attach them directly via a jump ring, or create a small loop with wire at the leaf’s base to attach.
Attach the prepared gemstone beads and extra pearls (on headpins) to the chain using jump rings, scattering them for a natural, organic look as seen in the image.
Step 6: Create Pearl Swags (as seen in image)
To create the double strand effect with pearls: Cut several short lengths of thin jewelry wire (approx. 2-3 inches).
Thread 3-5 small pearls onto each wire segment.
Create a loop at each end of the wire segment.
Attach these pearl swags between points on the main chain where you have flowers or leaves, creating a draped effect. Use small jump rings to connect the loops of the pearl swags to the main chain. Ensure these swags are relatively loose to create the desired drape.
Step 7: Final Touches
Attach a clasp to one end of the main gold chain and a jump ring or small length of chain to the other end for adjustability.
Carefully check all connections to ensure they are secure. Adjust the placement of motifs if necessary.