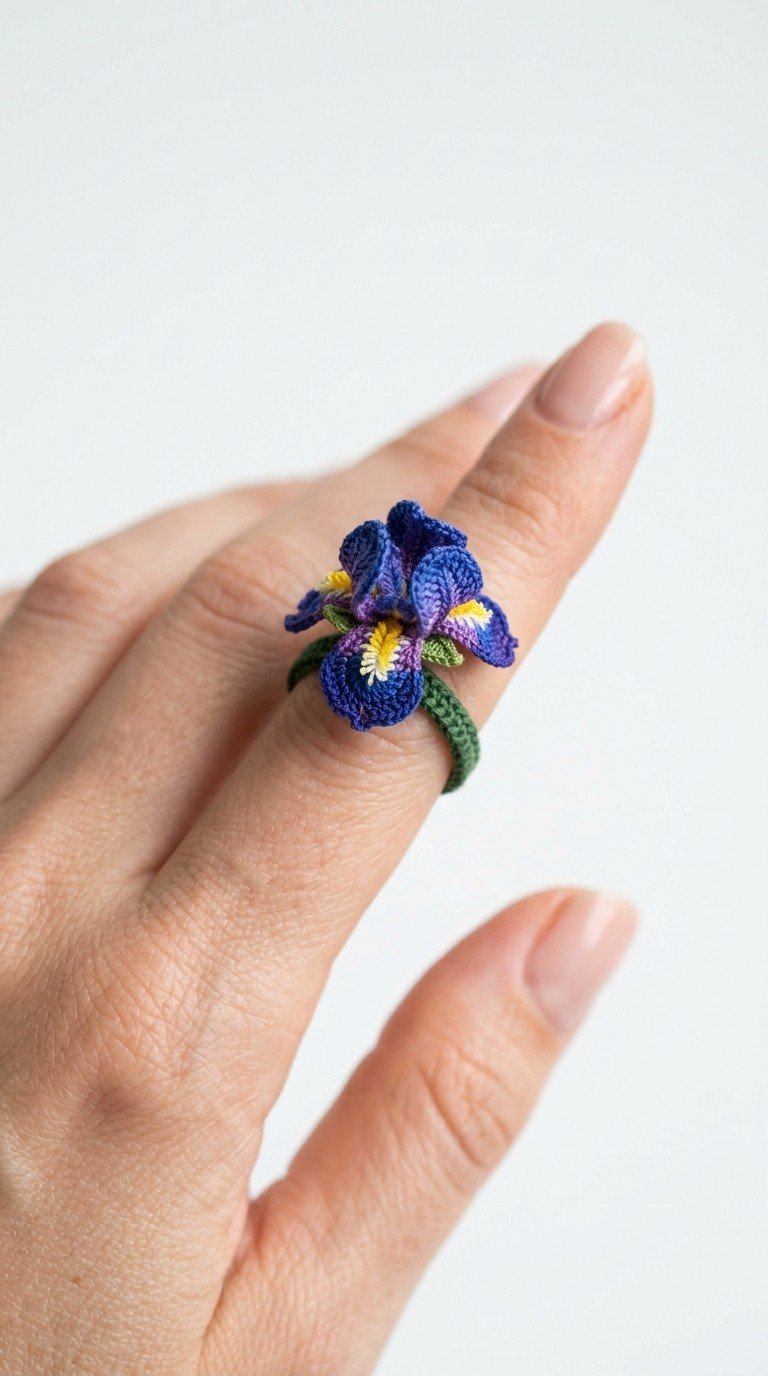
Embrace the beauty of nature with this exquisite Crochet Iris Ring Pattern. Perfect for adding a touch of floral elegance to your everyday style or as a thoughtful handmade gift, this delicate accessory captures the vibrant charm of an iris in bloom. With detailed instructions, you can craft your own miniature garden for your finger, even if you’re new to micro-crochet.
Craft a Unique Statement Piece: The Allure of Handmade Crochet Jewelry
Handmade crochet jewelry, like this stunning iris ring, offers a unique way to express your personal style and creativity. It’s a delightful project that allows you to work with intricate details and vibrant colors, resulting in a wearable piece of art. Imagine the compliments you’ll receive on this one-of-a-kind accessory, a testament to your crafting skills and a celebration of springtime beauty.
Crochet Pattern: Blossom Your Fingers: Free Crochet Iris Ring Pattern for Elegant Wear
Materials
Crochet thread, size 10, in Dark Blue/Purple (for main petals)
Crochet thread, size 10, in Yellow (for petal details)
Crochet thread, size 10, in White (for petal details)
Crochet thread, size 10, in Dark Green (for ring band and leaves)
Steel crochet hook, 0.75mm or 1.0mm
Tapestry needle
Small sharp scissors
Fabric stiffener (optional)
Abbreviations
ch: chain
sl st: slip stitch
sc: single crochet
hdc: half double crochet
dc: double crochet
tr: treble crochet
st(s): stitch(es)
rep: repeat
FO: fasten off
Rnd: Round
Instructions
Create a beautiful, tiny iris flower ring with these step-by-step instructions. Remember to work tightly for a crisp finish.
Ring Band (Dark Green)
Ch 40 (adjust length to fit your finger snugly). Join with sl st to the first ch to form a ring, being careful not to twist.
Rnd 1: Ch 1, sc in each ch around. Join with sl st to the first sc. (40 sc)
Rnd 2-3: Ch 1, sc in each sc around. Join with sl st. FO, weave in ends securely.
Small Leaves (Make 2, Dark Green)
Ch 5.
Row 1: Sc in 2nd ch from hook, hdc in next ch, dc in next ch, sc in last ch.
Ch 1, then sl st down the side of the leaf, back to the starting point, for a neat edge. FO, leave a long tail for sewing.
Iris Petals (Dark Blue/Purple, Yellow, White)
Standard Petals (Make 3, Dark Blue/Purple)
Ch 6.
Row 1: Sc in 2nd ch from hook, sc in next ch, hdc in next ch, dc in next ch, 2 dc in last ch. (6 sts)
Ch 1, turn.
Row 2: 2 hdc in first st, hdc in next 2 sts, sc in next 2 sts, sl st in last st.
Sl st along the raw edge of the petal to the starting chain for a neat finish. FO, leave a tail for sewing.
Fall Petals (Make 3, Dark Blue/Purple)
Ch 7.
Row 1: Sc in 2nd ch from hook, hdc in next 2 ch, dc in next 2 ch, 2 tr in last ch. (7 sts)
Ch 1, turn.
Row 2: 2 tr in first st, dc in next 2 sts, hdc in next 2 sts, sc in last 2 sts.
Sl st along the raw edge of the petal to the starting chain for a neat finish. FO, leave a tail for sewing.
Adding Yellow/White Details to Fall Petals
With Yellow thread and a tapestry needle, embroider a small