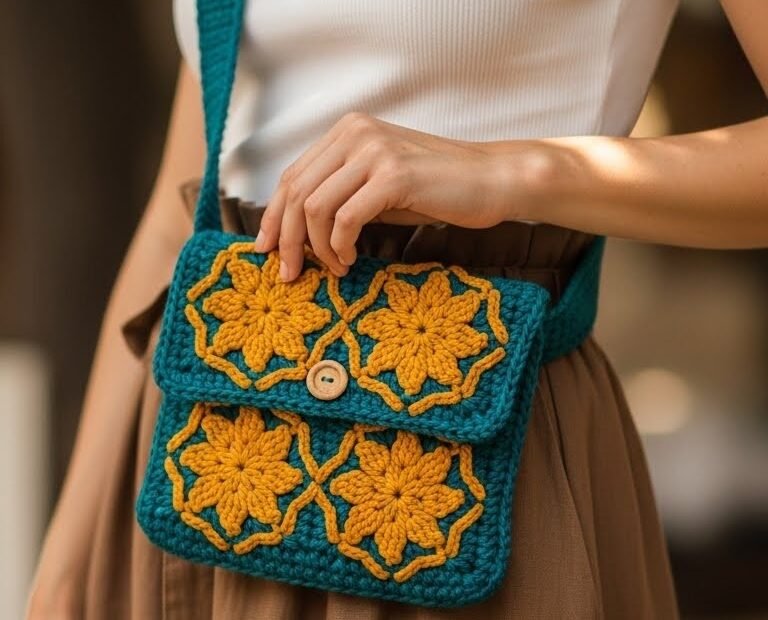
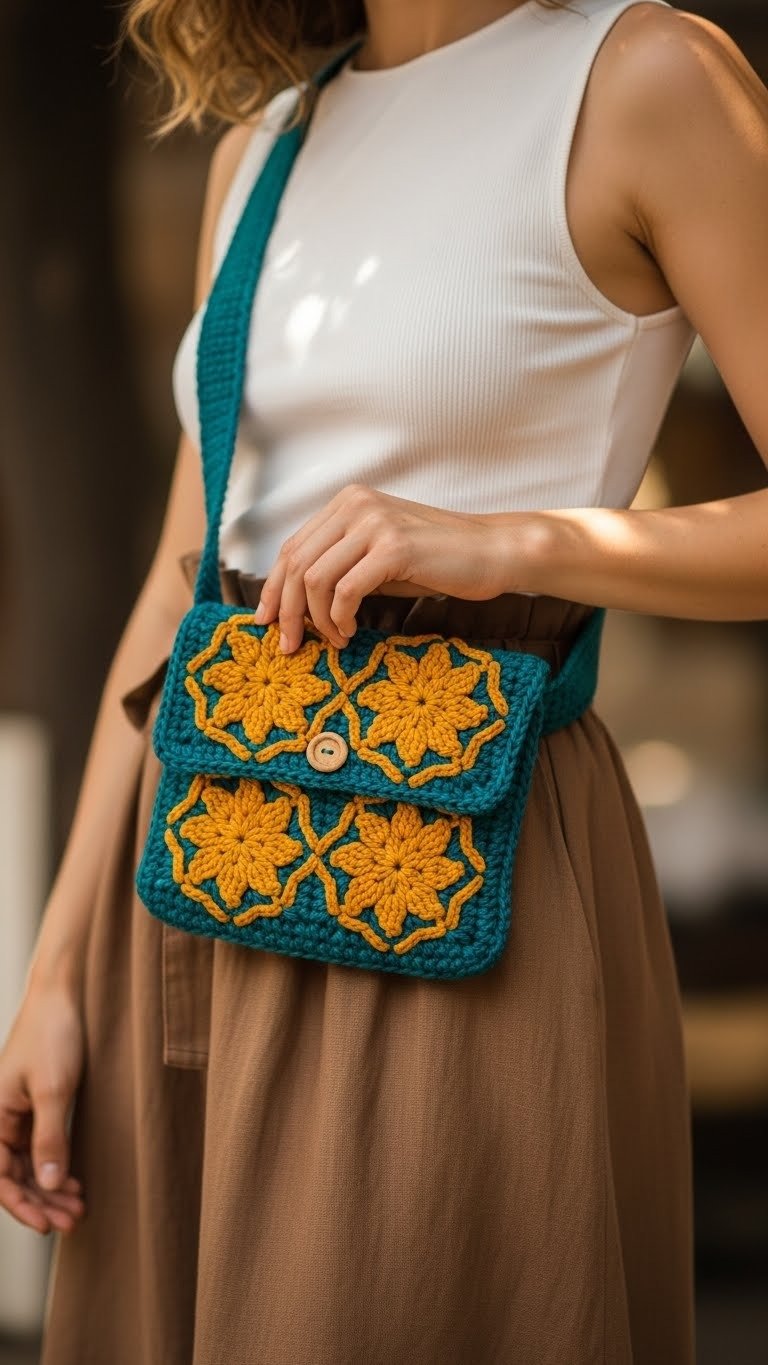
Embrace your inner bohemian spirit with our stunning Boho Blossom Crochet Crossbody Bag! This unique pattern combines vibrant golden yellow flowers with a refreshing teal background, creating a stylish accessory perfect for any season. Handmade with love, this bag adds a touch of whimsical charm to your everyday outfits and is a joy to create.
Why This Floral Crochet Bag Is a Must-Make
This beautiful crossbody bag isn’t just a fashion statement; it’s a versatile piece that complements a wide range of styles, from casual jeans to summer dresses. Its sturdy construction ensures it’s practical for daily use, while the intricate floral design makes it a thoughtful, personalized gift for friends or family. Enjoy the satisfaction of crafting a truly unique accessory!
Crochet Pattern: Boho Blossom Crochet Crossbody Bag Pattern: Your Next Floral Project!
Materials
Worsted weight cotton yarn in Teal (approx. 200 yards)
Worsted weight cotton yarn in Golden Yellow (approx. 100 yards)
Crochet hook (4.0mm / G-6)
Yarn needle
Scissors
1 wooden button (approx. 1 inch diameter)
Abbreviations
ch – chain
sl st – slip stitch
sc – single crochet
hdc – half double crochet
dc – double crochet
tr – treble crochet
yo – yarn over
st – stitch
sp – space
Puff St – Puff Stitch (yarn over, insert hook, pull up a loop, repeat 2 more times in same st/space, yarn over, pull through all 7 loops on hook)
Instructions
This pattern creates a beautiful floral granny square bag. You’ll start by making individual flower motifs, then joining them to form the bag body and flap.
The Floral Motif (Make 10)
Using Golden Yellow Yarn:
Round 1: Start with a Magic Ring. Ch 2 (does not count as a stitch). Work (Puff St, ch 1) 8 times into the ring. Join with a sl st to the top of the first Puff St. Fasten off yellow yarn. (8 Puff Stitches, 8 ch-1 spaces)
Using Teal Yarn:
Round 2: Join Teal yarn into any ch-1 space. Ch 3 (counts as 1st dc). Work 2 dc in the same ch-1 space. This forms your first 3-dc cluster.
Work 3 dc into the next ch-1 space.
Into the next ch-1 space, work (3 tr, ch 2, 3 tr). This forms your first corner.
*Work 3 dc into the next ch-1 space. Work (3 tr, ch 2, 3 tr) into the next ch-1 space.* Repeat from * to * two more times to create the remaining corners.
Work 3 dc into the last ch-1 space. Join with a sl st to the top of the initial Ch 3. Fasten off teal yarn. (Each motif should now be a square with 4 corners and 4 sides, each side having one 3-dc cluster between corners).
Bag Assembly
Joining Motifs:
Lay out your motifs. You will need 4 motifs for the front panel, 4 for the back panel, and 2 for the flap.
Using the Teal yarn and a sl st or sc join method (or your preferred joining method), connect the motifs.
Front Panel: Join 4 motifs together to form a 2×2 square grid.
Back Panel: Join 4 motifs together to form another 2×2 square grid.
Flap: Join 2 motifs side-by-side to form a rectangular flap (1×2 grid).
Constructing the Bag:
Place the Front Panel and Back Panel together, right sides facing each other.
Using Teal yarn and sc stitches (or sl st), join three sides (bottom and two sides) together, leaving the top open. Turn the bag right side out.
Attach the Flap: Position the Flap along the top edge of the Back Panel. Using Teal yarn, sc or sl st the flap securely to the top edge of the Back Panel. The flap should then fold over the top part of the Front Panel.
Strap
Using Teal Yarn: Ch 100 (or desired length for your strap).
Row 1: Hdc in the 3rd ch from hook and in each ch across. (98 hdc, or 2 less than starting chain). Ch 2, turn.
Row 2-3: Hdc in each st across. Ch 2, turn. (Repeat until desired strap width, approx. 3 rows for a sturdy strap).
Fasten off, leaving a long tail for sewing.
Attach the strap firmly to the top corners of the bag using a yarn needle and the long tails.
Finishing
Weave in all remaining loose ends.
Sew the wooden button onto the front of the bag, centered on the main body panel, below the flap.
Create a button loop on the flap by attaching yarn to the center edge of the flap, chaining about 10-15 stitches (adjust as needed to fit around the button), and then slip stitching back into the flap edge. Secure and weave in ends.