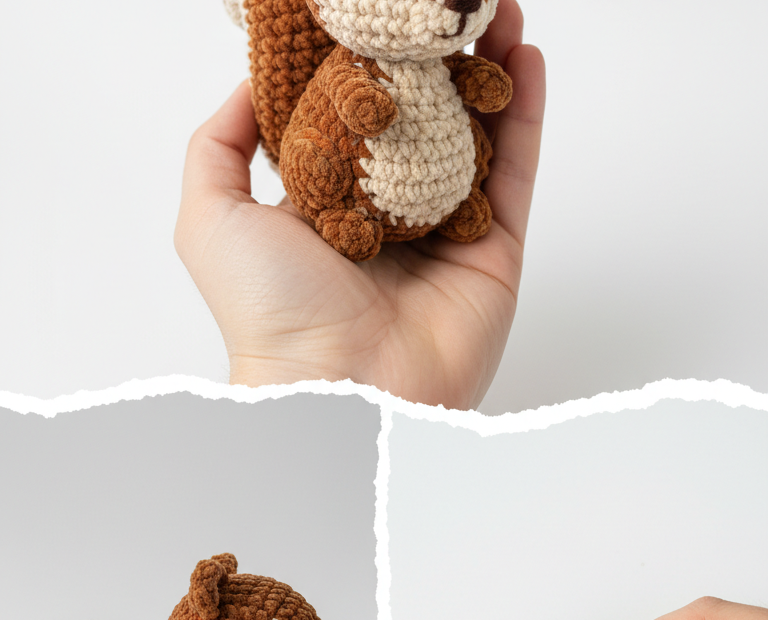
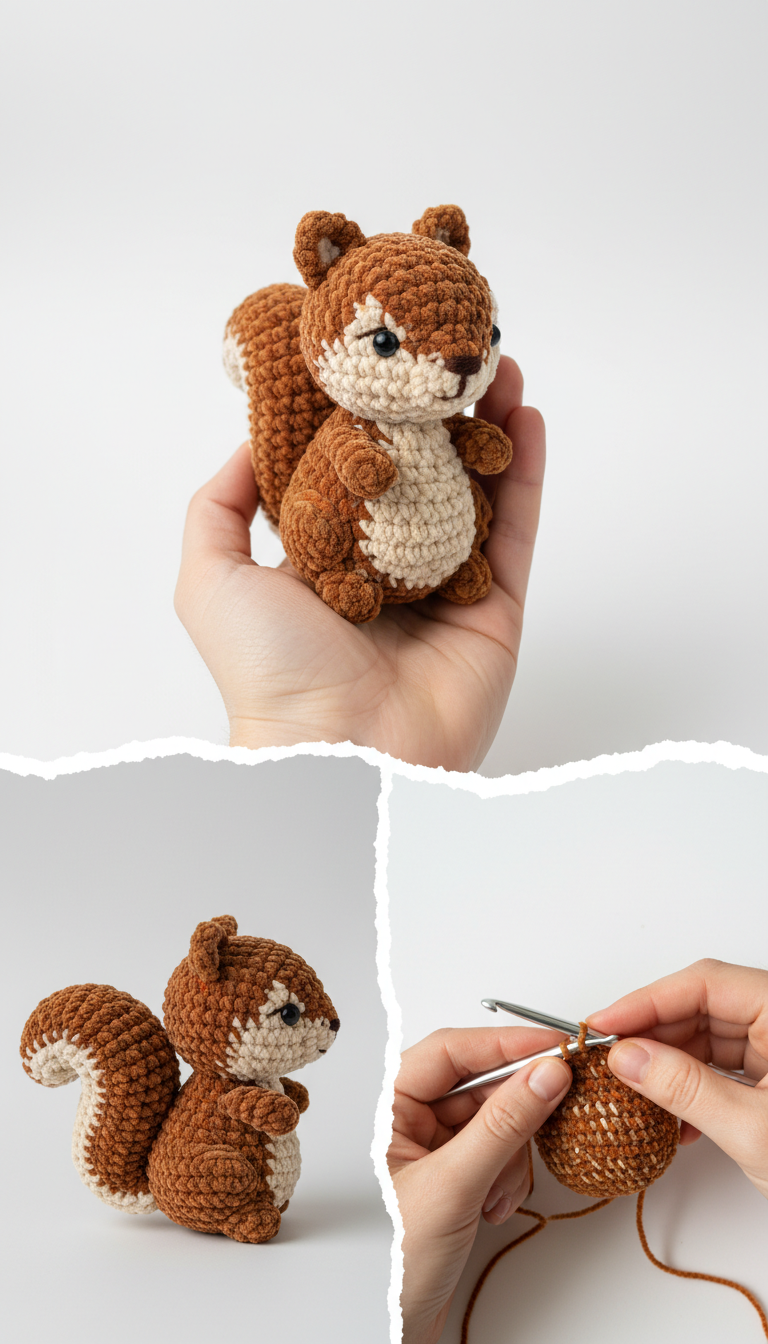
Bring a touch of woodland charm into your home with this adorable Amigurumi Squirrel! This detailed crochet pattern guides you through creating a soft, huggable forest companion, perfect for gifting, decorating, or simply adding a sweet, handmade touch to any space. Get ready to fall in love with your new bushy-tailed friend!
Craft Your Own Charming Forest Companion There’s a unique joy in crafting something beautiful with your own hands, and this amigurumi squirrel is no exception. It’s a fantastic project for intermediate crocheters or enthusiastic beginners looking to expand their skills. Imagine the delight on a child’s face, or the cozy accent it adds to a shelf – a true testament to the magic of handmade creations.
Pattern Here
Crochet Pattern: Charming Amigurumi Squirrel Pattern: Crochet Your Own Forest Friend! Materials Velvet Yarn in Rust Brown (approx. 50g) Velvet Yarn in Cream/Beige (approx. 20g) 4.0mm (G/6) Crochet Hook 8mm Black Safety Eyes Black Embroidery Floss (for nose) Polyester Fiberfill for stuffing Tapestry Needle Stitch Marker Scissors Abbreviations MR: Magic Ring sc: single crochet inc: increase (2 sc in one stitch) dec: decrease (single crochet 2 stitches together) sl st: slip stitch ch: chain FO: Fasten off (X): number of stitches at the end of the round Instructions Gauge: Not crucial for this project, but aim for tight stitches to prevent stuffing from showing.
Notes: Work in continuous rounds unless otherwise specified. Use a stitch marker to keep track of your first stitch in each round.
Head & Body (Start with Rust Brown) R1: 6 sc in MR (6)R2: (inc) x 6 (12)R3: (sc, inc) x 6 (18)R4: (2 sc, inc) x 6 (24)R5: (3 sc, inc) x 6 (30)R6-R9: sc around (30) (4 rounds)Place safety eyes between R7 and R8, approximately 6-7 stitches apart. R10: (3 sc, dec) x 6 (24)R11: (2 sc, dec) x 6 (18)Start stuffing the head firmly. R12: Switch to Cream yarn for the first 9 sc (belly), then switch back to Rust Brown yarn for the next 9 sc (back) (18)R13: (sc, inc) x 3 in Cream, (sc, inc) x 3 in Rust Brown, continuing color changes as established (24)R14: (3 sc, inc) x 6, continuing color changes as established (30)R15-R17: sc around, continuing color changes as established (30) (3 rounds)R18: (3 sc, dec) x 6, continuing color changes as established (24)R19: (2 sc, dec) x 6, continuing color changes as established (18)Finish stuffing the body firmly, shaping as you go. R20: (sc, dec) x 6 (12)R21: (dec) x 6 (6)FO, weave in the tail and close the remaining hole securely. Ears (Make 2, Rust Brown) R1: 6 sc in MR (6)R2: (sc, inc) x 3 (9)R3: sc around (9)FO, leaving a long tail for sewing. Flatten the ear and stitch the bottom edges together lightly before attaching. Arms (Make 2, Rust Brown) R1: 5 sc in MR (5)R2-R4: sc around (5) (3 rounds)FO, leaving a long tail for sewing. Stuff lightly. Legs (Make 2, Rust Brown) R1: 6 sc in MR (6)R2-R4: sc around (6) (3 rounds)FO, leaving a long tail for sewing. Stuff lightly. Tail (Rust Brown and Cream) R1 (Rust Brown): 6 sc in MR (6)R2: (inc) x 6 (12)R3: (sc, inc) x 6 (18)R4: (2 sc, inc) x 6 (24)R5: sc around (24)R6 (Cream): sc around (24)R7 (Rust Brown): (6 sc, dec) x 3 (21)R8: sc around (21)R9 (Cream): sc around (21)R10 (Rust Brown): (5 sc, dec) x 3 (18)R11: sc around (18)R12 (Cream): sc around (18)R13 (Rust Brown): (4 sc, dec) x 3 (15)R14: sc around (15)Stuff the tail firmly, shaping it into a bushy curve. R15 (Rust Brown): (3 sc, dec) x 3 (12)R16: (dec) x 6 (6)FO, weave in the tail and close the remaining hole. Shape the tail to curl upwards. Assembly Ears: Sew the ears to the top of the head, slightly to the sides, at around R9-R10.Arms: Attach the arms to the sides of the body, just below the neck area (around R12-R13 of the body section).Legs: Sew the legs to the bottom of the body, evenly spaced.Tail: Securely sew the tail to the lower back of the body, ensuring it stands up with a nice curve.Nose: Using black embroidery floss, embroider a small V-shape for the nose just below the eyes.Your adorable Amigurumi Squirrel is complete! Enjoy your new handmade friend!