Embark on an epic crafting adventure and bring the King of Wakanda to life with this detailed Black Panther Amigurumi pattern! Perfect for Marvel fans and crochet enthusiasts alike, this adorable amigurumi captures the iconic look of T’Challa. Get ready to create a miniature hero that’s perfect for display or gifting to a fellow Avenger.
Unleash Your Inner Hero with a Wakanda-Inspired Crochet Project!
There’s immense satisfaction in crafting a beloved character from scratch. This Black Panther Amigurumi isn’t just a toy; it’s a handmade tribute to courage, strength, and innovation. Whether you’re making it for yourself, a child, or a fellow Marvel enthusiast, this project allows you to infuse a bit of Wakandan spirit into your everyday life, creating a cherished keepsake.
Crochet Pattern: Craft Your Own Wakandan Warrior: The Ultimate Black Panther Amigurumi Pattern
Materials
Black worsted weight yarn
White or silver embroidery floss
2.0mm or 2.5mm crochet hook (or size suitable for your yarn to create a tight fabric)
6mm safety eyes
Polyester fiberfill for stuffing
Tapestry needle
Stitch markers
Scissors
Abbreviations
MR = Magic Ring
sc = single crochet
inc = increase (2 sc in one stitch)
dec = decrease (sc2tog – single crochet 2 stitches together)
sl st = slip stitch
ch = chain
FO = Fasten off
Rnd = Round
st(s) = stitch(es)
Instructions
Head & Body (Work in one piece):
Use black yarn. Work in continuous rounds unless otherwise stated.
Head:
Rnd 1: 6 sc in MR (6)
Rnd 2: (inc) x 6 (12)
Rnd 3: (sc, inc) x 6 (18)
Rnd 4: (2 sc, inc) x 6 (24)
Rnd 5: (3 sc, inc) x 6 (30)
Rnd 6: (4 sc, inc) x 6 (36)
Rnd 7-12: sc in each st around (36) (6 rounds)
Attach safety eyes between Rnd 9 and 10, approximately 6-7 stitches apart.
Rnd 13: (4 sc, dec) x 6 (30)
Rnd 14: (3 sc, dec) x 6 (24)
Start stuffing the head firmly.
Body:
Rnd 15: (2 sc, inc) x 8 (32)
Rnd 16-20: sc in each st around (32) (5 rounds)
Continue stuffing as you go.
Rnd 21: (6 sc, dec) x 4 (28)
Rnd 22: (5 sc, dec) x 4 (24)
Rnd 23: (4 sc, dec) x 4 (20)
Rnd 24: (3 sc, dec) x 4 (16)
Rnd 25: (2 sc, dec) x 4 (12)
FO, leaving a long tail for closing. Close the remaining hole by weaving the tail through the front loop of each remaining stitch and pulling tight. Weave in end.
Ears (Make 2):
Use black yarn. Work in continuous rounds.
Rnd 1: 4 sc in MR (4)
Rnd 2: (sc, inc) x 2 (6)
Rnd 3: sc in each st around (6)
FO, leaving a long tail for sewing. Flatten the ear.
Arms (Make 2):
Use black yarn. Work in continuous rounds.
Rnd 1: 5 sc in MR (5)
Rnd 2-6: sc in each st around (5) (5 rounds)
FO, leaving a long tail for sewing. Do not stuff. Flatten the opening.
Legs (Make 2):
Use black yarn. Work in continuous rounds.
Rnd 1: 6 sc in MR (6)
Rnd 2-7: sc in each st around (6) (6 rounds)
FO, leaving a long tail for sewing. Lightly stuff. Flatten the opening.
Assembly:
Sew the ears onto the top of the head, slightly to the sides, around Rnd 2-3.
Sew the arms to the sides of the body, just below the neck, around Rnd 15-16 of the body.
Sew the legs to the bottom of the body, evenly spaced, around Rnd 23-24.
Embroidery (Using white/silver embroidery floss):
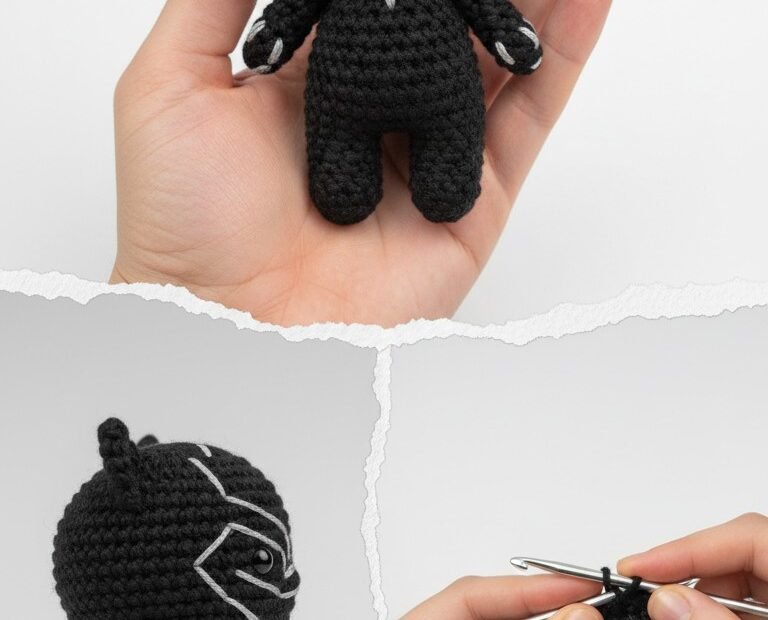
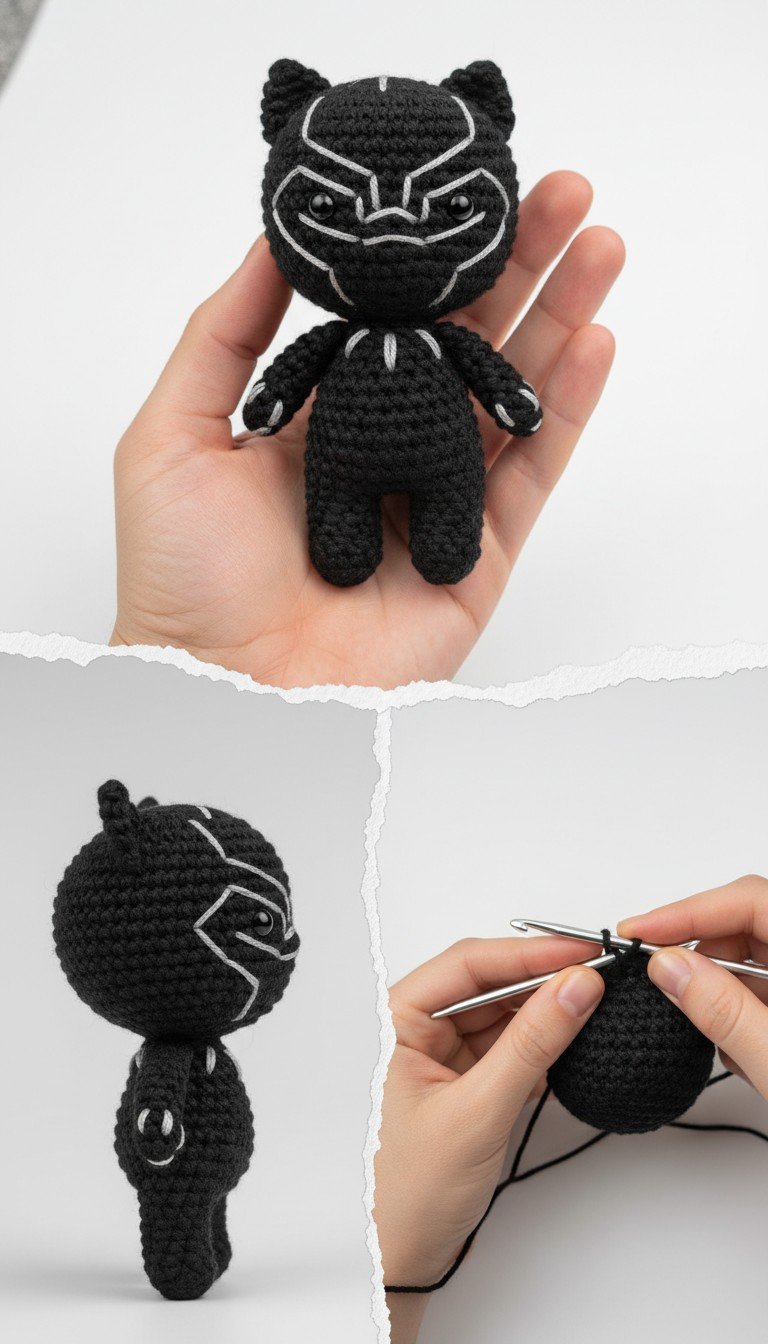
Refer to the image for placement.
Embroider the mask details around the eyes and forehead. This includes the ‘eye mask’ shape, the lines extending to the temples, and the central forehead accent.
Embroider the suit accents on the chest (a ‘necklace’ shape) and forearms (three small lines on each forearm, resembling claws).