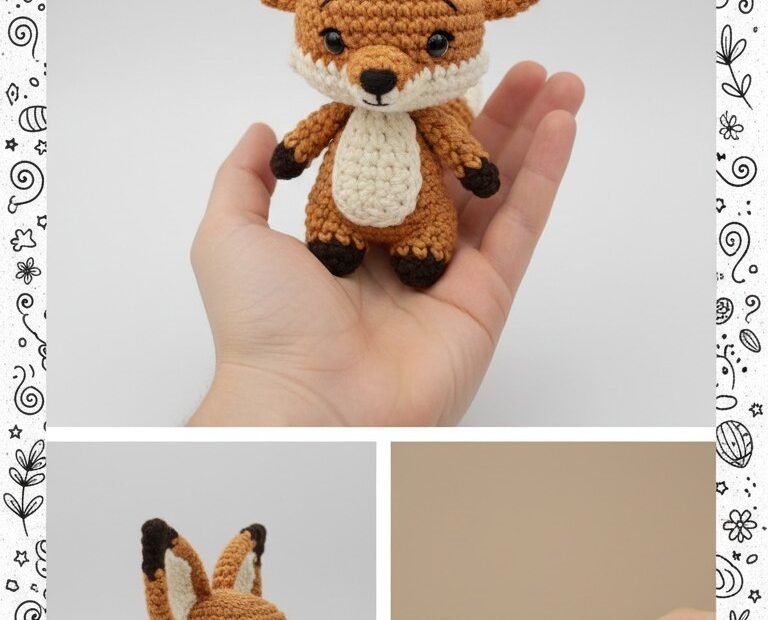
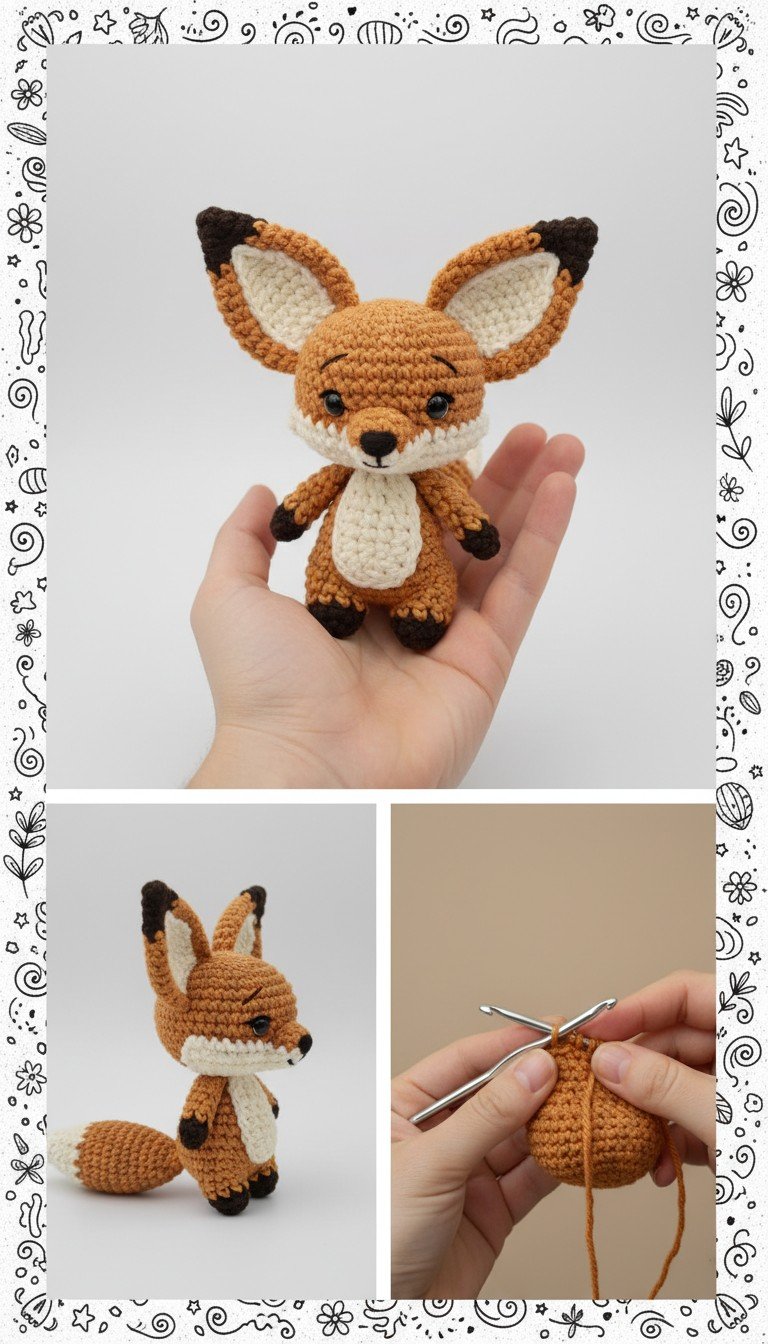
Discover the joy of creating your very own charming amigurumi fox! This detailed crochet pattern will guide you through every step, allowing you to craft a cuddly woodland companion perfect for playtime, gifting, or as an adorable piece of home decor. Get ready to bring this foxy friend to life with your crochet hook and a little bit of yarn magic!
Bring a Touch of Woodland Whimsy to Your World
There’s something truly special about a handmade creation, and this crochet fox is no exception. With its sweet expression and iconic colors, it promises to be a beloved addition to any collection. Imagine the delight on a child’s face receiving this unique gift, or the cozy charm it adds to a shelf. It’s more than just a toy; it’s a creation filled with warmth and personality.
Crochet Pattern: Crochet Amigurumi Fox Pattern: Craft Your Own Adorable Foxy Friend
Materials
Worsted weight yarn in Rust Orange (main color)
Worsted weight yarn in Cream (contrast color)
Worsted weight yarn in Dark Brown (accent color)
2.5mm crochet hook
6mm safety eyes
Polyester fiberfill for stuffing
Tapestry needle
Stitch markers
Scissors
Abbreviations
MR: Magic Ring
ch: chain
sc: single crochet
inc: increase (2 sc in one stitch)
dec: decrease (sc 2 together)
st(s): stitch(es)
sl st: slip stitch
FO: Fasten off
R: Round/Row
*: repeat instructions
Instructions
Important Notes: Work in continuous rounds unless otherwise specified. Use a stitch marker to mark the first stitch of each round. Stuff firmly as you go.
Head (Rust Orange)
R1: MR, 6 sc (6)
R2: *inc* x6 (12)
R3: *sc, inc* x6 (18)
R4: *2 sc, inc* x6 (24)
R5: *3 sc, inc* x6 (30)
R6: *4 sc, inc* x6 (36)
R7-R12: sc around (36)
R13: *4 sc, dec* x6 (30)
R14: *3 sc, dec* x6 (24)
R15: *2 sc, dec* x6 (18)
Insert safety eyes between R10 and R11, about 6 stitches apart. Stuff the head firmly.
R16: *sc, dec* x6 (12)
FO, leaving a long tail for sewing.
Muzzle (Cream)
R1: MR, 6 sc (6)
R2: *inc* x6 (12)
R3: *sc, inc* x6 (18)
R4-R5: sc around (18)
FO, leaving a long tail for sewing. Do not stuff.
Ears (Make 2)
Outer Ear (Rust Orange)
R1: MR, 4 sc (4)
R2: *sc, inc* x2 (6)
R3: *2 sc, inc* x2 (8)
R4: *3 sc, inc* x2 (10)
R5: sc around (10)
FO.
Inner Ear (Cream)
R1: MR, 4 sc (4)
R2: *sc, inc* x2 (6)
R3: *2 sc, inc* x2 (8)
FO.
Sew the cream inner ear onto the rust orange outer ear. Fold the bottom corners of the finished ear slightly inward and sew to the head between R3 and R8 of the head, with approximately 8-10 stitches between them.
Body (Rust Orange & Cream)
R1: MR, 6 sc (6)
R2: *inc* x6 (12)
R3: *sc, inc* x6 (18)
R4: *2 sc, inc* x6 (24)
R5: *3 sc, inc* x6 (30)
R6: *4 sc, inc* x6 (36)
R7-R11: sc around (36)
R12: Switch to Cream yarn. sc around (36)
R13-R14: sc around (36)
R15: Switch back to Rust Orange. *4 sc, dec* x6 (30)
R16: sc around (30)
R17: *3 sc, dec* x6 (24)
R18: sc around (24)
R19: *2 sc, dec* x6 (18)
Stuff the body firmly.
R20: *sc, dec* x6 (12)
FO, leaving a long tail for sewing to the head.
Arms (Make 2 – Dark Brown & Rust Orange)
Start with Dark Brown yarn.
R1: MR, 6 sc (6)
R2: sc around (6)
Switch to Rust Orange yarn.
R3-R7: sc around (6)
FO, leaving a long tail for sewing. Do not stuff.
Legs (Make 2 – Dark Brown & Rust Orange)
Start with Dark Brown yarn.
R1: MR, 6 sc (6)
R2: *sc, inc* x3 (9)
Switch to Rust Orange yarn.
R3-R7: sc around (9)
R8: *sc, dec* x3 (6)
Stuff lightly. FO, leaving a long tail for sewing.
Tail (Cream & Rust Orange)
Start with Cream yarn.
R1: MR, 4 sc (4)
R2: *sc, inc* x2 (6)
Switch to Rust Orange yarn.
R3: sc around (6)
R4: *2 sc, inc* x2 (8)
R5: sc around (8)
R6: *3 sc, inc* x2 (10)
R7-R10: sc around (10)
R11: *3 sc, dec* x2 (8)
Stuff lightly. FO, leaving a long tail for sewing.
Assembly
Attach Head to Body: Sew the head to the body, ensuring the front of the muzzle aligns with the cream belly patch.
Attach Muzzle: Pin the muzzle to the front of the head below the eyes. Sew it securely, stuffing it lightly before fully closing.
Embroider Details: With Dark Brown yarn and a tapestry needle, embroider a small triangular nose on the tip of the muzzle. Embroider small eyebrows above the safety eyes.
Attach Arms: Sew the arms to the sides of the body, just below the neck.
Attach Legs: Sew the legs to the bottom of the body.
Attach Tail: Sew the tail to the back of the body.