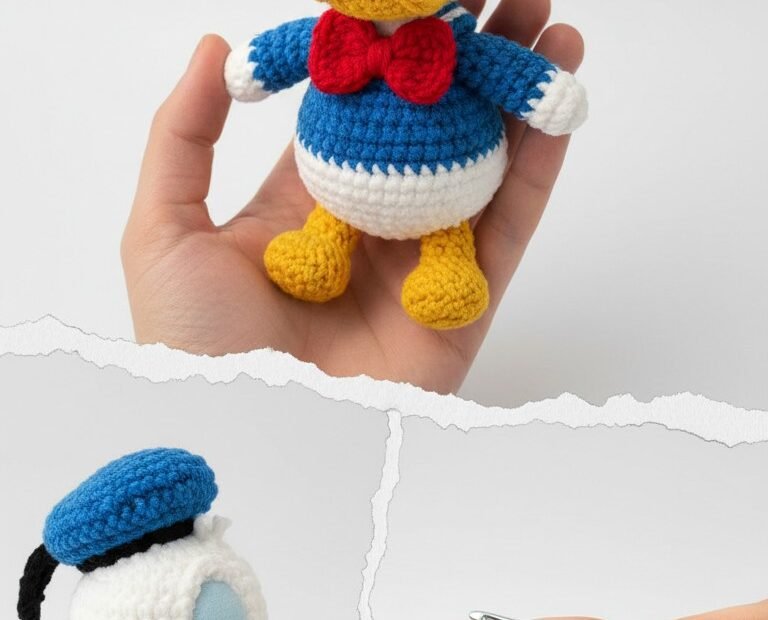
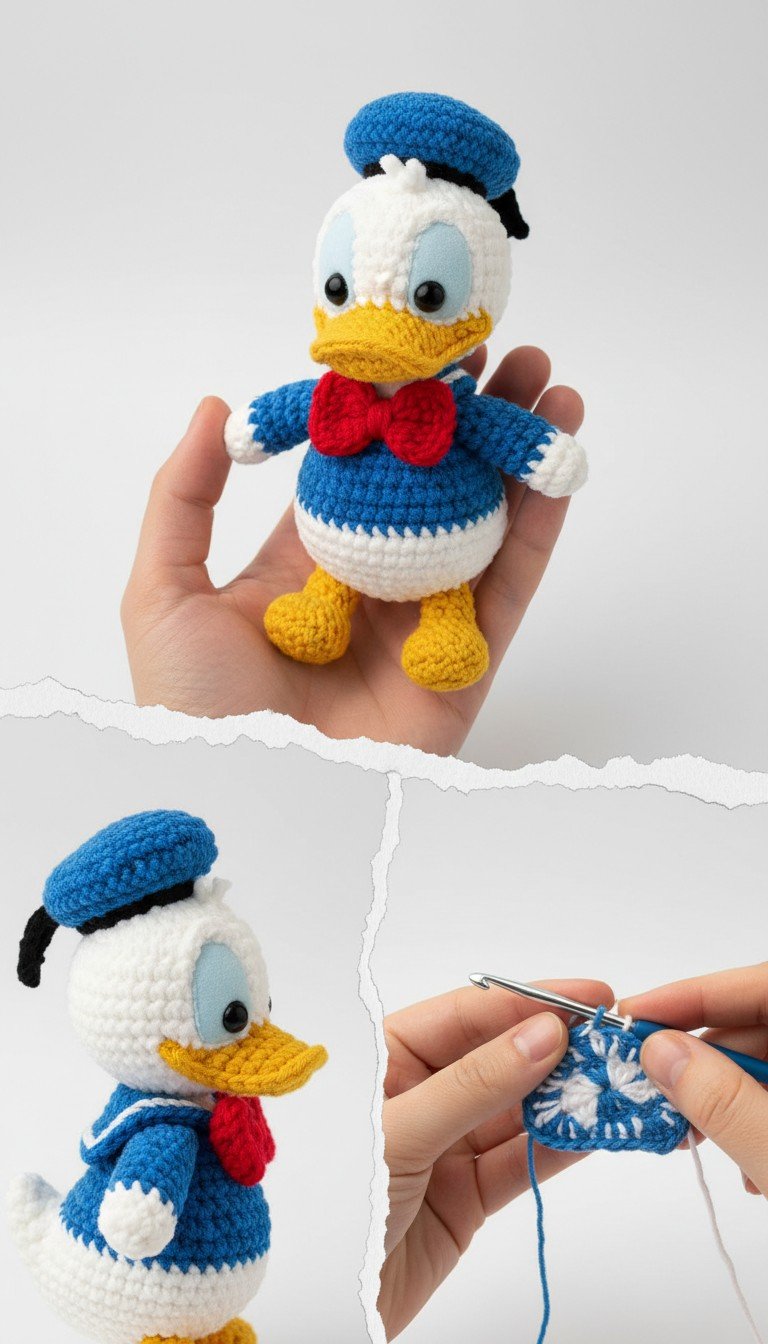
Dive into the whimsical world of Disney with this adorable Donald Duck amigurumi pattern! Perfect for fans of the iconic duck, this detailed guide will help you crochet your very own collectible figure. Bring a touch of classic cartoon charm to your home or create a cherished gift for a loved one with this fun and rewarding project.
Why You’ll Love Crocheting Your Own Donald Duck
Crafting your own Donald Duck is more than just making a toy; it’s about bringing a beloved character to life with your own hands. This project is fantastic for developing your amigurumi skills and results in a unique, handmade item that holds sentimental value. Whether for display, play, or as a thoughtful gift, your crocheted Donald will surely bring smiles and a splash of Disney magic.
Crochet Pattern: Crochet Donald Duck Amigurumi Pattern: Craft Your Own Disney Pal!
Materials
Worsted weight yarn in White
Worsted weight yarn in Bright Blue
Worsted weight yarn in Yellow
Worsted weight yarn in Red
Worsted weight yarn in Black
3.0mm crochet hook (or size appropriate for yarn)
9mm safety eyes
Small amount of light blue felt (for eye whites)
Polyester fiberfill for stuffing
Yarn needle
Stitch markers
Scissors
Abbreviations
MR: Magic Ring
sc: single crochet
inc: increase (2 sc in one stitch)
dec: decrease (sc two stitches together)
ch: chain
sl st: slip stitch
FO: Fasten off
BLO: back loop only
FLO: front loop only
(X): number of stitches at the end of the round/row
Instructions
General Notes: Work in continuous rounds unless otherwise specified. Use a stitch marker to mark the beginning of each round. Stuff firmly as you go.
Head (White Yarn)
R1: MR, 6 sc (6)
R2: inc in each st around (12)
R3: (sc, inc) x6 (18)
R4: (2 sc, inc) x6 (24)
R5: (3 sc, inc) x6 (30)
R6: (4 sc, inc) x6 (36)
R7-R13: sc in each st around (36) (7 rounds)
Attach safety eyes between R10 and R11, about 8 stitches apart. Cut two small light blue felt circles and place behind the safety eyes before securing them.
R14: (4 sc, dec) x6 (30)
R15: (3 sc, dec) x6 (24)
R16: (2 sc, dec) x6 (18)
R17: (sc, dec) x6 (12)
FO, leaving a long tail for sewing. Finish stuffing.
Beak (Yellow Yarn)
Ch 5
R1: sc in 2nd ch from hook, sc in next 2 ch, 3 sc in last ch. Continue on other side of chain: sc in next 2 ch, 2 sc in last ch (10)
R2: inc, sc in next 2, inc x3, sc in next 2, inc x2 (16)
R3: sc in each st around (16)
FO, leaving a long tail for sewing. Do not stuff, flatten slightly.
Sew beak to the front of the head, centered below the eyes.
Hat (Blue and Black Yarn)
Blue Beret Top:
R1: MR, 6 sc (6)
R2: inc in each st around (12)
R3: (sc, inc) x6 (18)
R4: (2 sc, inc) x6 (24)
R5: (3 sc, inc) x6 (30)
R6: (4 sc, inc) x6 (36)
R7: sc in each st around (36)
R8: sc in BLO of each st around (36)
R9: sc in each st around (36)
FO, weave in ends.
Black Hat Band:
Ch 20 (adjust as needed to fit around the hat’s base)
R1: sc in 2nd ch from hook and across (19)
FO, leaving a tail for sewing.
Sew the black band around R8 of the blue beret top. Create a small black ‘tail’ detail by stitching a short line of black yarn on the back of the hat, coming from the band. Sew the completed hat onto the top of Donald’s head.
Body (Blue and White Yarn)
Start with Blue Yarn:
R1: MR, 6 sc (6)
R2: inc in each st around (12)
R3: (sc, inc) x6 (18)
R4: (2 sc, inc) x6 (24)
R5: (3 sc, inc) x6 (30)
R6-R10: sc in each st around (30) (5 rounds)
Change to White Yarn.
R11-R12: sc in each st around (30) (2 rounds)
R13: (3 sc, dec) x6 (24)
R14: (2 sc, dec) x6 (18)
FO, leaving a long tail for sewing. Stuff firmly.
Sew head to body, making sure it is securely attached and centered.
Arms (Make 2) (Blue and White Yarn)
Start with Blue Yarn:
R1: MR, 6 sc (6)
R2-R5: sc in each st around (6) (4 rounds)
Change to White Yarn.
R6: sc in each st around (6)
FO, leaving a long tail for sewing. Lightly stuff the end.
Sew arms to the sides of the body, just below the neck.
Feet (Make 2) (Yellow Yarn)
R1: MR, 6 sc (6)
R2: inc in each st around (12)
R3-R4: sc in each st around (12) (2 rounds)
R5: (sc, dec) x4 (8)
Stuff lightly.
R6: dec x4 (4)
FO, weave tail through remaining stitches and pull tight to close. Leave a long tail for sewing.
Sew feet to the bottom of the white part of the body.
Bow Tie (Red Yarn)
Ch 6
R1: sc in 2nd ch from hook and across (5)
R2-R4: Ch 1, turn, sc in each st across (5) (3 rows)
FO, leaving a long tail. Weave in one end. Use the remaining tail to wrap tightly around the center of the rectangle several times to create the bow shape. Secure with a knot.
Sew the bow tie to the front of the body, below the head.
Collar (Blue Yarn)
Ch 16 (adjust for desired length around neck)
R1: sc in 2nd ch from hook and across (15)
R2: Ch 1, turn, sc in next 4, (dec) x3, sc in next 5 (12)
FO, leaving a long tail for sewing.
Position the collar around the back of Donald’s neck, just above the bow tie, and sew securely.
Finishing
Weave in all remaining loose ends. Make sure all parts are securely attached and stuffing is evenly distributed. Your adorable Donald Duck amigurumi is now complete!