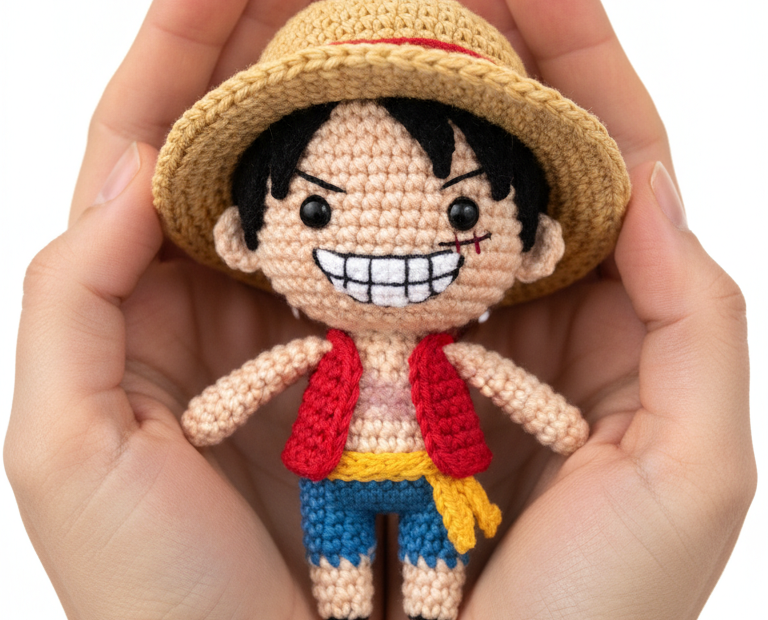
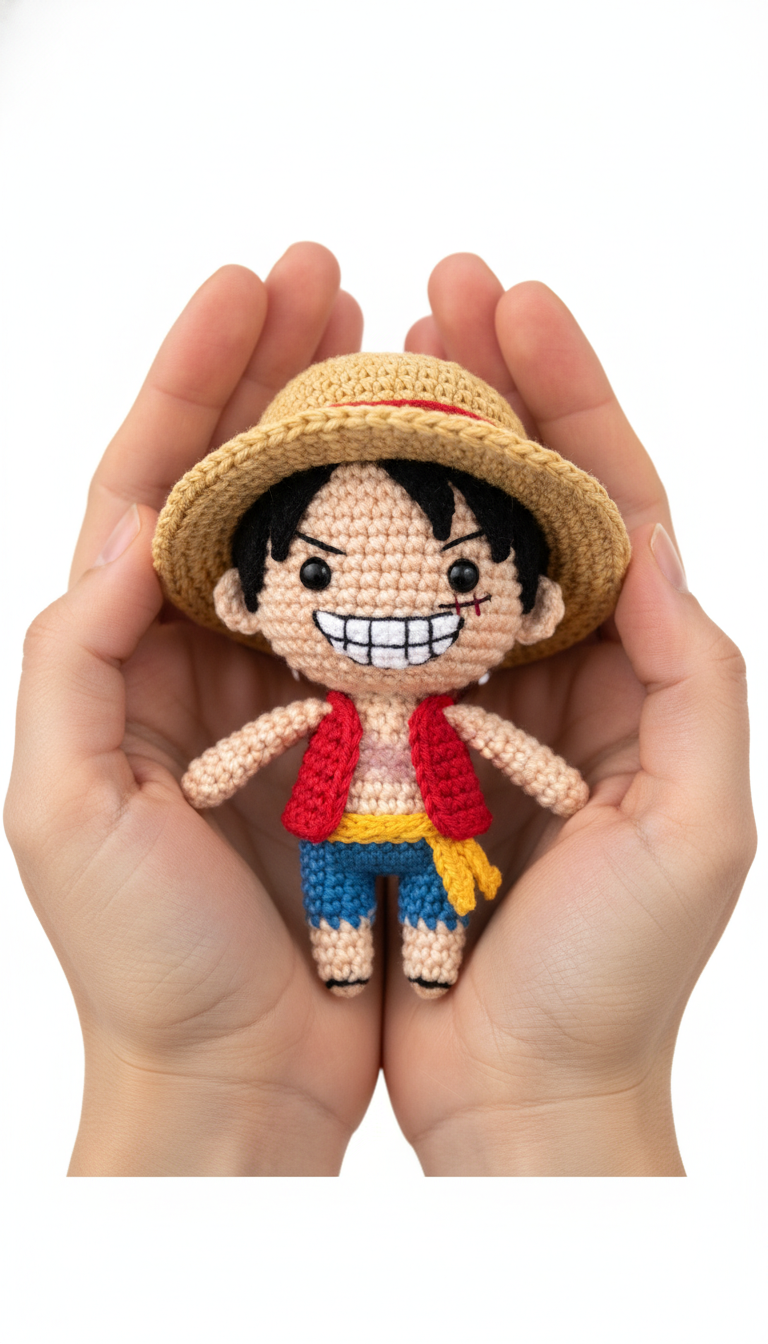
Set sail on a crafting adventure and bring the Straw Hat Captain to life with this detailed Luffy Amigurumi crochet pattern! Perfect for fans of One Piece, this adorable chibi-style figure captures Luffy’s iconic grin and adventurous spirit. Whether for display, play, or gifting, this project is sure to delight any fan of the Grand Line.
Bring the Straw Hat Captain to Life with Crochet!
There’s immense joy in creating beloved characters with your own hands. This Luffy Amigurumi pattern offers a rewarding experience, allowing you to craft a unique piece of fan art. Imagine the smile on a fellow fan’s face when they receive this handmade treasure, or the satisfaction of adding it to your own collection. It’s more than just a toy; it’s a piece of the One Piece world brought to life.
Crochet Pattern: Crochet Luffy Amigurumi Pattern: Craft Your Own Straw Hat Captain!
Materials
Light Beige DK or Worsted Weight Yarn (Skin Tone)
Black DK or Worsted Weight Yarn (Hair, Eyes, Scar)
White DK or Worsted Weight Yarn (Teeth)
Red DK or Worsted Weight Yarn (Vest, Hat Trim)
Blue DK or Worsted Weight Yarn (Shorts)
Yellow DK or Worsted Weight Yarn (Sash, Hat Trim)
Light Brown/Tan DK or Worsted Weight Yarn (Straw Hat)
2.5mm or 3.0mm Crochet Hook (or size to achieve tight stitches)
Polyester Fiberfill for stuffing
Tapestry Needle
Stitch Markers
Scissors
Abbreviations
MR: Magic Ring
ch: chain
sc: single crochet
inc: increase (2 sc in one stitch)
dec: decrease (sc 2 together)
st(s): stitch(es)
BLO: back loop only
FO: fasten off
Instructions
Work in continuous rounds unless otherwise specified. Use a stitch marker to mark the beginning of each round.
Head (Light Beige)
R1: 6 sc in MR (6)
R2: (inc) x6 (12)
R3: (sc, inc) x6 (18)
R4: (2 sc, inc) x6 (24)
R5: (3 sc, inc) x6 (30)
R6: (4 sc, inc) x6 (36)
R7-R13: sc around (36) – 7 rounds
R14: (4 sc, dec) x6 (30)
R15: (3 sc, dec) x6 (24)
R16: (2 sc, dec) x6 (18)
Stuff head firmly.
R17: (sc, dec) x6 (12)
R18: (dec) x6 (6)
FO, leaving a long tail for sewing. Close the opening and weave in the end.
Body (Light Beige)
R1: 6 sc in MR (6)
R2: (inc) x6 (12)
R3: (sc, inc) x6 (18)
R4: (2 sc, inc) x6 (24)
R5-R10: sc around (24) – 6 rounds
Stuff body firmly.
FO, leaving a long tail for sewing.
Arms (Light Beige, Make 2)
R1: 5 sc in MR (5)
R2-R8: sc around (5) – 7 rounds
Stuff lightly.
Flatten the opening and sc across to close (2 sc). FO, leaving a long tail for sewing.
Legs (Light Beige & Blue, Make 2)
R1: With Light Beige, 6 sc in MR (6)
R2-R3: sc around (6) – 2 rounds
Switch to Blue yarn.
R4-R9: sc around (6) – 6 rounds
Stuff lightly.
Flatten the opening and sc across to close (2 sc). FO, leaving a long tail for sewing.
Hair Cap (Black)
R1: 6 sc in MR (6)
R2: (inc) x6 (12)
R3: (sc, inc) x6 (18)
R4: (2 sc, inc) x6 (24)
R5: (3 sc, inc) x6 (30)
R6: (4 sc, inc) x6 (36)
R7-R8: sc around (36) – 2 rounds
FO, leaving a long tail for sewing.
For the spiky hair strands, cut several short pieces of black yarn, attach them to the hair cap, and trim to desired length.
Vest (Red, Make 2 Panels)
Ch 7
Row 1: sc in 2nd ch from hook and next 5 ch (6). Ch 1, turn.
Row 2-5: sc across (6). Ch 1, turn.
Row 6: sc in next 2 sts, ch 2, skip 2 sts (armhole), sc in next 2 sts (6 total stitches, counting ch 2 as 2). Ch 1, turn.
Row 7-8: sc across (6). Ch 1, turn.
FO, leaving a long tail for sewing. (Repeat for the second panel).
Sash (Yellow)
Ch 25-30 (or desired length to wrap around body).
Row 1: sc in 2nd ch from hook and across. (24-29 sc).
FO.
Straw Hat (Light Brown & Red)
Hat Top (Light Brown)
R1: 6 sc in MR (6)
R2: (inc) x6 (12)
R3: (sc, inc) x6 (18)
R4: (2 sc, inc) x6 (24)
R5: (3 sc, inc) x6 (30)
R6: (4 sc, inc) x6 (36)
R7: sc around (36)
FO, leaving a long tail.
Hat Brim (Light Brown & Red)
R1: With Light Brown, 6 sc in MR (6)
R2: (inc) x6 (12)
R3: (sc, inc) x6 (18)
R4: (2 sc, inc) x6 (24)
R5: (3 sc, inc) x6 (30)
R6: (4 sc, inc) x6 (36)
R7: (5 sc, inc) x6 (42)
R8: (6 sc, inc) x6 (48)
R9: sc around in BLO (48)
R10: sc around (48)
Switch to Red yarn.
R11: sc around (48)
FO, leaving a long tail.
Assembly
Sew the head to the body.
Sew the arms to the sides of the body.
Sew the legs to the bottom of the body, side-by-side.
Sew the hair cap onto the head. Attach additional strands of black yarn for the spiky effect as seen in the image.
Wrap the yellow sash around the body’s waist area and secure with a few stitches.
Sew the red vest panels onto the front of the body, leaving the chest area exposed.
Sew the Hat Top to the center of the Hat Brim.
Place the completed hat on Luffy’s head.
Facial Features (Black & White Yarn)
Using black yarn, embroider two small round eyes on the face between R10 and R11 of the head, about 4-5 stitches apart.
Embroider a wide, crescent-shaped smile below the eyes using black yarn.
Using white yarn, embroider small vertical lines for teeth within the smile.
Using black yarn, embroider Luffy’s scar below the left eye.