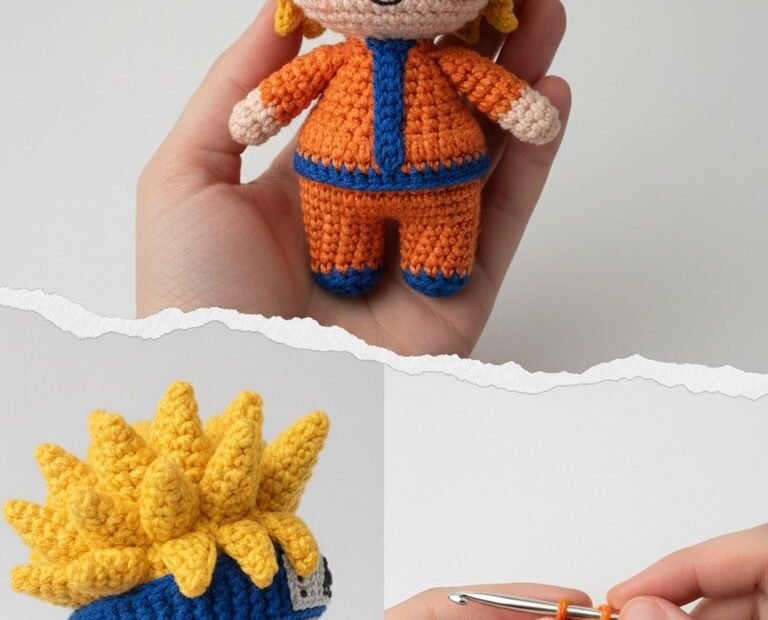
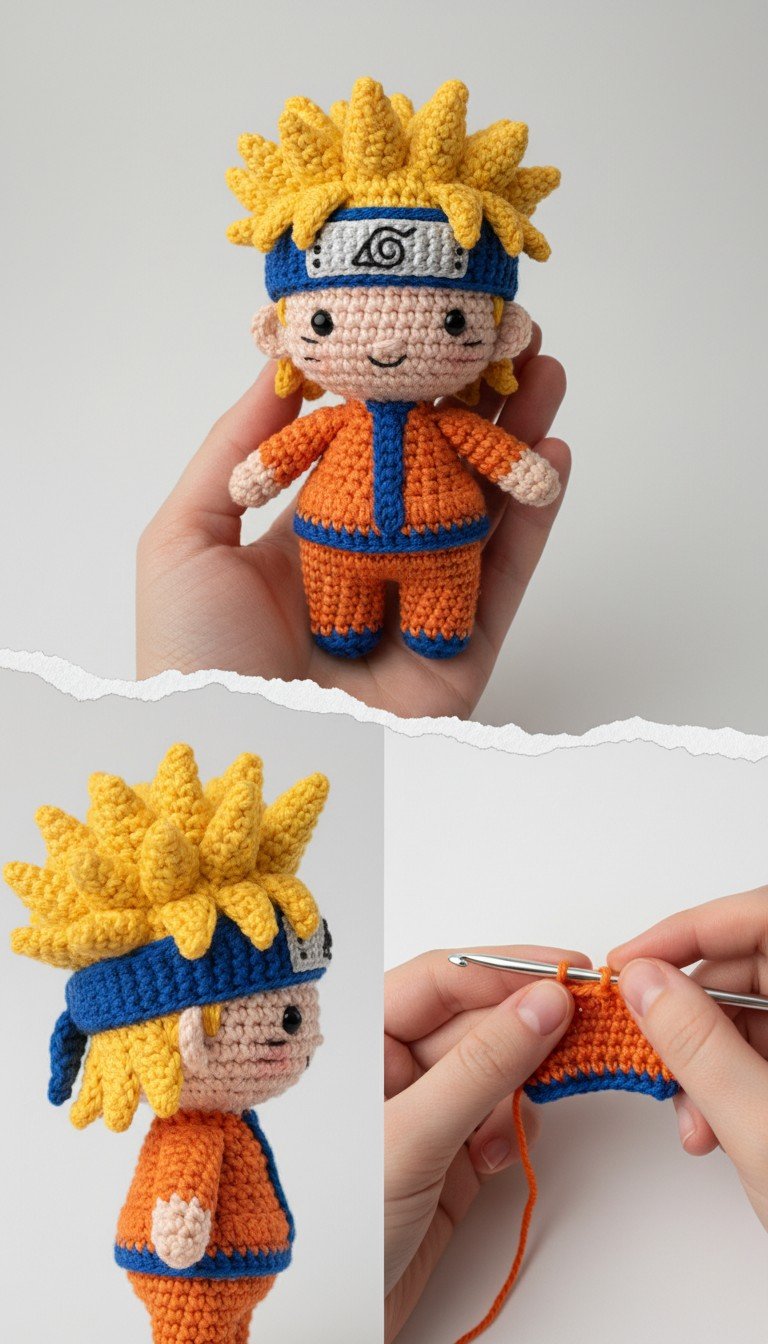
Unleash your inner ninja and crochet your very own adorable Naruto Uzumaki amigurumi! This detailed pattern will guide you through creating a miniature version of the beloved anime hero, complete with his iconic spiky hair, headband, and orange jumpsuit. Perfect for fans of all ages, this project makes a fantastic gift or a charming addition to your collection.
Bring the Hidden Leaf Village to Life with Your Hook
There’s a special joy in crafting characters you adore, and this Naruto amigurumi pattern offers just that. Imagine the delight of seeing your favorite determined ninja take shape, stitch by stitch. Whether you’re a seasoned crocheter or looking for a fun challenge, this project promises a rewarding experience and a unique, handmade keepsake inspired by the world of shinobi.
Crochet Pattern: Crochet Naruto Amigurumi Pattern: Craft Your Own Mini Ninja!
Materials
DK or Sport weight yarn in: Orange, Blue, Yellow, Skin Tone (Peach/Beige), Black, White, Grey/Silver
2.5mm or 3.0mm crochet hook (or size suitable for your yarn to achieve tight stitches)
Polyester fiberfill for stuffing
Tapestry needle
Stitch markers
Scissors
Optional: Small amount of pink embroidery floss for cheeks
Abbreviations
MR: Magic Ring
ch: chain
sc: single crochet
inc: increase (2 sc in one stitch)
dec: decrease (single crochet 2 together)
sl st: slip stitch
FO: Fasten off
BLO: back loop only
(): repeat instructions in parentheses N times
[]: total number of stitches
Instructions
Head (Skin Tone Yarn)
R1: 6 sc in MR [6]
R2: (inc) x 6 [12]
R3: (sc, inc) x 6 [18]
R4: (2 sc, inc) x 6 [24]
R5: (3 sc, inc) x 6 [30]
R6-R12: sc around [30] (7 rounds)
R13: (3 sc, dec) x 6 [24]
R14: (2 sc, dec) x 6 [18]
Stuff head firmly.
R15: (sc, dec) x 6 [12]
R16: (dec) x 6 [6]
FO, leave a long tail for sewing.
Hair Cap (Yellow Yarn)
R1: 6 sc in MR [6]
R2: (inc) x 6 [12]
R3: (sc, inc) x 6 [18]
R4: (2 sc, inc) x 6 [24]
R5: (3 sc, inc) x 6 [30]
R6-R8: sc around [30] (3 rounds)
Sl st, FO, leave long tail for sewing to head.
Hair Spikes (Yellow Yarn)
Attach yellow yarn to the hair cap at various points.
For each spike: ch 3-5 (vary chain length for different spike sizes), sc in 2nd ch from hook and in each remaining chain, then sl st back into the hair cap.
Repeat this process all over the cap to create dense, spiky hair, mimicking Naruto’s signature look. FO and weave in ends.
Headband
Band (Blue Yarn)
Ch 30 (adjust length to fit around the head). Sl st to join, being careful not to twist.
Ch 1, sc in each ch around. Sl st to first sc. FO, weave in ends.
Plate (Grey/Silver Yarn)
Ch 6.
R1: Sc in 2nd ch from hook, sc in next 4. Ch 1, turn [5]
R2-R3: Sc across. Ch 1, turn [5]
FO, leave long tail for sewing.
Symbol (Black Yarn)
Using black yarn and a tapestry needle, embroider the Hidden Leaf Village swirl symbol onto the center of the grey plate.
Assembly of Headband: Sew the embroidered grey plate to the center front of the blue band.
Legs (Make 2 – Orange and Blue Yarn)
Start with Orange yarn.
R1: 6 sc in MR [6]
R2: (inc) x 6 [12]
R3-R5: sc around [12] (3 rounds)
Change to Blue yarn for the shoe/boot cuff.
R6: sc around in BLO [12]
R7: sc around [12]
FO first leg, leave long tail for sewing. Do NOT FO second leg.
Body (Orange and Blue Yarn)
Continue with Orange yarn from the second leg.
Ch 3, join to first leg with sc in any stitch.
R8: sc 12 around first leg, sc 3 in ch, sc 12 around second leg, sc 3 in ch [30]
R9-R12: sc around [30] (4 rounds in Orange)
R13: (3 sc, dec) x 6 [24]
R14-R16: sc around [24] (3 rounds)
Change to Blue yarn for the bottom trim.
R17: sc around [24]
R18: (2 sc, dec) x 6 [18]
Stuff body firmly.
R19: (sc, dec) x 6 [12]
R20: (dec) x 6 [6]
FO, leave a long tail for sewing to the head.
Vertical Blue Stripe on Body (Blue Yarn)
Using blue yarn and a tapestry needle, surface crochet a vertical line of slip stitches up the front center of the body, starting from the blue trim (R17) and extending upwards to the neck.
Arms (Make 2 – Skin Tone, Orange, Blue Yarn)
Start with Skin Tone yarn.
R1: 6 sc in MR [6]
R2-R3: sc around [6] (2 rounds)
Change to Orange yarn.
R4-R7: sc around [6] (4 rounds)
Change to Blue yarn for the cuff.
R8: sc around [6]
Sl st, FO, leave a long tail for sewing. Lightly stuff the hand section only.
Final Assembly and Finishing
Sew the head securely to the top of the body.
Sew the arms to the sides of the body, just below the neck.
Sew the yellow hair cap, with its spikes, to the top of the head. Position it so the spikes fan out naturally.
Carefully place the assembled headband over the hair and around the head, sewing it in place.
Facial Features: Using black yarn/floss and a tapestry needle, embroider the eyes as small ovals or lines. Embroider a small ‘U’ shape for the mouth. Add three short horizontal lines on each cheek for his whisker marks. Optionally, use pink embroidery floss for small blush lines on the cheeks.