
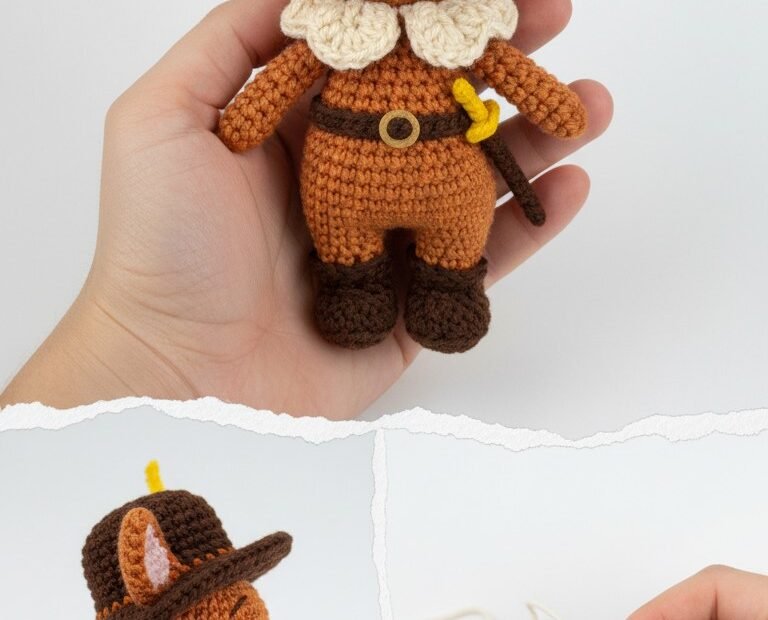
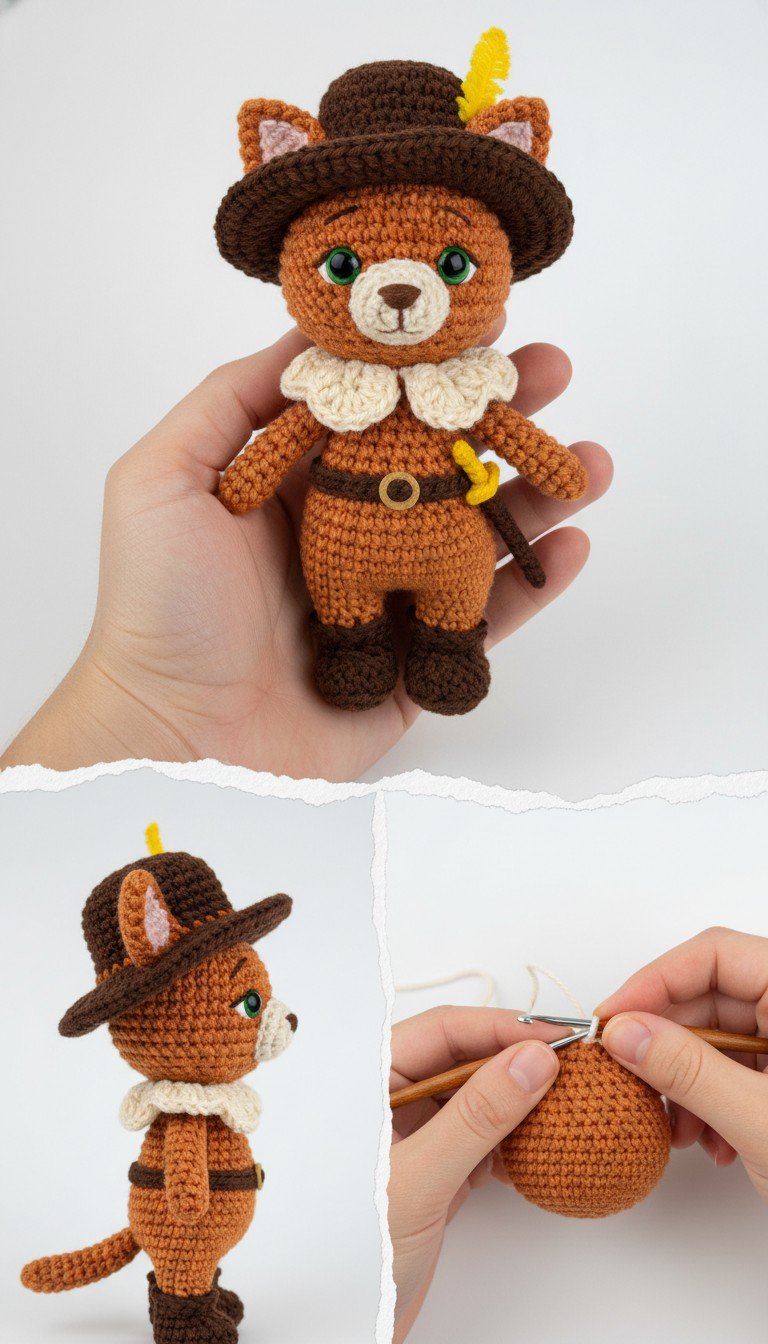
Embark on a grand adventure with your very own handcrafted Puss in Boots amigurumi! This detailed crochet pattern allows you to bring the legendary swashbuckling feline to life, complete with his iconic hat, boots, and a trusty sword. Perfect for fans of fairy tales and adorable stuffed creatures, this project promises a rewarding and charming result.
Unleash Your Inner Storyteller with this Adorable Feline Hero
Creating your own Puss in Boots is more than just a crochet project; it’s an opportunity to capture a beloved character’s spirit in yarn. This charming amigurumi makes a fantastic gift for children and adults alike, a unique addition to any fairy tale collection, or a delightful decorative piece that sparks joy and imagination in any room.
Crochet Pattern: Crochet Puss in Boots Amigurumi Pattern: Craft Your Own Feline Hero!
Materials
- Worsted weight yarn in Terracotta/Rust (Main Color – MC)
- Worsted weight yarn in Dark Brown (Hat, Boots, Belt – DB)
- Worsted weight yarn in Cream/Light Beige (Muzzle, Ruffle – CR)
- Worsted weight yarn in Yellow (Feather, Sword Hilt – Y)
- Small amount of Light Pink yarn (for inner ears, optional embroidery)
- Small amount of Black yarn (for nose/mouth embroidery)
- 2.5mm or 3.0mm crochet hook (adjust as needed for tight stitches)
- 9mm or 10mm green safety eyes
- Polyester fiberfill for stuffing
- Yarn needle
- Stitch markers
- Small wooden O-ring (approx. 1cm diameter for belt buckle)
- Optional: Craft wire or pipe cleaner for sword rigidity
Abbreviations
- MR: Magic Ring
- ch: chain
- sl st: slip stitch
- sc: single crochet
- inc: increase (2 sc in one stitch)
- dec: decrease (sc two stitches together)
- BLO: back loop only
- FO: Fasten off
- rnd: round
- st(s): stitch(es)
Instructions
Gauge: Not critical for this project, but ensure your stitches are tight enough so stuffing does not show through.
Note: Work in continuous rounds unless otherwise specified. Use a stitch marker to mark the beginning of each round.
Head (MC)
- Rnd 1: 6 sc in MR (6)
- Rnd 2: [inc] x6 (12)
- Rnd 3: [sc, inc] x6 (18)
- Rnd 4: [2 sc, inc] x6 (24)
- Rnd 5: [3 sc, inc] x6 (30)
- Rnd 6: [4 sc, inc] x6 (36)
- Rnd 7-12: sc around (36)
- Insert safety eyes between Rnd 9 and 10, approx. 6-7 sts apart.
- Rnd 13: [4 sc, dec] x6 (30)
- Rnd 14: [3 sc, dec] x6 (24)
- Stuff head firmly.
- Rnd 15: [2 sc, dec] x6 (18)
- Rnd 16: [sc, dec] x6 (12)
- Rnd 17: [dec] x6 (6)
- FO, leave a long tail for sewing. Close the opening.
Muzzle (CR)
- Rnd 1: 6 sc in MR (6)
- Rnd 2: [inc] x6 (12)
- Rnd 3: [sc, inc] x6 (18)
- Rnd 4: sc around (18)
- FO, leave a long tail for sewing. Lightly stuff and sew onto the head below the eyes. Embroider a small pink nose and black mouth.
Ears (Make 2, MC)
- Rnd 1: 4 sc in MR (4)
- Rnd 2: [sc, inc] x2 (6)
- Rnd 3: [2 sc, inc] x2 (8)
- Rnd 4: [3 sc, inc] x2 (10)
- FO, leave a long tail for sewing. Flatten the ear and sew to the top of the head. Embroider a small triangle of light pink yarn for the inner ear.
Body (MC)
- Rnd 1: 6 sc in MR (6)
- Rnd 2: [inc] x6 (12)
- Rnd 3: [sc, inc] x6 (18)
- Rnd 4: [2 sc, inc] x6 (24)
- Rnd 5: [3 sc, inc] x6 (30)
- Rnd 6-10: sc around (30)
- Rnd 11: [3 sc, dec] x6 (24)
- Rnd 12-14: sc around (24)
- Rnd 15: [2 sc, dec] x6 (18)
- Rnd 16-18: sc around (18)
- Stuff firmly. FO, leave a long tail for sewing. Sew head to body.
Arms (Make 2, MC)
- Rnd 1: 6 sc in MR (6)
- Rnd 2: [sc, inc] x3 (9)
- Rnd 3-7: sc around (9)
- Stuff lightly. FO, leave a long tail for sewing. Flatten opening and sew to sides of body on Rnd 16.
Legs (Make 2, MC)
- Rnd 1: 6 sc in MR (6)
- Rnd 2: [inc] x6 (12)
- Rnd 3-5: sc around (12)
- Stuff lightly. FO, leave a long tail for sewing. Flatten opening and sew to bottom of body, centered.
Boots (Make 2, DB)
- Rnd 1: 6 sc in MR (6)
- Rnd 2: [inc] x6 (12)
- Rnd 3: [sc, inc] x6 (18)
- Rnd 4-6: sc around (18)
- Rnd 7: In BLO, [sc, dec] x6 (12)
- Rnd 8: sc around (12)
- FO, leave a long tail. No need to stuff. Slip boots over the crocheted legs and sew in place.
Tail (MC)
- Rnd 1: 5 sc in MR (5)
- Rnd 2-8: sc around (5)
- Stuff lightly. FO, leave a long tail for sewing. Sew to the back of the body.
Hat (DB)
Crown:
- Rnd 1: 6 sc in MR (6)
- Rnd 2: [inc] x6 (12)
- Rnd 3: [sc, inc] x6 (18)
- Rnd 4: [2 sc, inc] x6 (24)
- Rnd 5: [3 sc, inc] x6 (30)
- Rnd 6-8: sc around (30)
Brim:
- Rnd 9: In BLO, sl st around (30)
- Rnd 10: ch 1, [4 sc, inc] x6 (36)
- Rnd 11: [5 sc, inc] x6 (42)
- FO, weave in ends. Sew hat to the top of the head, slightly tilted.
Feather (Y):
- ch 5, sl st into 2nd ch from hook, sc in next ch, hdc in next ch, dc in last ch.
- FO, leaving a tail. Secure feather to the hat. (Alternatively, use a small piece of yellow pipe cleaner).
Ruffle (CR)
- ch 20 (adjust length to fit around neck)
- Starting in 2nd ch from hook, [sl st, ch 2, sl st] in each ch across.
- FO, leave a long tail. Sew around the neck of the cat, gathering slightly to create a ruffle effect.
Belt (DB)
- ch 30 (or length to fit around cat’s waist)
- Starting in 2nd ch from hook, sc across (29 sc)
- FO. Thread one end of the strip through the wooden O-ring, then sew the ends of the belt together around the cat’s waist.
Sword (Y and DB)
- Hilt (Y): ch 3, sl st in 2nd ch, sc in last ch.
- Blade (DB): ch 5, starting in 2nd ch from hook, sc in next 4 ch.
- Sew the blade to the hilt. Secure the sword to the belt, either by sewing or tucking it through the belt. (For more rigidity, you can insert a small piece of craft wire or pipe cleaner into the blade before sewing to the hilt.)
Finishing
Weave in all remaining loose ends. Ensure all parts are securely sewn. Your Puss in Boots amigurumi is now ready for adventure!