Get ready to add a touch of handmade charm to your holiday decor with this adorable Crochet Reindeer Amigurumi pattern! Perfect for gifting or adorning your own home, this sweet little reindeer, complete with a cozy sweater and festive antlers, is a joyful project for any crocheter. Dive into the magic of amigurumi and create your very own Christmas companion.
Craft a Unique Handmade Christmas Gift or Decoration
There’s nothing quite like the warmth of a handmade gift or decoration during the festive season. This crochet reindeer offers a wonderful opportunity to express your creativity and make something truly special. Imagine the smiles when loved ones receive this charming amigurumi, or the cozy feeling it brings to your mantelpiece. It’s more than just a craft; it’s a piece of holiday joy.
Crochet Pattern: Crochet Reindeer Amigurumi: Your Festive DIY Christmas Decor
Materials
Worsted weight yarn in Main Brown (for head, body, ears, snout)
2.5mm or 3.0mm crochet hook (or size suitable for your yarn to achieve tight stitches)
9mm safety eyes (black)
Polyester fiberfill for stuffing
Tapestry needle
Stitch marker
Gold decorative thread
Small decorative pearls (optional, for antlers)
Abbreviations
MR: Magic Ring
ch: chain
sc: single crochet
inc: increase (2 sc in one stitch)
dec: decrease (sc 2 together)
sl st: slip stitch
FO: Fasten off
Instructions
Head & Body (Start with Main Brown yarn)
R1: 6 sc in MR (6)
R2: 6 inc (12)
R3: (1 sc, inc) x 6 (18)
R4: (2 sc, inc) x 6 (24)
R5: (3 sc, inc) x 6 (30)
R6-R10: Sc in each stitch around (30) (5 rounds)
Insert safety eyes between R7 and R8, approximately 5-6 stitches apart.
R11: (3 sc, dec) x 6 (24)
R12: (2 sc, dec) x 6 (18)
Begin stuffing head firmly.
R13: (1 sc, dec) x 6 (12)
R14-R15: Sc in each stitch around (12) (2 rounds for neck)
Change to Cream yarn.
R16: Sc in each stitch around (12) (Sweater collar)
Change to Dark Green yarn.
R17: (2 sc, inc) x 4 (16)
R18: (3 sc, inc) x 4 (20)
R19: (4 sc, inc) x 4 (24)
R20-R22: Sc in each stitch around (24) (3 rounds)
Change to Main Brown yarn.
R23-R24: Sc in each stitch around (24) (2 rounds for sweater bottom)
Continue stuffing body firmly.
R25: (2 sc, dec) x 6 (18)
R26: (1 sc, dec) x 6 (12)
R27: 6 dec (6)
FO, cut yarn, and weave in tail to close the opening.
Snout (Main Brown yarn)
R1: 6 sc in MR (6)
R2: 6 inc (12)
R3: (1 sc, inc) x 6 (18)
R4: Sc in each stitch around (18)
FO, leaving a long tail for sewing. Lightly stuff.
Nose (Red yarn)
R1: 6 sc in MR (6)
FO, leaving a tail for sewing.
Ears (Make 2 – Main Brown & Cream yarn)
Using Main Brown yarn, Ch 5.
R1: Sc in 2nd ch from hook, sc in next 2 ch, 3 sc in last ch. Continue on other side of ch: sc in next 3 ch. (9)
R2: Sc in next 3, 3 sc in next, sc in next 5. (11)
Change to Cream yarn.
R3: Sl st around the entire edge of the ear to create an inner ear effect.
FO, leaving a long tail for sewing. Pinch the base of the ear to give it shape.
Antler Prongs (Make 6 – Dark Brown yarn)
R1: 4 sc in MR (4)
R2-R4: Sc in each stitch around (4) (3 rounds)
FO, leaving a tail for sewing. Stuff lightly.
Tail (Cream yarn)
R1: 6 sc in MR (6)
R2: 6 inc (12)
R3: Sc in each stitch around (12)
R4: 6 dec (6)
FO, leaving a tail for sewing. Stuff lightly.
Assembly
Sew the Snout to the front of the Head, centering it below the eyes.
Sew the Red Nose to the tip of the Snout.
Sew the Ears to the sides of the Head, slightly behind the eyes.
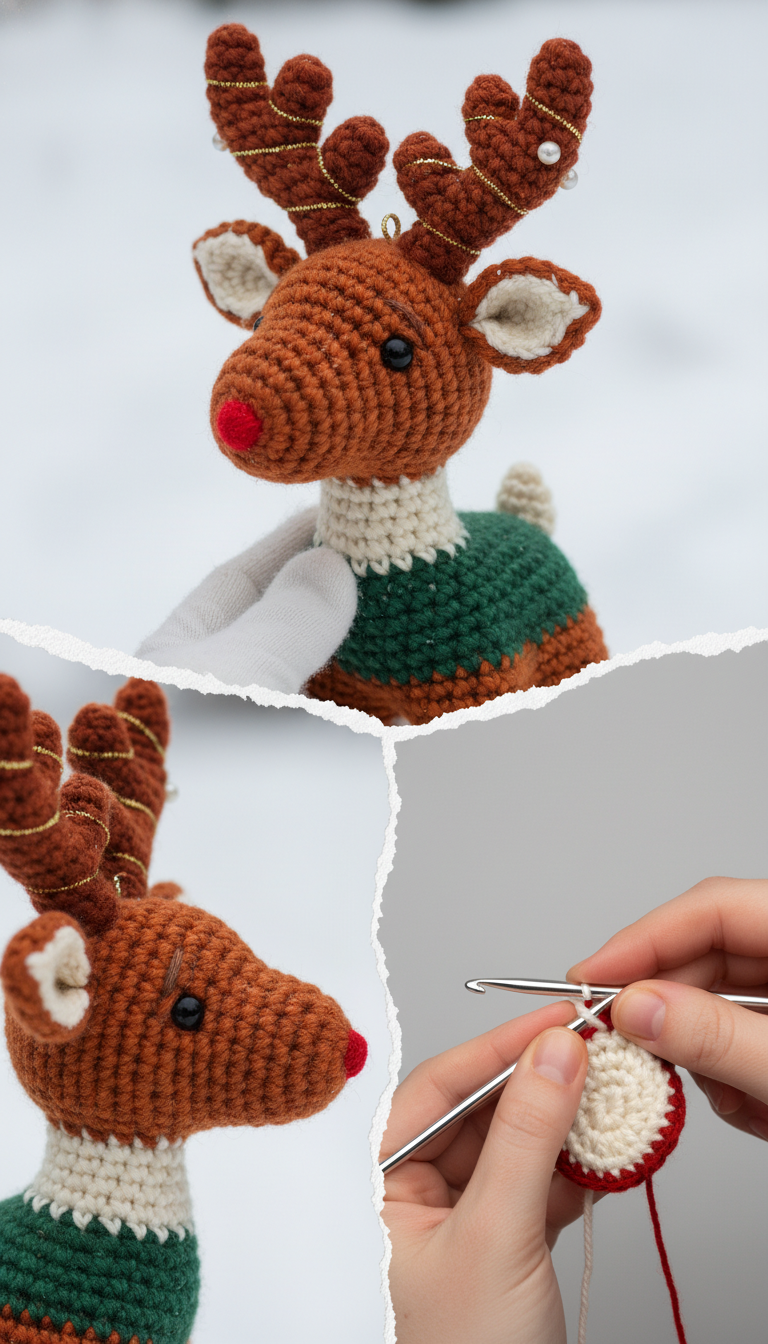
For each Antler, arrange three Antler Prongs together at their bases and sew them securely to form one antler unit. Then, sew the two assembled Antlers to the top of the Head, between the ears.
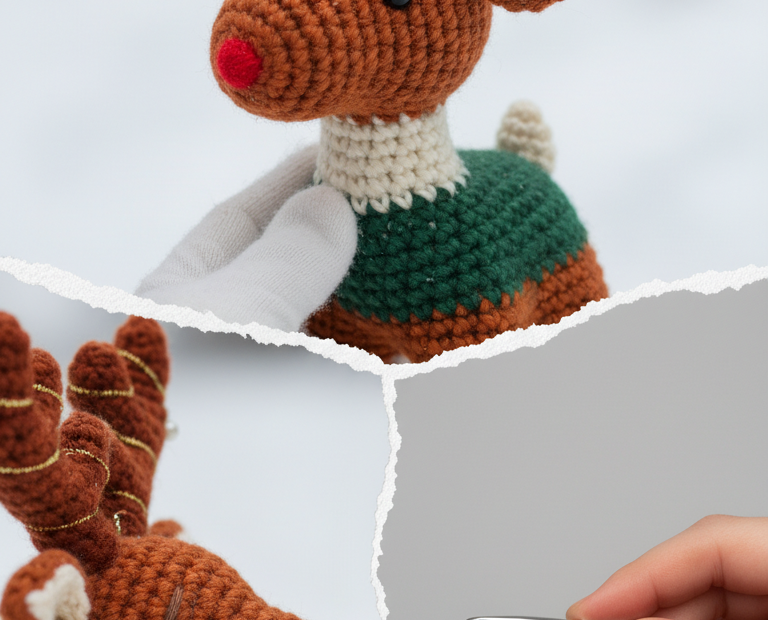
Wrap gold decorative thread around the antlers as shown in the image. Secure with a tiny dab of fabric glue if needed.
Attach small decorative pearls to one of the antlers, if desired.