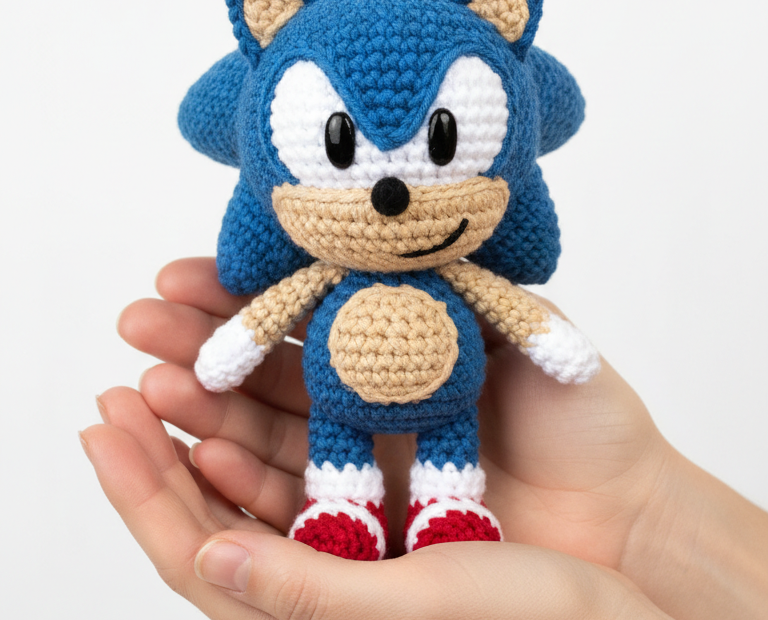
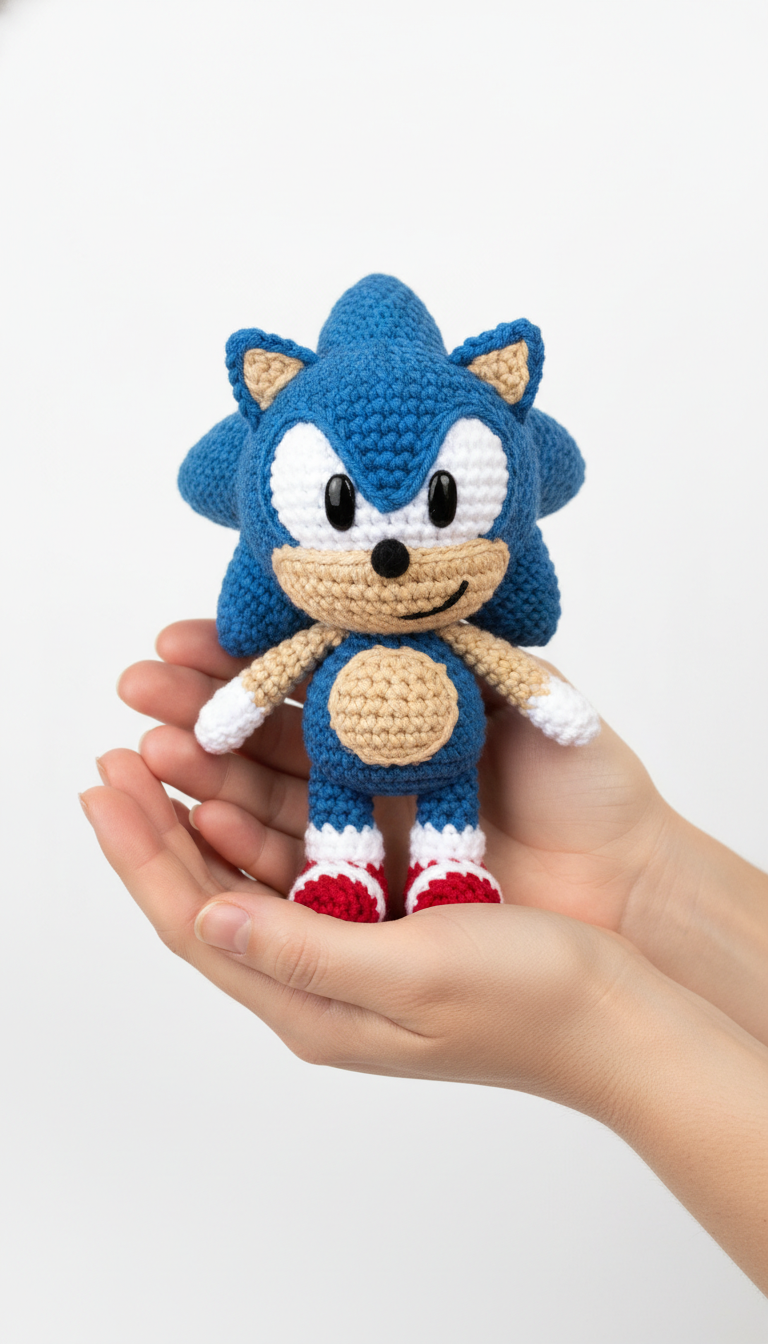
Get ready to race into your next crochet adventure with this exciting Sonic the Hedgehog amigurumi pattern! Perfect for fans of the iconic blue blur, this project brings the beloved video game character to life with your own hands. Create a charming, huggable Sonic that’s sure to be a hit with kids and collectors alike. Let’s grab our hooks and get started on this super-speedy craft!
Craft Your Own Iconic Blue Blur
This detailed pattern allows you to recreate Sonic’s distinctive features, from his spiky quills to his signature red shoes. Imagine the joy of gifting this handmade treasure or displaying it as a fun, nostalgic piece in your own collection. Our clear, step-by-step instructions ensure a smooth crafting experience, making it accessible for crocheters eager to create their favorite hedgehog.
Crochet Pattern: Crochet Sonic the Hedgehog Amigurumi Pattern: Speed Into Fun!
Materials
Sport or DK weight yarn in Royal Blue
Sport or DK weight yarn in Light Tan/Beige
Sport or DK weight yarn in White
Sport or DK weight yarn in Bright Red
Sport or DK weight yarn in Black (for embroidery)
2.5mm crochet hook (or hook size suitable for your yarn)
9mm safety eyes (black)
Polyester fiberfill for stuffing
Yarn needle
Stitch markers
Scissors
Abbreviations
MR: Magic Ring
ch: chain
sc: single crochet
inc: increase (2 sc in one stitch)
dec: decrease (sc 2 together)
sl st: slip stitch
FO: Fasten off
rnd: round
st(s): stitch(es)
Instructions
Important Note: Work in continuous rounds unless otherwise specified. Use a stitch marker to mark the first stitch of each round.
Head (Royal Blue)
Rnd 1: 6 sc in MR (6)
Rnd 2: inc in each st around (12)
Rnd 3: (sc, inc) x 6 (18)
Rnd 4: (2 sc, inc) x 6 (24)
Rnd 5: (3 sc, inc) x 6 (30)
Rnd 6-10: sc in each st around (30)
Rnd 11: (3 sc, dec) x 6 (24)
Rnd 12: (2 sc, dec) x 6 (18)
Stuff head firmly.
Rnd 13: (sc, dec) x 6 (12)
Rnd 14: dec x 6 (6)
FO, weave in tail.
Snout (Light Tan/Beige)
Rnd 1: 6 sc in MR (6)
Rnd 2: inc in each st around (12)
Rnd 3: (sc, inc) x 6 (18)
Rnd 4-5: sc in each st around (18)
FO, leave a long tail for sewing. Stuff lightly.
Ears (Make 2 – Royal Blue and Light Tan/Beige)
Inner Ear (Light Tan/Beige)
ch 4
Row 1: sc in 2nd ch from hook, sc in next 2 ch (3)
Row 2: ch 1, turn, dec, sc (2)
Row 3: ch 1, turn, dec (1)
FO.
Outer Ear (Royal Blue)
ch 4
Row 1: sc in 2nd ch from hook, sc in next 2 ch (3)
Row 2: ch 1, turn, dec, sc (2)
Row 3: ch 1, turn, dec (1)
Place tan inner ear on top of blue outer ear, and sc around the edges of both pieces together to join and form a finished ear shape. Leave a tail for sewing.
Spikes (Make 3 – Royal Blue)
ch 4
Row 1: sc in 2nd ch from hook, sc in next 2 ch (3)
Row 2: ch 1, turn, sc in each st across (3)
Row 3: ch 1, turn, dec, sc (2)
Row 4: ch 1, turn, dec (1)
FO, leave a long tail for sewing.
Body (Royal Blue)
Rnd 1: 6 sc in MR (6)
Rnd 2: inc in each st around (12)
Rnd 3: (sc, inc) x 6 (18)
Rnd 4: (2 sc, inc) x 6 (24)
Rnd 5: (3 sc, inc) x 6 (30)
Rnd 6-11: sc in each st around (30)
Rnd 12: (3 sc, dec) x 6 (24)
Rnd 13-14: sc in each st around (24)
Stuff firmly. FO, leaving a long tail for sewing.
Belly Patch (Light Tan/Beige)
Rnd 1: 6 sc in MR (6)
Rnd 2: inc in each st around (12)
Rnd 3: (sc, inc) x 6 (18)
FO, leave a long tail for sewing.
Arms (Make 2 – Start with Royal Blue, then White)
Rnd 1: 6 sc in MR (6)
Rnd 2-5: sc in each st around (6)
Change to White yarn.
Rnd 6-7: sc in each st around (6)
Stuff lightly. FO, leaving a long tail for sewing.
Legs (Make 2 – Start with Royal Blue, then Red, then White)
Rnd 1: 6 sc in MR (6)
Rnd 2: inc in each st around (12)
Rnd 3-4: sc in each st around (12)
Change to Red yarn.
Rnd 5-6: sc in each st around (12)
Change to White yarn.
Rnd 7: sc in each st around (12)
Change back to Red yarn.
Rnd 8: sc in each st around (12)
Stuff firmly. FO, leaving a long tail for sewing.
Assembly
Attach Snout: Pin and sew the stuffed tan snout to the lower front of the head.
Place Eyes: Insert 9mm safety eyes above the snout, ensuring they are evenly spaced. Secure the backings.
Embroider Mouth: Using black yarn, embroider a small smile below the snout.
Attach Ears: Sew the ears to the top sides of the head.
Attach Spikes: Sew the three blue spikes to the back of the head, arranging them to fan out.
Attach Head to Body: Sew the head securely to the top of the body, making sure it is centered.
Attach Belly Patch: Sew the tan belly patch to the front of the body.
Attach Arms: Sew the arms to the sides of the body, just below the neck.
Attach Legs: Sew the legs to the bottom of the body.