Get ready to craft your own Scarlet Speedster with this exciting The Flash Amigurumi pattern! Perfect for superhero fans and crochet enthusiasts alike, this project brings the iconic hero to life in adorable yarn form. Follow our detailed instructions to create a super-fast and super-cute Flash doll that’s sure to be a hit.
Unleash Your Inner Hero with a Handmade Flash Amigurumi
Crafting your own superhero is a rewarding experience, offering a unique, personalized gift or a cherished addition to your collection. This Flash amigurumi isn’t just a toy; it’s a testament to your creativity and love for the DC universe. Bring a touch of heroism and speed to any room with this charming, handmade creation!
Crochet Pattern: Crochet The Flash Amigurumi Pattern: Speed into Handmade Fun!
Materials
DK weight yarn in Red
DK weight yarn in Light Beige (skin tone)
DK weight yarn in Yellow
DK weight yarn in White
Small amount of Black embroidery floss
2.5mm crochet hook
6mm safety eyes
Fiberfill stuffing
Yarn needle
Stitch marker
Abbreviations
MR: Magic Ring
sc: single crochet
inc: increase (2 sc in one stitch)
dec: decrease (sc 2 stitches together)
ch: chain
sl st: slip stitch
fo: fasten off
FLO: Front Loop Only
BLO: Back Loop Only
rnd: round
Instructions
Gauge: Not crucial for this project, but aim for tight stitches to prevent stuffing from showing.
Note: Work in continuous rounds unless otherwise specified. Use a stitch marker to keep track of the beginning of each round.
Head & Body (Start with Red yarn)
Rnd 1: MR, 6 sc (6)
Rnd 2: 6 inc (12)
Rnd 3: (1 sc, 1 inc) x 6 (18)
Rnd 4: (2 sc, 1 inc) x 6 (24)
Rnd 5: (3 sc, 1 inc) x 6 (30)
Rnd 6: (4 sc, 1 inc) x 6 (36)
Rnd 7-10: sc around (36)
Rnd 11: (4 sc, 1 dec) x 6 (30)
Rnd 12: sc around (30)
Change to Light Beige yarn
Rnd 13: (3 sc, 1 dec) x 6 (24)
Rnd 14-16: sc around (24)
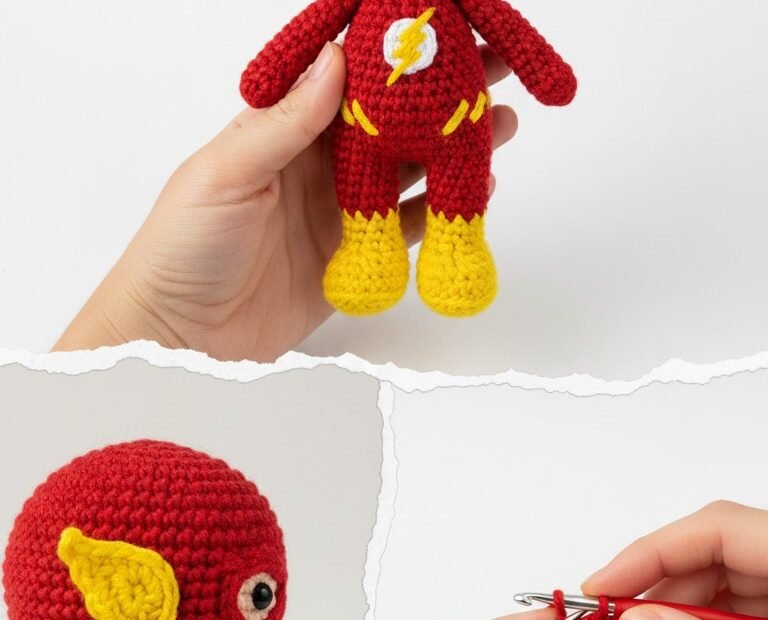
Insert safety eyes between Rnd 13 and Rnd 14, about 6-7 stitches apart. Embroider a small smile with black floss between the eyes.
Change to Red yarn
Rnd 17: (2 sc, 1 dec) x 6 (18)
Start stuffing the head firmly.
Rnd 18: (1 sc, 1 dec) x 6 (12)
Rnd 19: sc around (12) – This forms the neck.
Continue with Red yarn for the body.
Rnd 20: (1 sc, 1 inc) x 6 (18)
Rnd 21: (2 sc, 1 inc) x 6 (24)
Rnd 22: (3 sc, 1 inc) x 6 (30)
Rnd 23-28: sc around (30)
Rnd 29: (3 sc, 1 dec) x 6 (24)
Rnd 30: (2 sc, 1 dec) x 6 (18)
Finish stuffing the body firmly.
Rnd 31: (1 sc, 1 dec) x 6 (12)
Rnd 32: 6 dec (6)
Fo, weave in ends.
Arms (Make 2 – Red yarn)
Rnd 1: MR, 6 sc (6)
Rnd 2: (1 sc, 1 inc) x 3 (9)
Rnd 3-10: sc around (9)
Stuff lightly. Flatten the opening and sc across to close (4 sc).
Fo, leaving a long tail for sewing.
Legs (Make 2 – Start with Yellow yarn)
Rnd 1: MR, 6 sc (6)
Rnd 2: 6 inc (12)
Rnd 3: (1 sc, 1 inc) x 6 (18)
Rnd 4: BLO sc around (18)
Rnd 5: sc around (18)
Rnd 6: (1 sc, 1 dec) x 6 (12)
Stuff the boot portion.
Change to Red yarn
Rnd 7-15: sc around (12)
Continue stuffing. Flatten the opening and sc across to close (6 sc).
Fo, leaving a long tail for sewing.
Ears/Wings (Make 2 – Yellow yarn)
Row 1: Ch 5, sc in 2nd ch from hook, hdc in next ch, dc in next ch, 2 dc in last ch. (5)
Fo, leaving a long tail for sewing.
Lightning Bolt Emblem (White and Yellow yarn)
White Circle:
Rnd 1: MR, 6 sc (6)
Rnd 2: 6 inc (12)
Rnd 3: (1 sc, 1 inc) x 6 (18)
Fo, leaving a tail.
Yellow Lightning Bolt:
Embroider a lightning bolt shape onto the center of the white circle using yellow yarn or embroidery floss. Alternatively, crochet a small lightning bolt appliqué and sew it on.
Assembly
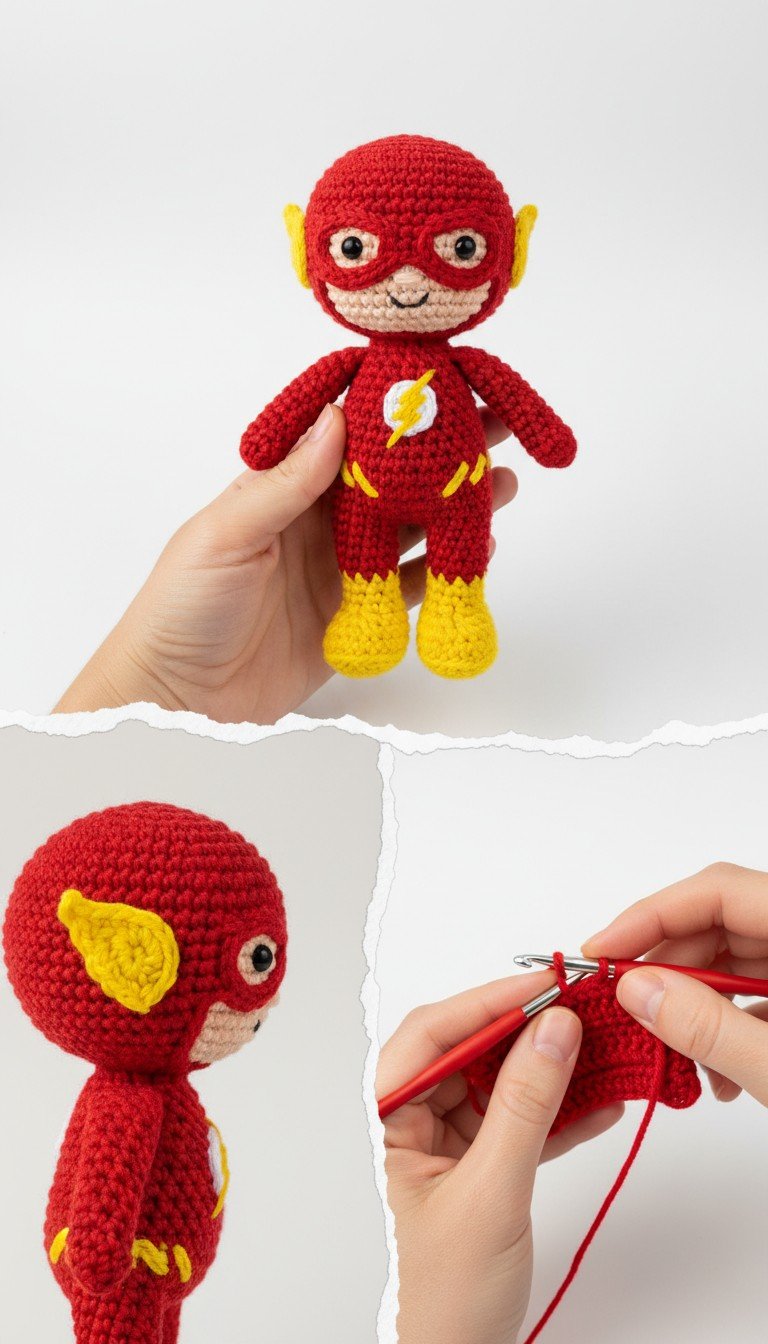
Sew the arms to the sides of the body, just below the neck.
Sew the legs to the bottom of the body.
Sew the yellow ears to the sides of the head, above the mask line.
Sew the lightning bolt emblem to the center of the chest.
Using yellow yarn, embroider small lightning bolt accents on the sides of the arms and legs as seen in the image.
Weave in all remaining loose ends. Your Flash Amigurumi is now ready for action!