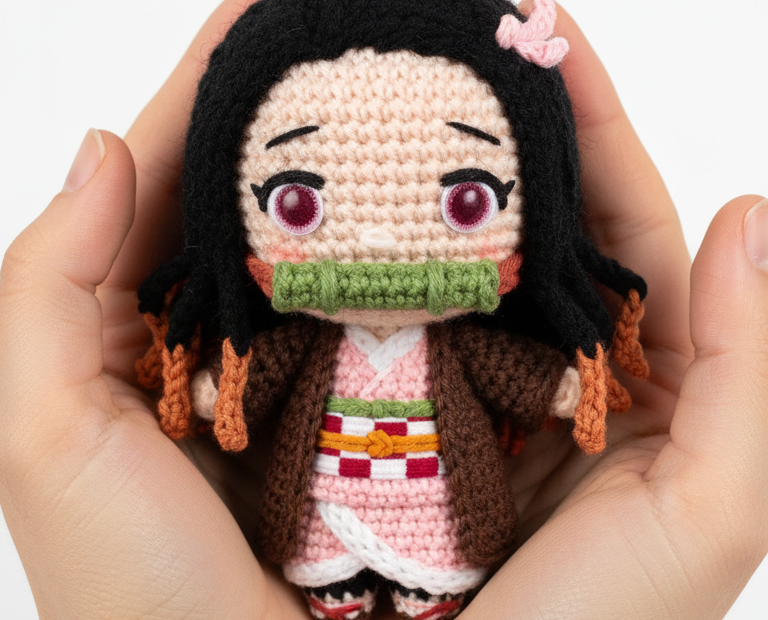
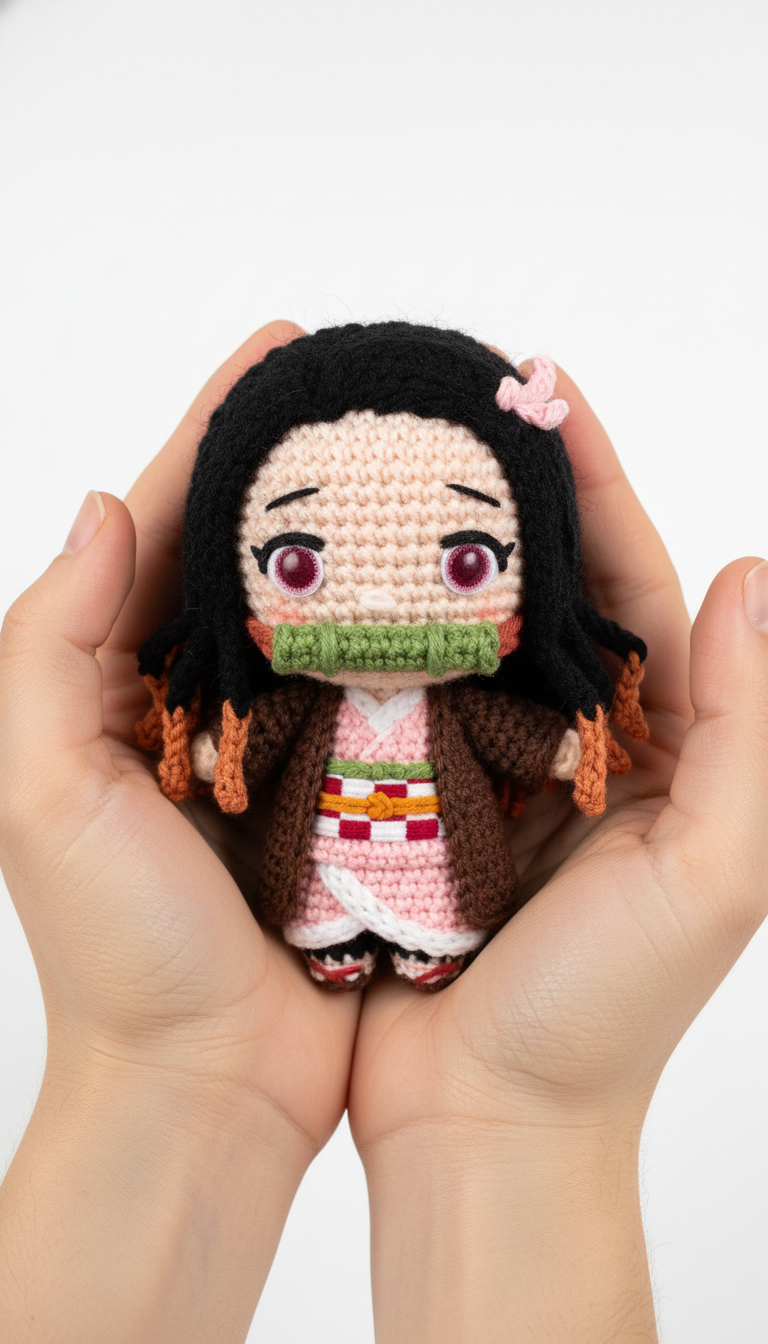
Step into the captivating world of Demon Slayer and bring home your very own adorable Nezuko Kamado with this detailed amigurumi pattern! Perfect for fans of the beloved anime, this pattern guides you through creating a charming, miniature version of Nezuko, complete with her iconic kimono, bamboo muzzle, and flowing hair. Get ready to crochet a delightful companion that captures her gentle spirit and fierce resolve!
Crafting Your Own Anime Companion
There’s immense joy in crafting characters you love, and this Nezuko amigurumi is no perfect example. Imagine gifting this handmade treasure to a fellow Demon Slayer enthusiast or proudly displaying her in your collection. This pattern empowers you to bring a piece of your favorite anime to life, adding a personal touch that store-bought merchandise simply can’t replicate. It’s more than just a doll; it’s a testament to your passion and skill.
Crochet Pattern: Crochet Your Own Adorable Nezuko Kamado: A Detailed Amigurumi Pattern
Materials
Worsted weight or DK yarn in Light Peach (skin), Black (hair, shoes), Orange (hair tips, obi), Pink (kimono, eye detail), White (kimono trim, obi, socks, eye highlight), Red (obi), Brown (haori), Green (muzzle), Light Pink (bow)
2.0mm or 2.5mm Crochet Hook
Polyester Fiberfill
Tapestry Needle
Stitch Markers
Scissors
Black, Pink/Red, and White embroidery thread for facial details
Abbreviations
MR: Magic Ring
ch: chain
sc: single crochet
inc: increase (2 sc in one stitch)
dec: decrease (sc 2 stitches together)
sl st: slip stitch
BLO: back loop only
FO: Fasten off
( ): Repeat instructions in parentheses
[ ]: Total number of stitches
Instructions
Get ready to bring Nezuko to life with these step-by-step instructions!
Head (Light Peach Yarn):
R1: MR 6sc [6]
R2: (inc) x6 [12]
R3: (sc, inc) x6 [18]
R4: (2sc, inc) x6 [24]
R5: (3sc, inc) x6 [30]
R6: (4sc, inc) x6 [36]
R7-14: sc around (8 rows) [36]
R15: (4sc, dec) x6 [30]
R16: (3sc, dec) x6 [24]
Stuff head firmly.
R17: (2sc, dec) x6 [18]
R18: (sc, dec) x6 [12]
R19: (dec) x6 [6]
FO, leave a long tail for closing.
Body (Start Pink Yarn):
R1: MR 6sc [6]
R2: (inc) x6 [12]
R3: (sc, inc) x6 [18]
R4: (2sc, inc) x6 [24]
R5: (3sc, inc) x6 [30]
R6-10: sc around (5 rows) [30]
Change to White yarn. R11: sc around [30]
Change to Red yarn. R12: sc around [30]
Change to Orange yarn. R13: sc around [30]
Change to Pink yarn. R14-16: sc around (3 rows) [30]
R17: (3sc, dec) x6 [24]
R18: (2sc, dec) x6 [18]
Stuff body.
FO, leaving a long tail for joining to head.
Arms (Make 2 – Light Peach & Pink Yarn):
Hand (Light Peach):
R1: MR 5sc [5]
R2: (inc) x5 [10]
R3-4: sc around (2 rows) [10]
Change to Pink yarn.
R5-9: sc around (5 rows) [10]
R10: (dec) x5 [5]
Stuff lightly. FO, leave tail for joining.
Legs (Make 2 – Black, White, Pink Yarn):
Foot (Black):
R1: Ch 5. Sc in 2nd ch from hook, sc in next 2 ch, 3sc in last ch. Continue on other side of chain: sc in next 2 ch, inc in last ch. [10]
R2: inc, 2sc, (inc) x3, 2sc, (inc) x2 [16]
R3: sc around BLO [16]
R4: 3sc, (dec) x4, 5sc [12]
R5: 3sc, (dec) x2, 5sc [10]
Stuff foot.
Change to White yarn. R6-7: sc around (2 rows) [10]
Change to Pink yarn. R8-12: sc around (5 rows) [10]
Stuff lightly. FO, leave tail for joining.
Hair (Black & Orange Yarn):
Hair Cap (Black):
R1: MR 6sc [6]
R2: (inc) x6 [12]
R3: (sc, inc) x6 [18]
R4: (2sc, inc) x6 [24]
R5: (3sc, inc) x6 [30]
R6: (4sc, inc) x6 [36]
R7-9: sc around (3 rows) [36]
Sl st, FO.
Hair Strands (Black with Orange tips): Cut approximately 16-20 strands of black yarn, about 8-10 inches long. For the orange tips, thread a small piece of orange yarn through the end of the black strand, knot it securely, and trim neatly. Attach strands evenly around the edge of the hair cap and some in the center for volume using a crochet hook or tapestry needle. Style as desired, creating the long, wavy look.
Muzzle (Green Yarn):
R1: MR 6sc [6]
R2-3: sc around (2 rows) [6]
Sl st, FO. Stuff lightly.
Haori (Brown Yarn):
Ch 15.
Row 1: Sc in 2nd ch from hook, sc across. [14]
Rows 2-15: Ch 1, turn, sc across. [14] (Adjust rows to fit doll’s length if needed)
Fold the rectangle in half lengthwise. Sew edges together on the bottom for the back seam, leaving openings for the arms. Sl st, FO.
Pink Bow (Light Pink Yarn):
Ch 6. Sl st into 1st ch to form a ring.
Ch 2, (dc, trc, dc) into ring, ch 2, sl st into ring. (First loop of bow)
Ch 2, (dc, trc, dc) into ring, ch 2, sl st into ring. (Second loop of bow)
Wrap yarn around the center to cinch. FO, leave tail for sewing.
Kimono Trim & Obi Details (White, Red, Orange Yarn):
Using White yarn, sl st around the neck opening and down the front opening of the pink kimono part. Also, sl st around the bottom edge of the pink kimono section.
Using White yarn, embroider thin horizontal lines above and below the Red/Orange sections on the body to define the obi.
Using Orange yarn, embroider small checkerboard or ‘X’ shapes onto the Red band of the obi to mimic the pattern.
Facial Features (Embroidery Thread – Black, Pink/Red, White):
Using Pink/Red embroidery thread, carefully embroider two almond shapes for the iris.
Using Black embroidery thread, embroider pupils within the iris.
Using White embroidery thread, add a small dot or line for highlight on each eye.
Embroider small arching eyebrows above the eyes with black thread.
Add blush to the cheeks with a light pink yarn or embroidery floss.
Assembly:
Securely sew the head to the body.
Sew the arms to the sides of the body, just below the neck.
Sew the legs to the bottom of the body.
Sew the hair cap onto the head, positioning it carefully. Attach the prepared hair strands.
Sew the green muzzle onto Nezuko’s face, positioning it under her nose.
Dress the doll in the brown haori.
Sew the light pink bow onto the side of the head, above the ear area.