Dive into the exciting world of amigurumi with our detailed pattern for crafting your very own Black Widow doll! This adorable rendition of Natasha Romanoff, complete with her iconic black suit and fiery red hair, makes a perfect gift for Marvel fans or a fantastic addition to your superhero collection. Get ready to crochet a super-spy!
Unleash Your Inner Hero: Crafting Your Own Amigurumi Black Widow
There’s immense satisfaction in bringing beloved characters to life with your own hands. This Black Widow amigurumi pattern not only provides a fun and engaging crochet project but also allows you to create a personalized, handmade tribute to one of Marvel’s most iconic heroines. Display her proudly, gift her to a fellow fan, or use her for imaginative play.
Crochet Pattern: Crochet Your Own Agile Avenger: The Black Widow Amigurumi Doll Pattern
Materials
Worsted weight yarn in: Black, Nude/Skin Tone, Reddish Brown, Red
2.5mm crochet hook
6mm black safety eyes
Polyester fiberfill for stuffing
Tapestry needle
Stitch markers
Embroidery floss in Black (for mouth) and Pink (for cheeks)
Scissors
Abbreviations
MR: Magic Ring
ch: Chain
sl st: Slip Stitch
sc: Single Crochet
inc: Increase (2 sc in one stitch)
dec: Decrease (sc 2 stitches together)
FO: Fasten Off
BLO: Back Loop Only
Rnd: Round
(X): Stitch count at the end of the round
Instructions
This pattern is worked in continuous rounds unless otherwise specified. Use a stitch marker to keep track of the first stitch of each round.
Head (Nude/Skin Tone Yarn)
Rnd 1: MR with 6 sc (6)
Rnd 2: [inc] x 6 (12)
Rnd 3: [sc, inc] x 6 (18)
Rnd 4: [2 sc, inc] x 6 (24)
Rnd 5: [3 sc, inc] x 6 (30)
Rnd 6-12: sc around (30) (7 rounds)
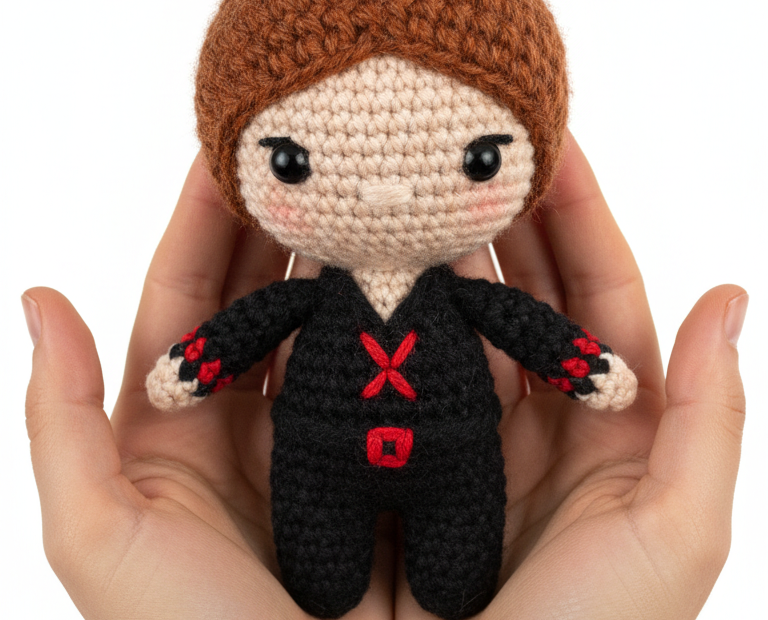
Place safety eyes between Rnd 9 and 10, about 6-7 stitches apart. Lightly embroider eyebrows above eyes with black yarn. Embroider a small V-shape for the mouth between Rnd 7 and 8. Add a touch of pink blush to the cheeks.
Rnd 13: [3 sc, dec] x 6 (24)
Rnd 14: [2 sc, dec] x 6 (18)
Stuff firmly.
Rnd 15: [sc, dec] x 6 (12)
Rnd 16: [dec] x 6 (6)
FO, leave a long tail for sewing if attaching separately, or continue with body.
Body (Black Yarn)
If continuing from head, change to Black yarn here. Otherwise, start with MR.
Rnd 1 (If starting new): MR with 6 sc (6)
Rnd 2 (If starting new): [inc] x 6 (12)
Rnd 3 (If starting new): [sc, inc] x 6 (18)
Rnd 4 (If starting new): [2 sc, inc] x 6 (24)
Rnd 1 (If continuing from head): sc around (6)
Rnd 2: [inc] x 6 (12)
Rnd 3: [sc, inc] x 6 (18)
Rnd 4: [2 sc, inc] x 6 (24)
Rnd 5-10: sc around (24) (6 rounds)
Rnd 11: [2 sc, dec] x 6 (18)
Rnd 12-14: sc around (18) (3 rounds)
Stuff body firmly as you go. FO and weave in ends if making legs separately.
Legs (Make 2, Black Yarn)
Rnd 1: MR with 6 sc (6)
Rnd 2: [sc, inc] x 3 (9)
Rnd 3-8: sc around (9) (6 rounds)
Lightly stuff. FO, leave a long tail for sewing.
Arms (Make 2, Black Yarn)
Rnd 1: MR with 5 sc (5)
Rnd 2: [inc] x 5 (10)
Rnd 3-8: sc around (10) (6 rounds)
Rnd 9: Change to Nude/Skin Tone yarn. sc around (10)
Rnd 10: Change to Black yarn. sc around (10)
Rnd 11: Change to Red yarn. sc around (10)
Rnd 12: dec x 5 (5)
Lightly stuff the arm. FO, leave a long tail for sewing. Using the tapestry needle and red yarn, embroider small X shapes or criss-cross patterns onto the red and black sections of the cuff for detail, mimicking the image.
Hair Cap (Reddish Brown Yarn)
Rnd 1: MR with 6 sc (6)
Rnd 2: [inc] x 6 (12)
Rnd 3: [sc, inc] x 6 (18)
Rnd 4: [2 sc, inc] x 6 (24)
Rnd 5: [3 sc, inc] x 6 (30)
Rnd 6-9: sc around (30) (4 rounds)
FO, leave a long tail for sewing.
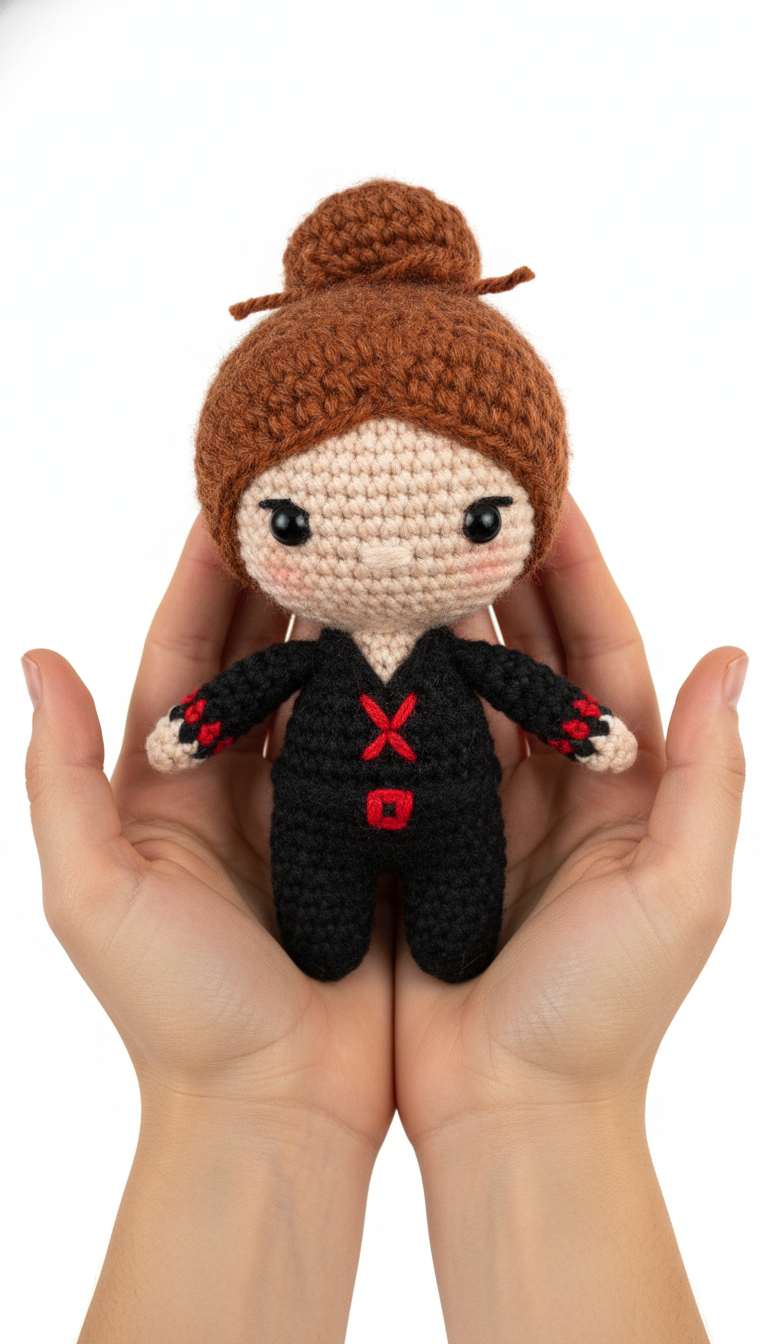
Hair Bun (Reddish Brown Yarn)
Rnd 1: MR with 6 sc (6)
Rnd 2: [inc] x 6 (12)
Rnd 3: [sc, inc] x 6 (18)
Rnd 4-5: sc around (18) (2 rounds)
Rnd 6: [sc, dec] x 6 (12)
Stuff lightly. FO, leave a long tail for sewing.
Assembly
1. Head and Body: If not crocheted together, sew the head securely to the top of the body.
2. Legs: Sew the two legs to the bottom of the body, positioning them so the doll can sit or stand.
3. Arms: Sew the arms to the sides of the body, just below the neck.
4. Hair: Sew the hair cap onto the head, positioning it as seen in the image. Then sew the hair bun onto the top/back of the hair cap.
5. Suit Details: Using Red yarn, embroider a large ‘X’ on the chest area of the black suit. Below that, embroider a small red rectangle or square shape for the ‘belt buckle’.