
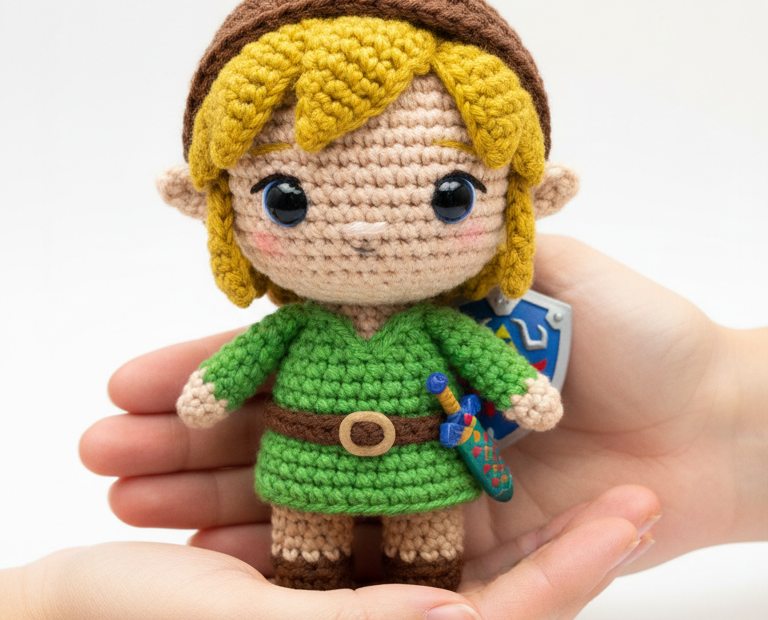
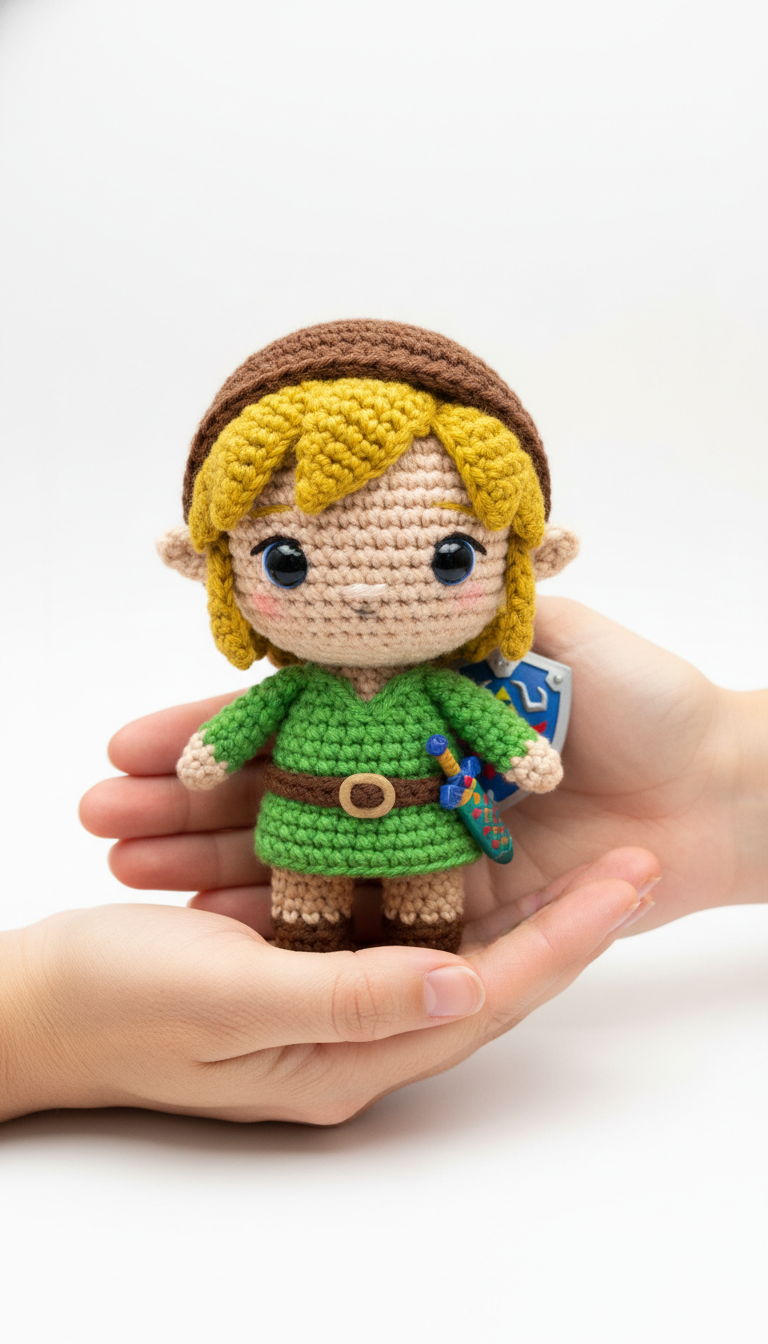
Embark on a legendary crafting quest with this adorable Link Amigurumi pattern! Perfect for fans of The Legend of Zelda, this detailed guide will help you create a charming, pint-sized hero ready for any adventure. With his iconic green tunic, master sword, and Hylian shield, this little Link makes a fantastic gift or a treasured addition to your own collection.
Bring the World of Hyrule to Life with Yarn
Unleash your inner crafter and crochet a piece of your favorite video game history. This pattern is designed to be enjoyable for intermediate crocheters, offering a rewarding project that results in a high-quality, recognizable character. Imagine the joy of holding your very own Hylian hero, crafted with love and skill, ready to save Princess Zelda!
Crochet Pattern: Crochet Your Own Hero: Adorable Link Amigurumi Pattern
Materials
- Worsted weight yarn in: Light Beige (skin), Bright Yellow (hair), Emerald Green (tunic), Medium Brown (belt, boots), Dark Brown (cap), Sky Blue (shield, sword), White (eye reflection), Black (eyes, mouth)
- Small amounts of Red and Gold/Mustard yarn (for shield, sword details)
- 2.5mm or 3.0mm crochet hook (or size suitable for your yarn to achieve tight stitches)
- 6mm or 8mm black safety eyes
- Fiberfill stuffing
- Tapestry needle
- Stitch markers
- Embroidery floss in pink (for cheeks)
Abbreviations
- MR: Magic Ring
- ch: chain
- sc: single crochet
- inc: increase (2 sc in next stitch)
- dec: decrease (single crochet 2 stitches together)
- sl st: slip stitch
- FO: Fasten Off
- BLO: Back Loop Only
- R: Round/Row
Instructions
Important Note: This pattern is worked in continuous rounds unless otherwise specified. Use a stitch marker to keep track of the first stitch of each round.
Head (Light Beige yarn):
- R1: 6 sc in MR (6)
- R2: (inc) x6 (12)
- R3: (sc, inc) x6 (18)
- R4: (2 sc, inc) x6 (24)
- R5: (3 sc, inc) x6 (30)
- R6: (4 sc, inc) x6 (36)
- R7: (5 sc, inc) x6 (42)
- R8-R14: sc around (42) (7 rounds)
- Insert safety eyes between R11 and R12, about 6-7 stitches apart. Start stuffing firmly.
- R15: (5 sc, dec) x6 (36)
- R16: (4 sc, dec) x6 (30)
- R17: (3 sc, dec) x6 (24)
- R18: (2 sc, dec) x6 (18)
- Sl st to next st, FO, leaving a long tail for sewing. Finish stuffing.
Body (Start with Emerald Green yarn):
- R1: 6 sc in MR (6)
- R2: (inc) x6 (12)
- R3: (sc, inc) x6 (18)
- R4: (2 sc, inc) x6 (24)
- R5: (3 sc, inc) x6 (30)
- R6-R10: sc around (30) (5 rounds)
- Change to Light Beige yarn.
- R11: In BLO, sc around (30)
- R12-R14: sc around (30) (3 rounds)
- R15: (3 sc, dec) x6 (24)
- R16: sc around (24)
- R17: (2 sc, dec) x6 (18)
- R18: sc around (18)
- Stuff the body firmly. Sl st, FO, leaving a long tail for sewing to the head.
Legs (Make 2) (Start with Medium Brown yarn for Boots):
- R1: 6 sc in MR (6)
- R2: (inc) x6 (12)
- R3: (sc, inc) x6 (18)
- R4: sc around (18)
- R5: (sc, dec) x6 (12)
- Change to Light Beige yarn.
- R6: In BLO, sc around (12)
- R7-R10: sc around (12) (4 rounds)
- Stuff firmly. Sl st, FO, leaving a long tail for sewing to the body.
Arms (Make 2) (Start with Light Beige yarn):
- R1: 6 sc in MR (6)
- R2-R6: sc around (6) (5 rounds)
- Change to Emerald Green yarn.
- R7-R11: sc around (6) (5 rounds)
- Stuff lightly. Sl st, FO, leaving a long tail for sewing to the body.
Ears (Make 2) (Light Beige yarn):
- R1: 4 sc in MR (4)
- R2: (sc, inc) x2 (6)
- R3: (2 sc, inc) x2 (8)
- R4: sc around (8)
- Fold flat and sc through both sides to close. FO, leaving a long tail for sewing.
Hair (Bright Yellow yarn):
- R1: 6 sc in MR (6)
- R2: (inc) x6 (12)
- R3: (sc, inc) x6 (18)
- R4: (2 sc, inc) x6 (24)
- R5: (3 sc, inc) x6 (30)
- R6: (4 sc, inc) x6 (36)
- R7: (5 sc, inc) x6 (42)
- R8-R10: sc around (42) (3 rounds)
- To create the fringe: For each strand, ch 5, starting in 2nd ch from hook, sl st across next 4 ch. Then sl st into the next stitch on the wig cap. Repeat this for approximately 10-12 stitches around the front edge to form the bangs.
- FO, leaving a long tail for sewing to the head.
Cap (Dark Brown yarn):
- R1: 4 sc in MR (4)
- R2: (sc, inc) x2 (6)
- R3: sc around (6)
- R4: (2 sc, inc) x2 (8)
- R5: sc around (8)
- R6: (3 sc, inc) x2 (10)
- R7: sc around (10)
- R8: (4 sc, inc) x2 (12)
- R9: sc around (12)
- R10: (5 sc, inc) x2 (14)
- R11-R12: sc around (14)
- R13: (6 sc, inc) x2 (16)
- R14-R15: sc around (16)
- R16: (7 sc, inc) x2 (18)
- R17-R18: sc around (18)
- FO, leaving a long tail for sewing. No need to stuff.
Belt (Medium Brown yarn):
- Ch 30 (adjust length as needed to fit around the body). Sc in 2nd ch from hook and across. (29 sc)
- Small Buckle (Gold/Mustard yarn): Ch 8, sl st to first ch to form a ring. FO. Attach buckle to the middle of the belt.
- Wrap belt around R11 of the body (just above the beige section) and sew ends together at the back.
Sword (Simplified Version – Blue, Gold/Mustard, Red yarn):
- Blade (Sky Blue yarn): Ch 5. Starting in 2nd ch from hook, sc in next 4 st. (4) Repeat for 8 rows. FO.
- Hilt (Gold/Mustard yarn): Ch 6, sc in 2nd ch from hook and across (5). Work 2 more rows. Attach to blade.
- Pommel (Red yarn): 4 sc in MR. (inc) x4 (8). sc around (8). (dec) x4 (4). FO. Attach to hilt.
Shield (Simplified Version – Sky Blue, Yellow, Red, White yarn):
- Main Shield (Sky Blue yarn): Ch 2. 6 sc in 2nd ch from hook (6). R2: (inc) x6 (12). R3: (sc, inc) x6 (18). R4: (2 sc, inc) x6 (24). R5: sc around (24). R6: (3 sc, inc) x6 (30). R7: sc around (30). Sl st, FO, leaving a tail.
- Triforce (Yellow yarn): Embroider or cut tiny felt triangles and glue/sew onto the shield.
- Bird Crest (Red and White yarn): Embroider a simplified red bird shape with white details onto the shield.
Assembly:
- Sew the Head to the top of the Body, ensuring it’s centered and secure.
- Sew the Legs to the bottom of the Body.
- Sew the Arms to the sides of the Body/tunic at shoulder height.
- Sew the Ears to the sides of the Head, just below the cap line.
- Position and sew the Hair cap to the Head, ensuring the bangs frame the face.
- Place the Dark Brown Cap on top of the Hair and sew it securely in place.
- Attach the crocheted Belt with its buckle around the waist.
- Facial Details: Embroider a small straight line for the mouth with black embroidery floss. Use pink embroidery floss or blush makeup to add rosy cheeks. Add small white stitches (or paint dots) on the safety eyes for reflections.
- Sew the crocheted Sword to one of Link’s hands and the crocheted Shield to the other hand or his back.