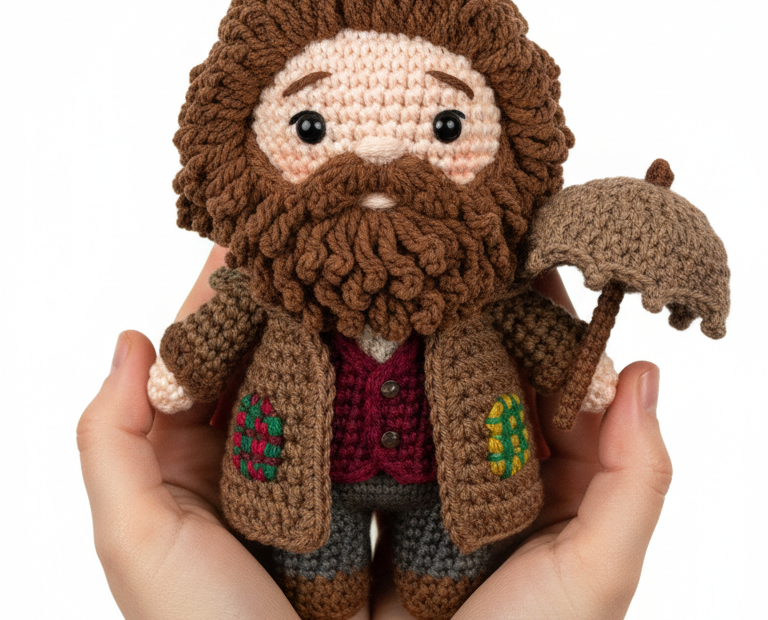
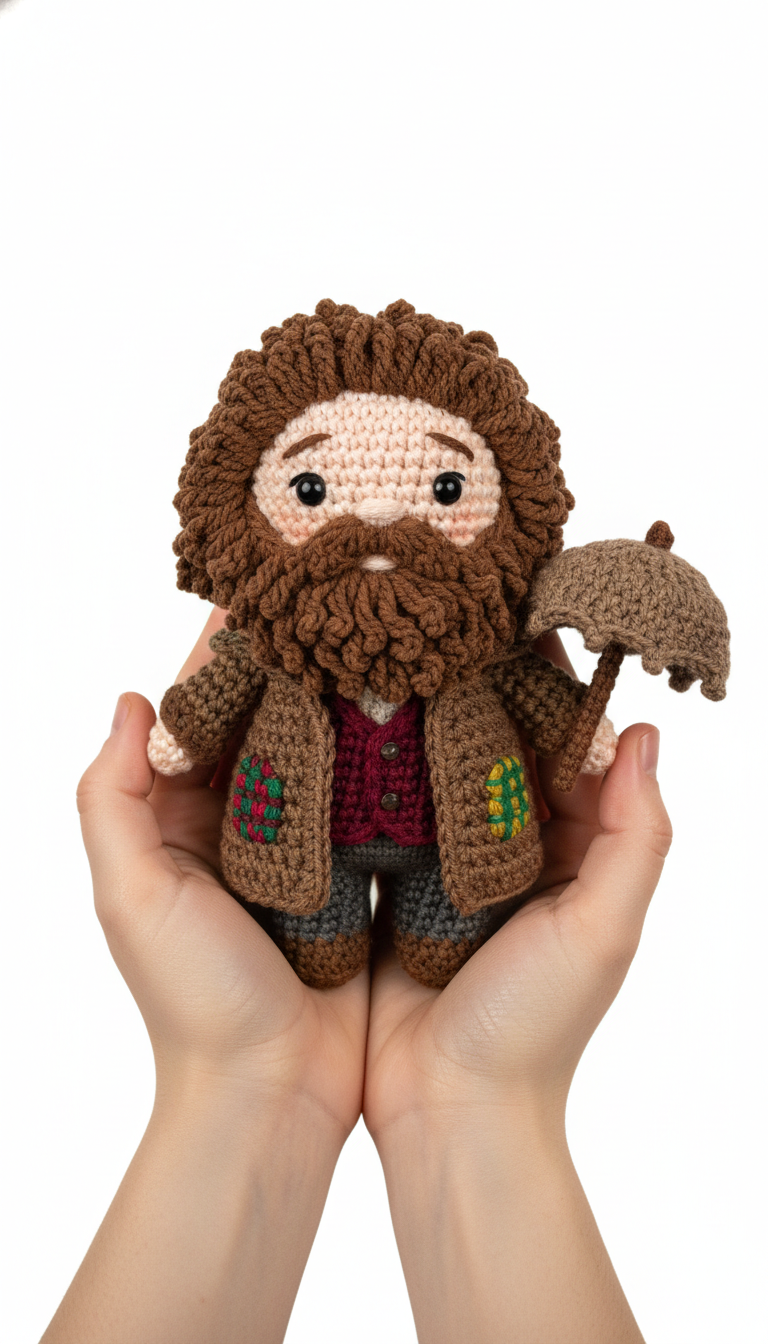
Step into a world of magic with our free Crochet Magical Keeper Doll pattern! This adorable amigurumi project captures the essence of a beloved, kind-hearted giant, complete with his rugged coat and signature umbrella. Perfect for fans of fantasy, this pattern guides you through creating a charming, textured doll that makes a wonderful gift or a treasured addition to your own collection. Get ready to bring this gentle protector to life with your hook and yarn!
Craft a Companion from the Enchanted Woods
There’s something truly special about creating a character that evokes warmth and wonder. This Magical Keeper doll isn’t just a toy; it’s a handcrafted friend, a symbol of kindness and loyalty, reminiscent of stories whispered by a crackling fire. Whether you’re making it for a child, a fellow fan, or yourself, this amigurumi brings a touch of whimsical charm and a tangible piece of storytelling into any home.
Crochet Pattern: Crochet Your Own Magical Keeper Doll: A Gentle Giant Amigurumi Pattern
Materials
Worsted weight yarn in: Light Peach (skin), Dark Brown (hair, beard, boots, umbrella), Medium Brown (coat), Dark Red (vest), Dark Grey (pants), Small amounts of Green, Red, Yellow (patches), Black (for embroidery)
2.5mm crochet hook (or size suitable for your yarn to achieve tight stitches)
6mm safety eyes
Fiberfill stuffing
Tapestry needle
Stitch marker
Scissors
Abbreviations
MR: Magic Ring
ch: chain
sc: single crochet
inc: increase (2 sc in one stitch)
dec: decrease (sc 2 together)
FLO: front loop only
BLO: back loop only
st(s): stitch(es)
sl st: slip stitch
(…) x N: repeat instructions in parenthesis N times
[…] : total number of stitches in round
Instructions
Head (Light Peach)
R1: MR 6 sc [6]
R2: 6 inc [12]
R3: (sc, inc) x 6 [18]
R4: (2 sc, inc) x 6 [24]
R5: (3 sc, inc) x 6 [30]
R6-R11: sc around (6 rounds) [30]
Insert safety eyes between R9 and R10, about 6-7 stitches apart.
R12: (3 sc, dec) x 6 [24]
R13: (2 sc, dec) x 6 [18]
R14: (sc, dec) x 6 [12]
Stuff head firmly.
Body (Integrated with Vest & Pants)
Neck (Light Peach)
R15: sc around [12]
Change to Dark Red
Vest (Dark Red)
R16: (sc, inc) x 6 [18]
R17: (2 sc, inc) x 6 [24]
R18-R22: sc around (5 rounds) [24]
Change to Dark Grey
Pants (Dark Grey)
R23: BLO sc around [24] (This creates a distinct waistline for the vest)
R24-R27: sc around (4 rounds) [24]
R28: (2 sc, dec) x 6 [18]
R29: (sc, dec) x 6 [12]
R30: 6 dec [6]
Stuff body firmly as you go. Fasten off, leave a long tail for sewing.
Legs (make 2)
Boot (Dark Brown)
R1: ch 6, sc in 2nd ch from hook, 3 sc, 3 sc in last st, continue on other side of ch: 3 sc, inc [12]
R2: inc, 3 sc, (inc, sc) x 2, inc, 3 sc, inc [18]
R3: sc around BLO [18]
R4-R5: sc around [18]
R6: 5 sc, 4 dec, 5 sc [14]
R7: 4 sc, 3 dec, 4 sc [11]
Stuff toe lightly.
Change to Dark Grey
R8: sc around [11]
R9-R14: sc around (6 rounds) [11]
Stuff firmly. Flatten opening and sc across 5 sts to close. Leave a long tail for sewing.
Arms (make 2)
Hand (Light Peach)
R1: MR 6 sc [6]
R2-R5: sc around (4 rounds) [6]
Stuff hand lightly.
Change to Medium Brown
Sleeve (Medium Brown)
R6: sc around [6]
R7: (sc, inc) x 3 [9]
R8-R14: sc around (7 rounds) [9]
Flatten opening and sc across 4 sts to close. Leave a long tail for sewing.
Hair (Dark Brown)
R1: MR 6 sc [6]
R2: 6 inc [12]
R3: (sc, inc) x 6 [18]
R4: (2 sc, inc) x 6 [24]
R5: (3 sc, inc) x 6 [30]
R6-R10: Working in loop stitch (pulling long loops), sc around [30]
Fasten off, leave a long tail for sewing. (Trim loops to desired shaggy length after assembly).
Beard (Dark Brown)
Ch 15.
R1: sc in 2nd ch from hook, 13 sc [14]
R2-R6: ch 1, turn, working in loop stitch, sc across [14]
R7: ch 1, turn, dec, 10 sc, dec [12]
R8: ch 1, turn, working in loop stitch, sc across [12]
Fasten off, leave a long tail for sewing. (Trim loops to desired shaggy length after assembly).
Coat (Medium Brown)
Back Panel: Ch 11. R1: sc in 2nd ch from hook, 9 sc [10]. R2-R10: ch 1, turn, sc across [10]. Fasten off.
Front Panels (make 2): Ch 6. R1: sc in 2nd ch from hook, 4 sc [5]. R2-R10: ch 1, turn, sc across [5]. Fasten off.
Sleeves (make 2): R1: MR 6 sc [6]. R2: 6 inc [12]. R3-R10: sc around [12]. Fasten off, leave a long tail.
Umbrella (Dark Brown)
Top: R1: MR 6 sc [6]. R2: 6 inc [12]. R3: (sc, inc) x 6 [18]. R4: (2 sc, inc) x 6 [24]. R5: sc around FLO [24]. R6: sc around [24]. R7: (2 sc, dec) x 6 [18]. R8: (sc, dec) x 6 [12]. Stuff lightly. R9: 6 dec [6]. Fasten off.
Handle: Ch 8. Sl st in 2nd ch from hook and next 6 ch. Fasten off.
Assembly
1. Sew the finished legs to the bottom of the body, positioning them so the doll can sit or stand.
2. Sew the arms to the sides of the body, just below the neck.
3. Sew the hair cap to the top of the head.
4. Sew the beard to the lower part of the face, covering the chin and mouth area.
5. Embroider eyebrows above the safety eyes using black yarn.
6. Assemble the coat: Sew the side seams of the front panels to the back panel, then sew the shoulder seams. Attach the sleeves to the armholes.
7. Dress the doll in the coat. Secure it with a few hidden stitches if desired.
8. Embroider colorful patches onto the coat sleeves: use Red and Green yarn for one sleeve (e.g., a simple criss-cross or square stitch) and Yellow and Green yarn for the other.
9. Sew the umbrella handle to the inside of the umbrella top. Place the finished umbrella in the doll’s hand and secure with a few stitches.