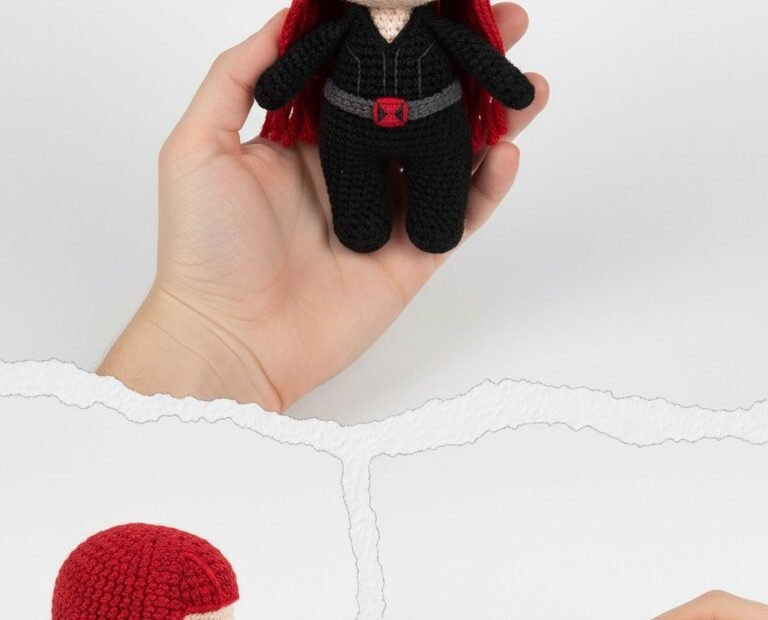
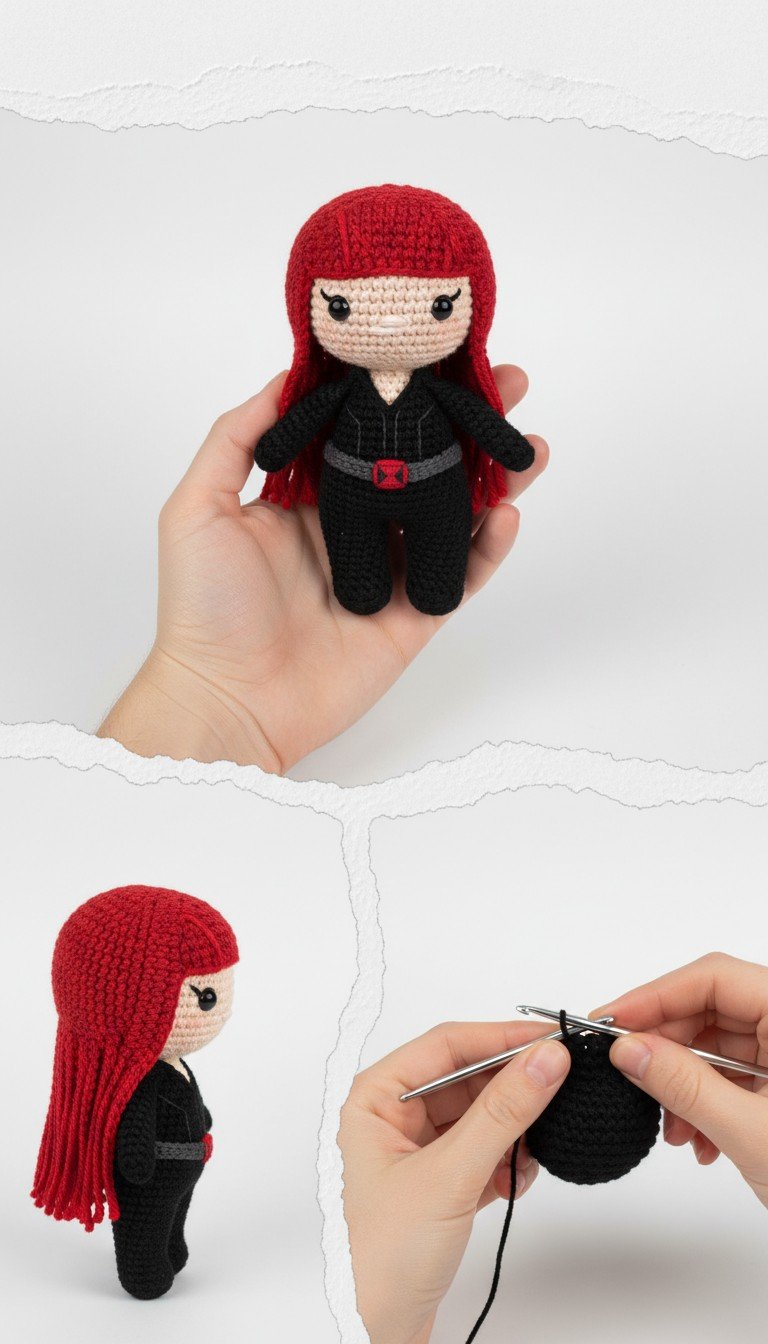
Unleash your inner superhero crafter with this detailed Black Widow Amigurumi pattern! Perfect for Marvel fans and crochet enthusiasts alike, this pattern guides you through creating your very own Natasha Romanoff doll. Featuring her iconic black suit and fiery red hair, this amigurumi makes a fantastic gift or a fierce addition to your collection.
Bring the Heroic Black Widow to Life with Yarn
Imagine the joy of holding a miniature, handmade version of your favorite Avenger! This Black Widow amigurumi isn’t just a pattern; it’s an opportunity to express your fandom and creativity. Whether for display, play, or as a thoughtful gift for a fellow Marvel devotee, crafting this superhero will bring immense satisfaction and a unique piece of fan art to cherish.
Crochet Pattern: Crochet Your Own Marvel Hero: The Black Widow Amigurumi Pattern
Materials
Worsted weight yarn in Black, Red, Skin Tone (Light Peach/Beige), and Grey
2.5mm or 3.0mm crochet hook (or size appropriate for your yarn and desired tension)
Polyester fiberfill for stuffing
Black embroidery floss for eyes and suit details (optional: 9mm safety eyes)
Tapestry needle
Stitch markers
Abbreviations
MR: Magic Ring
ch: chain
sc: single crochet
inc: increase (2 sc in one stitch)
dec: decrease (sc 2 stitches together)
sl st: slip stitch
FO: Fasten Off
(X) after a round: indicates the number of stitches in that round
Instructions
This pattern is worked in continuous rounds unless otherwise specified. Use a stitch marker to keep track of the beginning of each round.
Head (Skin Tone)
Rnd 1: MR 6 sc (6)
Rnd 2: 6 inc (12)
Rnd 3: (1 sc, 1 inc) x 6 (18)
Rnd 4: (2 sc, 1 inc) x 6 (24)
Rnd 5: (3 sc, 1 inc) x 6 (30)
Rnd 6: (4 sc, 1 inc) x 6 (36)
Rnd 7-13: Sc in each st around (36) – 7 rounds
If using safety eyes, insert between Rnd 10 and 11, about 6-7 stitches apart.
Rnd 14: (4 sc, 1 dec) x 6 (30)
Rnd 15: (3 sc, 1 dec) x 6 (24)
Stuff head firmly.
Rnd 16: (2 sc, 1 dec) x 6 (18)
Rnd 17: (1 sc, 1 dec) x 6 (12)
FO, leaving a long tail for sewing.
Body (Black and Skin Tone)
Start with the legs (make 2) in Black.
Legs (Make 2)
Rnd 1: MR 6 sc (6)
Rnd 2: 6 inc (12)
Rnd 3-7: Sc in each st around (12) – 5 rounds
For the first leg, FO. For the second leg, do NOT FO.
Joining Legs and Body
Rnd 8: From the second leg, ch 2, join with a sc to any stitch on the first leg. Sc 11 around the first leg, sc 2 in the ch, sc 12 around the second leg, sc 2 in the other side of the ch (28)
Rnd 9-14: Sc in each st around (28) – 6 rounds
Stuff legs firmly as you go.
Rnd 15: (5 sc, 1 dec) x 4 (24)
Rnd 16: Sc in each st around (24)
Rnd 17: (4 sc, 1 dec) x 4 (20)
Rnd 18: Sc in each st around (20)
Rnd 19: (3 sc, 1 dec) x 4 (16)
Rnd 20: Sc in each st around (16)
Change to Skin Tone yarn for the neck.
Rnd 21: Sc in each st around (16)
Stuff body firmly. FO, leaving a long tail for sewing.
Arms (Make 2, Black)
Rnd 1: MR 5 sc (5)
Rnd 2: 5 inc (10)
Rnd 3-9: Sc in each st around (10) – 7 rounds
Stuff lightly.
Rnd 10: (3 sc, 1 dec) x 2 (8)
Flatten the opening and sc 4 across to close. FO, leaving a long tail for sewing.
Hair (Red)
Cap:
Rnd 1: MR 6 sc (6)
Rnd 2: 6 inc (12)
Rnd 3: (1 sc, 1 inc) x 6 (18)
Rnd 4: (2 sc, 1 inc) x 6 (24)
Rnd 5: (3 sc, 1 inc) x 6 (30)
Rnd 6: (4 sc, 1 inc) x 6 (36)
Rnd 7-11: Sc in each st around (36) – 5 rounds
Fringe/Bangs: (Adjust placement on doll later)
Row 12: Ch 9, starting in 2nd ch from hook, 8 sc. Skip next 2 stitches on cap, sl st in next. (This forms one bang strand)
Repeat for 4-5 strands, adjusting length by changing chain count.
Side Hair Strands:
For longer strands, ch 20-25, starting in 2nd ch from hook, sc in each chain. Sl st into the edge of the hair cap. Repeat around the sides and back, creating several long strands.
FO, leaving a tail for sewing.
Assembly and Details
Sew the head to the body, ensuring it’s centered and secure.
Sew the arms to the sides of the body, just below the neck.
Position the hair cap on the head, aligning the bangs, and sew securely around the edges.
Belt (Grey and Red):
Cut a strip of grey yarn to fit around the waist of the doll. Stitch it around the doll to create the belt.
Using red yarn, embroider an hourglass shape onto the center of the grey belt for the Black Widow buckle.
Suit Details (Black):
Using black embroidery floss, stitch vertical lines on the front of the suit to mimic the details of her costume.
Facial Features (Black):
Embroider small oval eyes with black embroidery floss.