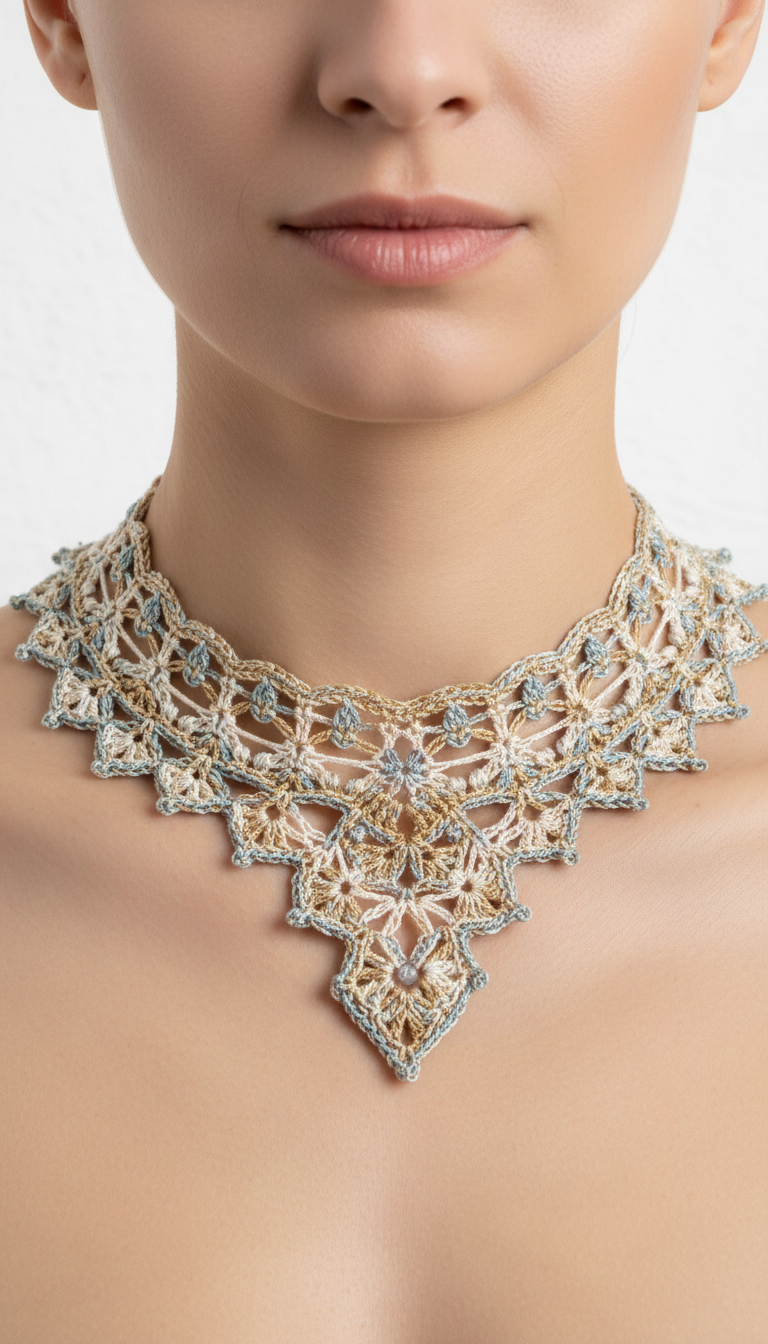
Unveil your inner artisan with this exquisite crochet lace choker pattern. Inspired by vintage elegance, this delicate accessory features a mesmerizing blend of cream, gold, and dusty blue threads, creating a sophisticated statement piece. Perfect for adding a touch of handmade charm to any outfit, this pattern guides you through crafting a truly unique necklace.
Embrace Timeless Elegance with Handmade Crochet Jewelry
There’s an undeniable allure to handmade jewelry, and this crochet lace choker is no exception. Crafting your own allows for personalization and the satisfaction of wearing a piece infused with your unique touch. Its intricate design and elegant color palette make it a versatile addition to both casual and formal ensembles, elevating your style with a touch of vintage-inspired sophistication.
1 Small Jewelry Clasp (e.g., lobster clasp with a jump ring)
Tapestry Needle
Scissors
Abbreviations
Ch: Chain
Sl St: Slip Stitch
Sc: Single Crochet
Dc: Double Crochet
Tr: Treble Crochet
Picot: Ch 3, Sl St in 1st ch
Instructions
Part 1: Lace Module (Make 7-9 depending on desired necklace length/width)
With Yarn B, Ch 6, Sl St to form a ring.
Round 1: Ch 3 (counts as 1 dc), 15 dc in ring. Sl St to top of Ch 3. (16 dc)
Round 2: With Yarn C, join with Sl St in any dc. Ch 1, Sc in same dc. *Ch 3, skip 1 dc, Sc in next dc*. Repeat 7 times. Ch 3, Sl St to first Sc. (8 Sc, 8 Ch-3 loops). Fasten off Yarn C.
Round 3: With Yarn A, join with Sl St in any Ch-3 loop. Ch 3, (2 dc, Ch 2, 3 dc) in same loop. *Ch 1, (3 dc, Ch 2, 3 dc) in next Ch-3 loop*. Repeat 7 times. Ch 1, Sl St to top of Ch 3. (8 ‘petal’ groups separated by Ch-1). Fasten off Yarn B.
Part 2: Assembly
Carefully arrange your completed Lace Modules to form the desired V-shape of the choker. The general structure in the image suggests:
One module for the central bottom point.
A layer of two modules on each side, joined to the central module and each other.
An outermost layer of one or two modules on each side, joined to the previous layer, creating the widening effect.
Central Module: Take one completed Lace Module. Attach the small seed bead to the lowest Ch-2 space of its Round 3. This will be the absolute bottom tip of your necklace.
Joining: Using Yarn A and your hook, align the Ch-2 spaces from Round 3 of adjacent modules. Use Sl St or Sc to connect these points securely. For the main body, you will typically join 2-3 points of one module to 2-3 points of its neighboring modules to create a strong, continuous fabric. Ensure symmetry as you build out the V-shape.
Connecting Gaps: Where modules meet and there are small open spaces, use Yarn A to create small connecting lace bridges (e.g., Ch 3, Sc into adjacent motif, Ch 3) to fill in gaps and ensure all motifs are securely attached and the necklace holds its shape.
Part 3: Top Edging (Neckline)
Once all the main body motifs are joined and secured, work a continuous edging along the top (straighter) edge of the necklace to create a neat finish.
With Yarn A, join with Sc at one end of the top edge.
Row 1: Work a continuous row of Sc, evenly spaced across the entire top edge of the necklace. Work into Ch-spaces and tops of stitches of the outermost motifs, aiming for approximately 2 Sc per Ch-space and 1 Sc per stitch.
Row 2 (Scalloped Edge with Yarn B): With Yarn B, join with Sc at the beginning of the row. Ch 1, Sc in first Sc. *Skip 1 Sc, (Dc, Picot, Dc) in next Sc, skip 1 Sc, Sc in next Sc*. Repeat across the top edge. This creates the small scalloped border. Fasten off Yarn B.
Part 4: Finishing & Clasp
Weave in all loose ends carefully with your tapestry needle, ensuring no threads are visible.
Gently block your necklace. Pin it flat onto a foam board or towel, spray lightly with water, and let it dry completely to help define the lace and shape.
Attach one side of your jewelry clasp to one end of the top edging (e.g., into an Sc from Row 2), and the other side (e.g., a jump ring for a lobster clasp) to the other end.