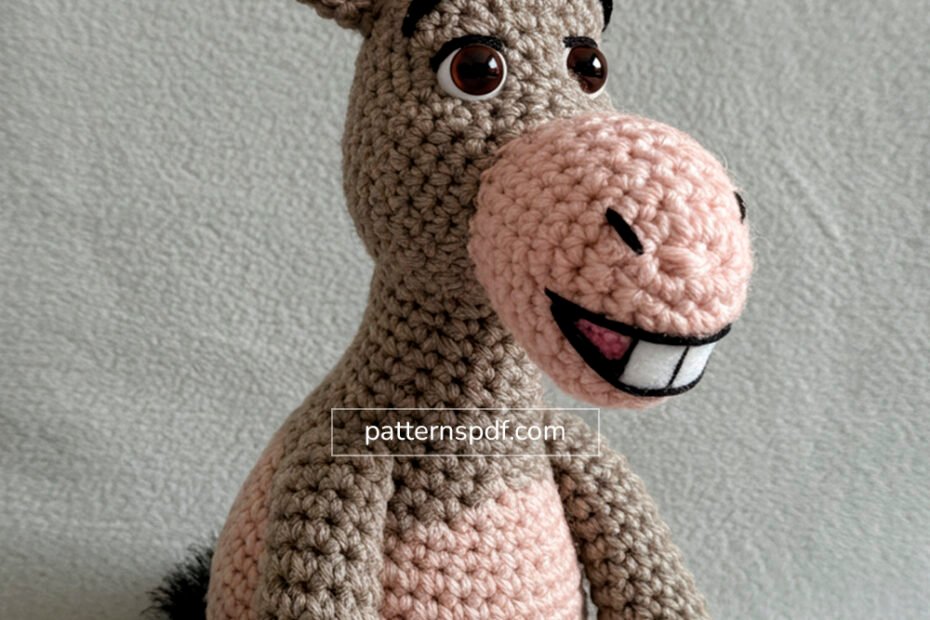
Donkey Shrek Amigurumi brings the beloved, talkative sidekick from the Shrek movies directly into your home in an adorable, handcrafted form. This crocheted masterpiece perfectly captures Donkey’s iconic features: his signature long ears with pink insides, that instantly recognizable wide, toothy grin, and his characteristic grey and pink coloring. From his expressive eyes to the fluffy black mane and tail tuft, every detail of this amigurumi is meticulously crafted, showcasing a true dedication to character accuracy. This charming Donkey is more than just a toy; he’s a piece of movie magic, ready to bring endless smiles to fans of all ages and a fantastic addition to any amigurumi collection.
Donkey Shrek Amigurumi: Tips for Your Amigurumi Project
For those eager to recreate this lovable character, crocheting Donkey from Shrek offers a delightful and rewarding project. While a specific pattern isn’t provided here, studying the image reveals the intricate shaping and color changes involved. The main body and head are likely worked in continuous rounds of single crochet, forming his distinct donkey shape. The challenge and fun lie in crafting his expressive features: the large, well-defined ears, the detailed snout with its wide, open mouth, and the white teeth that give him so much personality. Adding the fluffy mane and tail tuft with black yarn or faux fur techniques will complete his look. With careful attention to detail and a love for the character, crocheters can bring this iconic animated friend to life, stitch by hilarious stitch.
Donkey (Shrek) Amigurumi Pattern: Crochet Your Favorite Sidekick!
Skill Level: Intermediate
Finished Size: Approximately [X] inches / [Y] cm tall (when made with specified yarn and hook).
Rounds 7-10: Sc in each st around. (15) – Adjust for desired ear height.
FO, do not stuff.
Inner Ears (Make 2 – Light Pink Yarn)
Round 1: 6 sc in MR. (6)
Round 2: [Sc, inc] x3. (9)
Round 3: Sc in each st around. (9)
Round 4: [2 sc, inc] x3. (12)
Round 5: Sc in each st around. (12)
Round 6: [3 sc, inc] x3. (15)
Rounds 7-9: Sc in each st around. (15) – Make this slightly shorter than Outer Ear.
FO, do not stuff.
Arms (Make 2 – Grey Yarn)
Round 1: 6 sc in MR. (6)
Round 2: [Sc, inc] x3. (9)
Rounds 3-12: Sc in each st around. (9) – Adjust for desired arm length.
FO, leaving a long tail for sewing. Stuff lightly, leaving the top open.
Legs (Make 2 – Grey Yarn)
Round 1: 6 sc in MR. (6)
Round 2: [Inc] x6. (12)
Round 3: Sc in each st around. (12)
Rounds 4-13: Sc in each st around. (12) – Adjust for desired leg length.
FO, leaving a long tail for sewing. Stuff firmly.
Tail (Grey Yarn & Black Yarn)
Start with Grey Yarn.
Chain 15. (Adjust for desired tail length)
Row 1: Sc in 2nd ch from hook, sc in each ch across. (14)
FO, leaving a long tail.
Tail Tuft (Black Yarn):
Cut several 3-4 inch pieces of black yarn.
Fold each piece in half and loop onto the end of the crocheted tail using a crochet hook (like attaching fringe).
Trim and fluff with a wire brush if desired.
Mane (Black Yarn)
Cut numerous 3-4 inch pieces of black yarn.
Using a crochet hook, attach the yarn pieces to the top back of the head (where a mane would be) by folding each piece in half and looping it through a stitch, then pulling the ends through the loop to secure. Create a dense mane.
Trim and shape the mane as desired. You can brush it lightly with a wire brush for a fluffier look.
Assembly:
Attach Head to Body: Sew the head to the body, ensuring the pink belly aligns.
Attach Snout: Pin the snout to the front of the head, centering it below the eyes. Sew securely.
Attach Teeth: Carefully place the white tooth pieces inside the mouth opening of the snout. Sew them in place. Use black yarn to embroider a thin line defining the mouth opening.
Assemble Ears: Place an Inner Ear (pink) on top of an Outer Ear (grey). Sew them together along the edges. Fold the bottom base of each ear slightly to give them a natural curve.
Attach Ears: Sew the assembled ears to the top of the head, ensuring they stand upright and are evenly spaced.
Attach Arms: Sew the arms to the sides of the body, just below the grey section begins.
Attach Legs: Sew the legs to the bottom of the body. Donkey should be able to sit.
Attach Tail: Sew the crocheted tail (with black tuft) to the back of the body, below the grey section.
Embroider Details (Black Yarn):
Nostrils: Embroider two small vertical lines or dots on the snout above the mouth.
Eyebrows: Embroider expressive eyebrows above the safety eyes.
Weave in all remaining loose ends securely.
Copyright and Selling:
This pattern is for personal use only.
Please do not sell, distribute, or reproduce this pattern in any form, in whole or in part.
You may sell finished items made from this pattern, but please give credit to [Your Name/Pattern Name] as the designer.