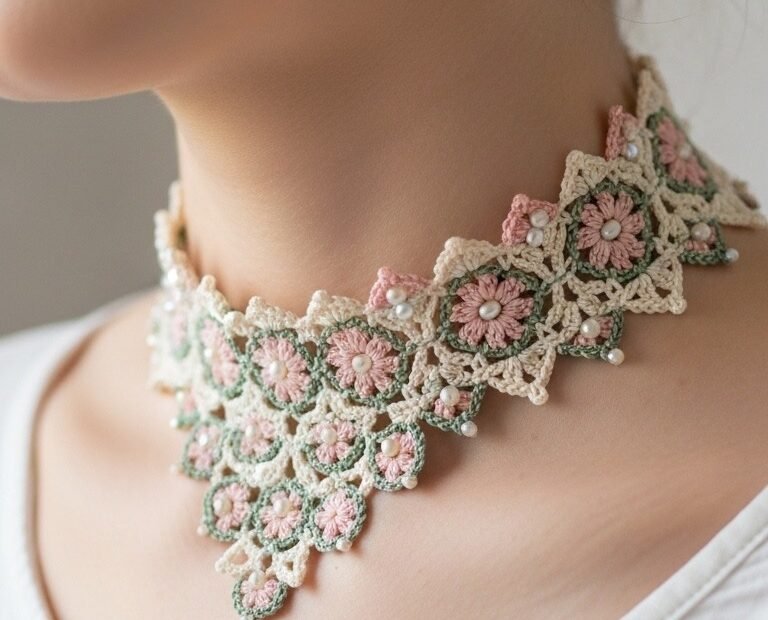
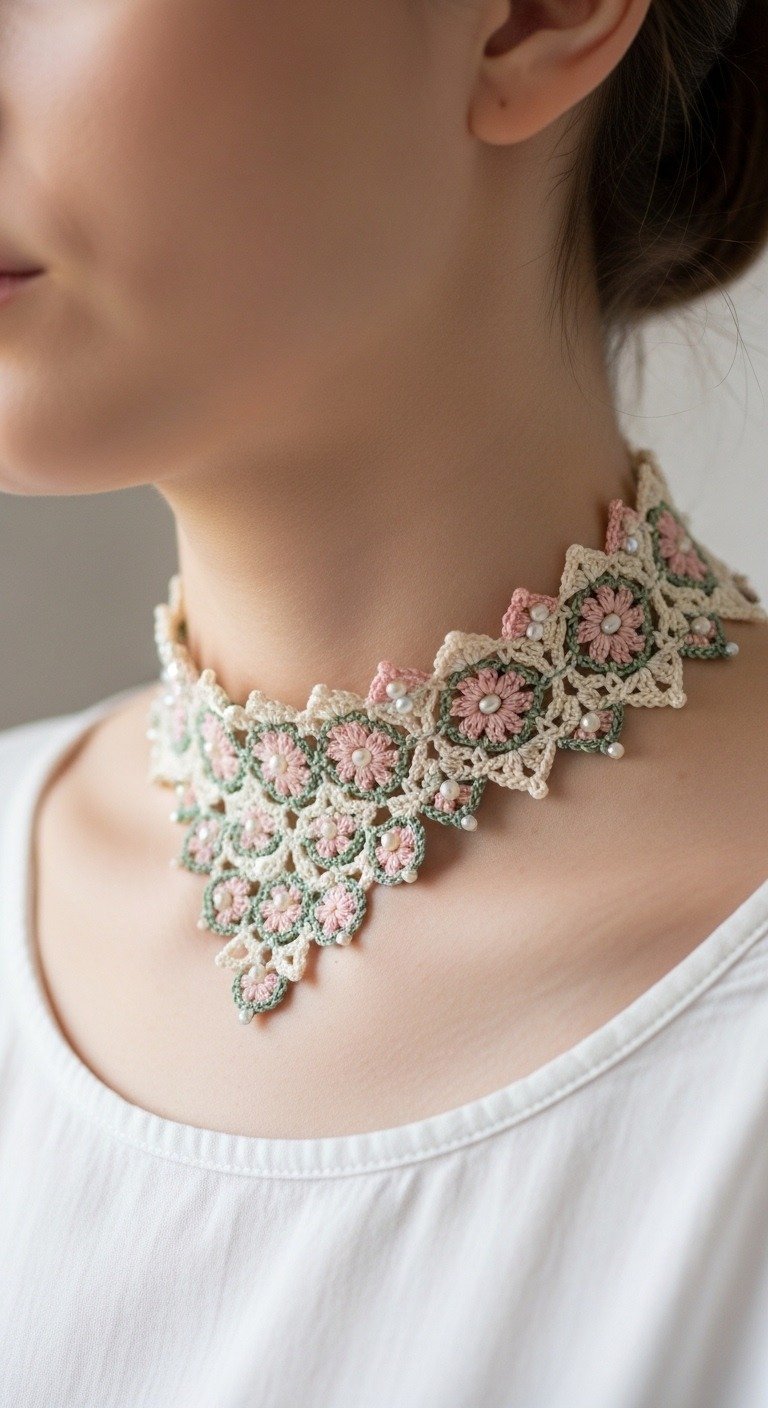
Craft a stunning statement piece with this elegant crochet floral choker necklace pattern. Featuring delicate pink flowers outlined in sage green and framed by creamy lace, this vintage-inspired accessory is adorned with subtle pearl beads, adding a touch of timeless sophistication to any outfit. It’s a beautiful project for intermediate crocheters looking to create a wearable art piece.
Handmade Elegance for Every Occasion
Imagine adorning your neckline with a unique, handcrafted piece that reflects your personal style. This crocheted choker adds a touch of intricate beauty to both casual and formal wear. It’s not just an accessory; it’s a conversation starter, showcasing the artistry of crochet and making a thoughtful gift. Elevate your look with this exquisite floral design.
Crochet Pattern: Elegant Crocheted Floral Choker Necklace with Pearl Accents
Small Pearl Beads: Approx. 50-70 beads (2-3mm diameter)
Beading Needle and matching sewing thread
Small button (approx. 10mm) or hook-and-eye clasp
Scissors
Tapestry needle
Abbreviations
ch: chain
sl st: slip stitch
sc: single crochet
hdc: half double crochet
dc: double crochet
tr: treble crochet
MR: Magic Ring
picot: ch 3, sl st into 3rd ch from hook
Instructions
This necklace is constructed using individual floral medallions that are joined together to form two rows: a top choker band and a lower tiered bib. Each medallion consists of three layers: a pink flower core, a green accent layer, and a cream outer layer with picots and bead placement.
A. Floral Medallion (Make 17 total: 9 for the top row, 8 for the bottom row)
Part 1: Pink Flower Core
With Light Pink yarn, create a MR.
Rnd 1: Ch 1, 12 sc in MR. Join with sl st to first sc. (12 sc)
Rnd 2 (Petals): *[Ch 2, 2 dc in next sc, ch 2, sl st in same sc], sl st in next sc*. Repeat * to * 6 times. (6 petals formed). Fasten off Light Pink. Weave in ends.
Part 2: Green Accent Layer
With Sage Green yarn, attach with a sl st to any ‘sl st between petals’ (from Rnd 2 of Pink Flower).
Rnd 1: Ch 1, sc in same sl st. *Ch 3, skip 1 petal, sc in next sl st between petals*. Repeat * to * 5 times. Join with sl st to first sc. (6 sc, 6 ch-3 loops)
Rnd 2 (Points): *Sl st into ch-3 loop. Ch 1, (sc, hdc, dc, hdc, sc) into same loop. Sl st to next sc*. Repeat * to * 6 times. Fasten off Sage Green. Weave in ends.
Part 3: Cream Outer Layer & Scallops (Joining occurs in this round)
With Cream yarn, attach with a sl st to the tip of any green point (the dc stitch from Rnd 2 of Green layer).
Rnd 1: Ch 1, sc in same st. *Ch 3, sc in the tip of the next green point, ch 3, sc in the tip of the next green point, ch 5 (corner space).* Repeat * to * 3 times. Ch 3, sc in tip of next green point, ch 3, sc in tip of next green point. Join with sl st to first sc. (8 sc, 4 ch-3 spaces, 4 ch-5 corner spaces).
Rnd 2 (Outer Scallops, Picots, & Joining): This round forms the decorative edge and connects the medallions.
Work the first Medallion completely: *Sl st into ch-5 corner space. Ch 3 (counts as dc), (2 dc, picot, 3 dc) in same corner space. Ch 1. In next ch-3 space: 3 dc. Ch 1. In next ch-3 space: (3 dc, picot, 3 dc). Ch 1*. Repeat * to * 3 times. Join with sl st to top of ch 3. Fasten off Cream. Weave in ends.
For subsequent Medallions (refer to diagrams if possible for visual aid, but not possible here): When reaching a joining point in Rnd 2, replace ‘ch 1’ with ‘sl st to corresponding ch-1 space of previous medallion’. Replace ‘picot’ with ‘sl st to picot of previous medallion’. Carefully align medallions to join along one full side for the top row, and two sides (one to top row, one to previous bottom row motif) for the bottom row.
B. Assembling the Necklace
1. Top Choker Band (9 Medallions):
Join 9 Floral Medallions side-by-side using the ‘join as you go’ method described in Part 3, Rnd 2 (Cream layer). The joining should occur along one full side of each square-like motif, creating a straight band.
2. Bottom Tiered Bib (8 Medallions):
Attach the first bottom row medallion to the center-bottom of the first medallion of the top row, joining along one side.
Then attach the second bottom row medallion to the bottom of the second top row medallion AND to the side of the first bottom row medallion.
Continue in this manner, attaching each bottom row medallion to the medallion directly above it in the top row, and to the previous medallion in the bottom row. This creates the descending, tiered effect.
The arrangement will form a gradual ‘V’ shape, with 9 medallions on top and 8 slightly below and in between.
C. Finishing Touches
Adding Beads: Using a beading needle and matching sewing thread, sew a small pearl bead to the center of each pink flower core. Sew additional beads to the center of each picot on the cream outer layer. Also, sew beads at the points where the cream scalloped edges of the medallions meet.
Clasp: On one end of the top choker band, create a small ch-loop (ch 10, sl st back into band). On the other end, attach a small button or a hook-and-eye clasp, ensuring it aligns with the ch-loop for closure.
Final Check: Weave in any remaining loose ends securely. Gently block your finished necklace to help it lay flat and define the intricate lace pattern.