
Adorn yourself with timeless elegance by creating this exquisite crocheted lace necklace. Inspired by nature’s delicate forms, this pattern allows you to craft a unique statement piece that adds a touch of sophistication to any outfit. Dive into the art of lace crochet and wear your creativity with pride.
Craft Your Own Statement: The Timeless Appeal of a Crocheted Necklace
Handmade jewelry holds a special charm, offering a personalized touch that mass-produced items cannot replicate. This delicate crocheted necklace not only showcases your crafting skills but also provides a versatile accessory perfect for gifting or elevating your own style. Enjoy the meditative process and the beauty of your finished work.
Crochet Pattern: Elegant Crocheted Lace Necklace Pattern: Craft Your Own Delicate Statement Piece
Materials
- Crochet Thread Size 10 (or similar fine mercerized cotton) in three colors: Color A (Light Sage Green, approx. 20g), Color B (Soft Beige, approx. 20g), Color C (Cream, approx. 10g)
- Steel Crochet Hook 1.75mm (US size 00)
- Scissors
- Tapestry needle
- Small jewelry clasp (lobster clasp or button clasp)
- Two small jump rings (optional, for clasp attachment)
Abbreviations
- ch – chain
- sl st – slip stitch
- sc – single crochet
- dc – double crochet
- tr – treble crochet
- picot – ch3, sl st into 1st ch
- sp – space
- rep – repeat
- st(s) – stitch(es)
- FO – fasten off
- yo – yarn over
Instructions
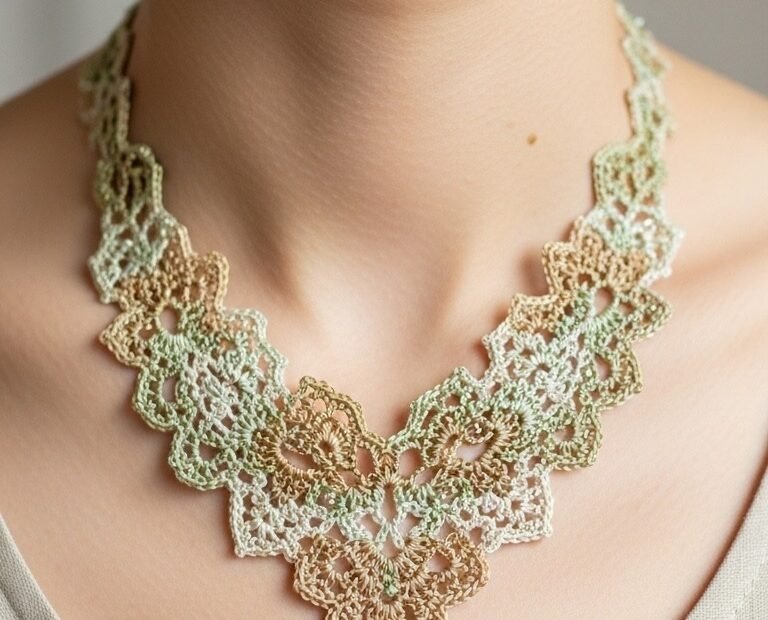
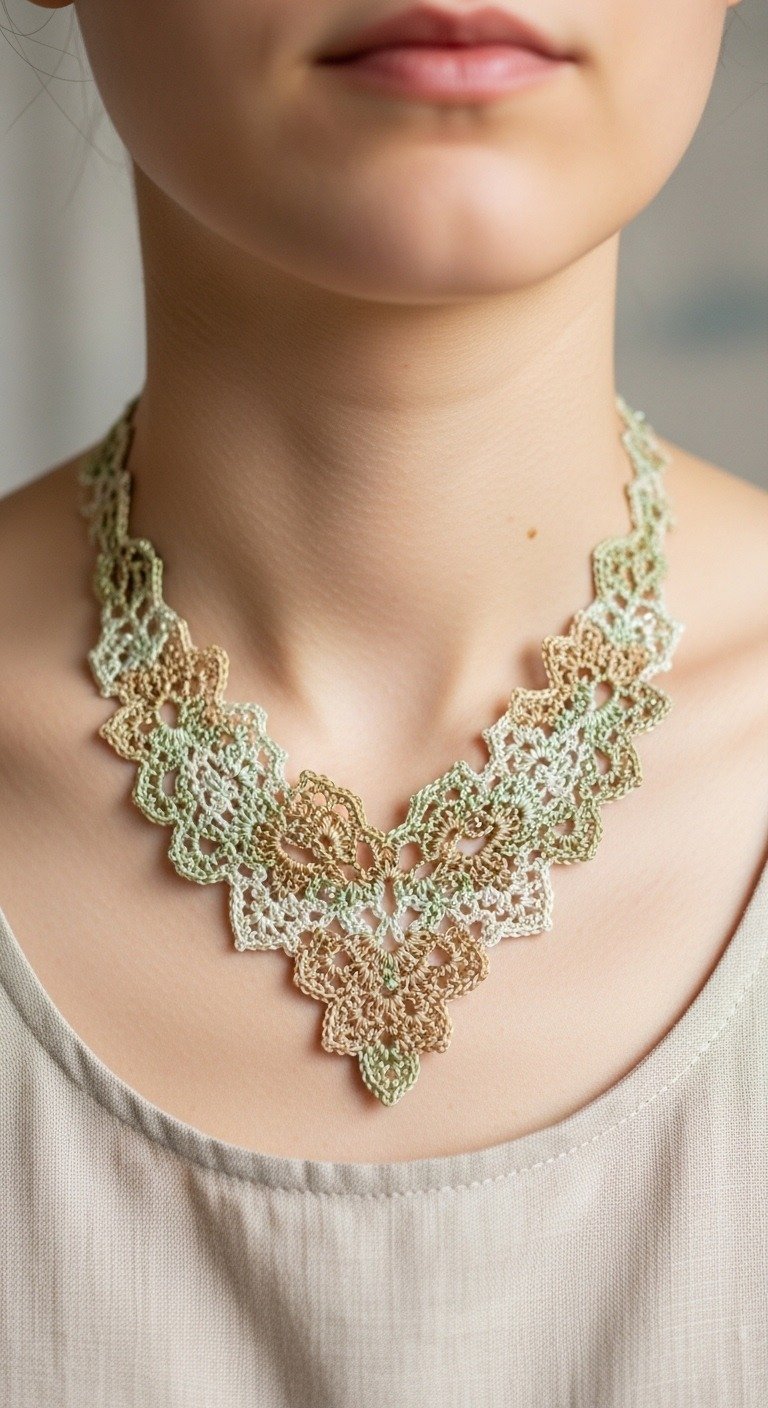
This necklace is constructed from several repeating ‘Lace Leaf Motifs’ which are joined as you go. We’ll start with a central motif that forms the ‘V’ point, and then build the sides symmetrically, alternating colors to achieve the beautiful gradient effect seen in the image.
Lace Leaf Motif (Make 7 total – 1 Central, 6 Side)
(Note: Colors will be specified for each motif during assembly.)
- Row 1: Ch 6, sl st into 1st ch to form a ring. Or, start with a magic ring. Ch 3 (counts as 1 dc), 11 dc into the ring. Join with sl st to top of beg ch 3. (12 dc)
- Row 2: Ch 3 (counts as 1 dc), dc in same st. (Ch 1, skip 1 dc, 2 dc in next dc) 5 times. Ch 1, skip 1 dc, join with sl st to top of beg ch 3. (12 dc, 6 ch-1 sps)
- Row 3: Sl st into next dc, sl st into ch-1 sp. Ch 3, (2 dc, ch 2, 3 dc) in same ch-1 sp. (Ch 1, skip next 2 dc, sl st in next ch-1 sp, ch 1, skip next 2 dc, 3 dc, ch 2, 3 dc in next ch-1 sp) 2 times. Ch 1, skip next 2 dc, sl st in next ch-1 sp, ch 1, skip next 2 dc. Join with sl st to top of beg ch 3. FO. (This forms a motif with 3 main ‘petals’ or ‘points’ and 3 small ‘gaps’ in between.)
Assembly Instructions
We will join motifs by replacing a picot or a chain space with a slip stitch connection to an adjacent motif. Refer to the image for specific color placement and joining points.
- Central V-Point Motif (Use Color B – Soft Beige): Work one Lace Leaf Motif as described above. Do not FO after Row 3, instead proceed to Finishing Row for Central Motif.
- Finishing Row for Central Motif: Ch 1. Sc in each dc and ch-1 sp around, making (sc, picot, sc) in each of the three ch-2 sps from Row 3. On the ‘gaps’ (sl st in ch-1 sp), work (sc, ch3, sc). Join with sl st to first sc. FO. (This motif is the bottom of the V-shape. We will attach others to its outer picots/chains).
Side Motifs (Make 6)
Each Side Motif will be joined on 1-2 sides to previous motifs during its final row. Work Row 1-3 of the Lace Leaf Motif. On Row 4, you will join.
- Side Motif 1 (Use Color A – Light Sage Green): Work Lace Leaf Motif Rows 1-3. Do not FO.
- Finishing & Joining Row for Side Motif 1: Ch 1. Sc in each dc and ch-1 sp around. When you reach a ch-2 sp (a ‘petal’ tip):
- For the 1st ‘petal’ that joins to the Central Motif: (Sc, ch 1, sl st into a picot of the Central Motif, ch 1, sc) in ch-2 sp.
- For the 2nd ‘petal’ that joins to the Central Motif: (Sc, ch 1, sl st into the *next* picot of the Central Motif, ch 1, sc) in ch-2 sp.
- For the 3rd ‘petal’ (outer edge): (Sc, picot, sc) in ch-2 sp.
- Side Motif 2 (Use Color A – Light Sage Green): Repeat instructions for Side Motif 1, joining it symmetrically to the other side of the Central Motif.
- Side Motif 3 (Use Color C – Cream): Work Lace Leaf Motif Rows 1-3. Do not FO.
- Finishing & Joining Row for Side Motif 3: Ch 1. Sc in each dc and ch-1 sp around. When you reach a ch-2 sp:
- For the 1st ‘petal’ that joins to Side Motif 1: (Sc, ch 1, sl st into a picot of Side Motif 1, ch 1, sc) in ch-2 sp.
- For the 2nd ‘petal’ that joins to Side Motif 1: (Sc, ch 1, sl st into the *next* picot of Side Motif 1, ch 1, sc) in ch-2 sp.
- For the 3rd ‘petal’ (outer edge): (Sc, picot, sc) in ch-2 sp.
- Side Motif 4 (Use Color C – Cream): Repeat instructions for Side Motif 3, joining symmetrically to Side Motif 2.
- Side Motif 5 (Use Color B – Soft Beige): Repeat joining pattern, attaching to Side Motif 3.
- Side Motif 6 (Use Color B – Soft Beige): Repeat joining pattern, attaching to Side Motif 4.
Continue adding Side Motifs in alternating colors (A, C, B, A…) until the necklace reaches your desired width and length, always joining to two points of the previous motifs. The image shows approximately 3 Side Motifs per side, for a total of 6 Side Motifs plus the Central Motif.
Neck Strap (Make 2 – using Color A or B)
- Using one of your chosen colors (e.g., Color A), ch 60-80 (or desired length for the back of your neck).
- Sc in 2nd ch from hook and in each ch across.
- Sl st into one of the outermost picots or chain spaces of the last Side Motif on each side of the necklace.
Finishing
- Weave in all ends securely using a tapestry needle.
- Attach a small jewelry clasp to one end of a neck strap and a small jump ring or button to the other end for closure.
- Gently block your necklace by dampening it and pinning it into shape on a foam board. Let it air dry completely to set the lace definition.