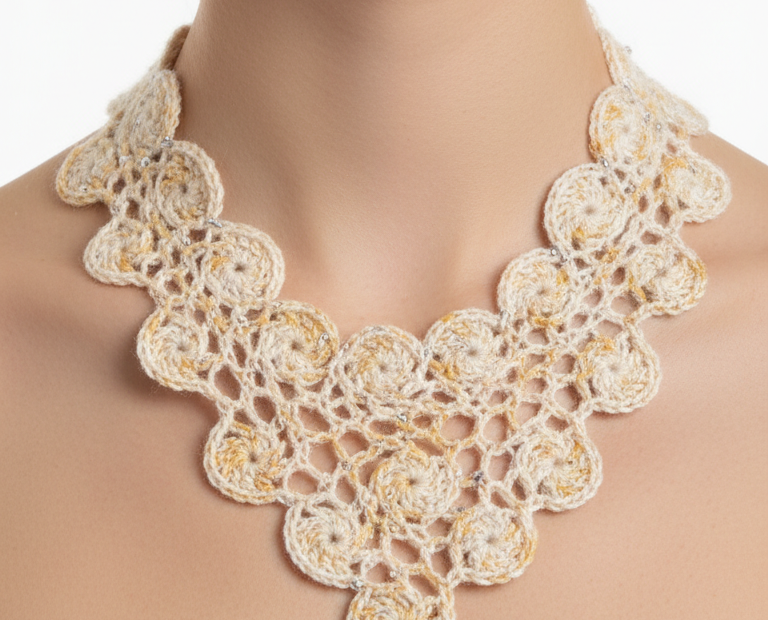
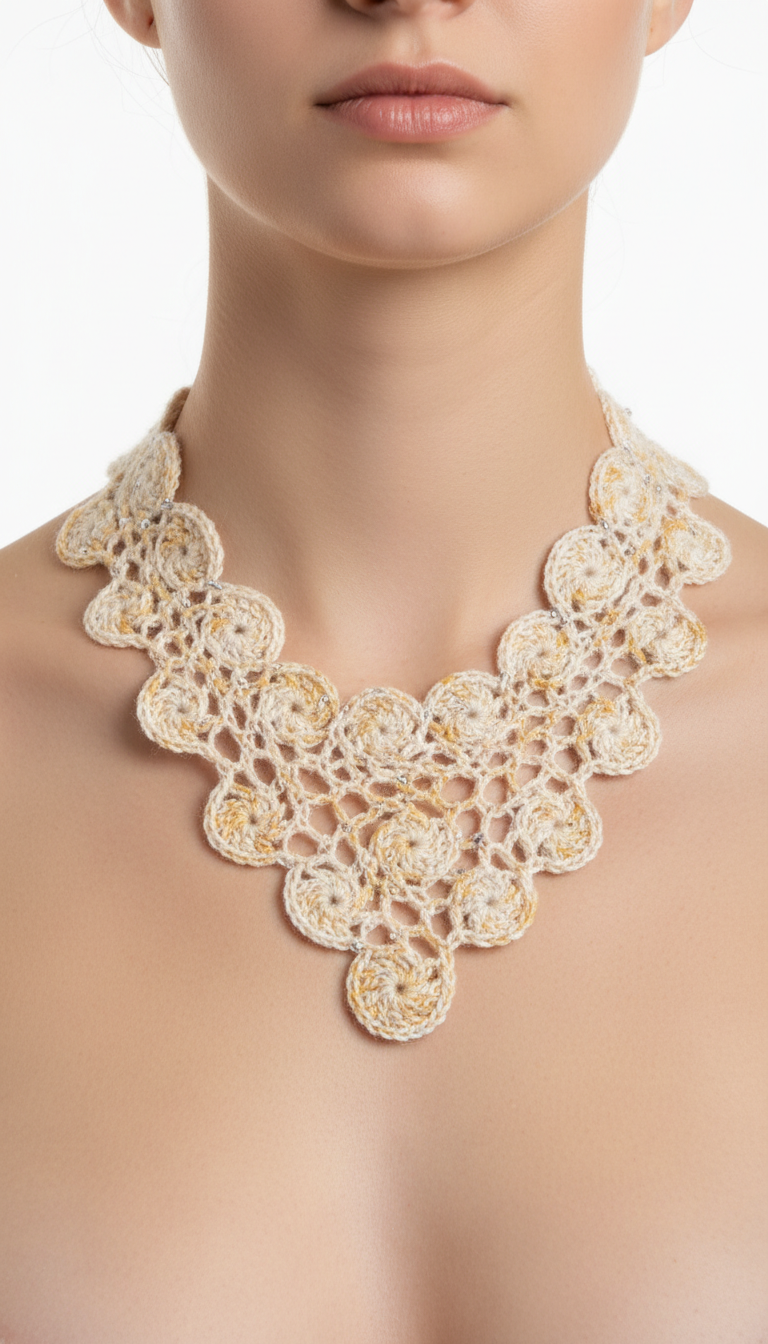
Adorn your neckline with a touch of handmade elegance! This beautiful crochet lace necklace pattern allows you to create a stunning piece of jewelry featuring delicate circular motifs and an intricate lacy web. Perfect for adding a unique, artisanal flair to any outfit, it’s a rewarding project for intermediate crocheters.
Design Your Signature Piece: The Versatility of Crocheted Jewelry
Unlock your creativity by crafting a personalized accessory that truly reflects your style. This crochet necklace makes a thoughtful, handcrafted gift or a delightful addition to your own collection. Its timeless design and delicate texture ensure it will be a cherished item, suitable for both casual wear and special occasions.
Crochet Pattern: Elegant Lace Crochet Necklace Pattern: Craft Your Own Statement Jewelry
Materials
Fine cotton crochet thread (Size 10) in Cream with Gold Flecks (or cream thread with a thin gold metallic thread held together)
1.75mm crochet hook
Small silver seed beads (approx. 30-40, size 6/0 or 8/0)
Tapestry needle
Small jewelry clasp (e.g., lobster clasp and jump ring)
Abbreviations
ch – chain
sl st – slip stitch
sc – single crochet
MR – magic ring
st(s) – stitch(es)
rep – repeat
Instructions
This pattern is constructed by first creating individual circular motifs, then joining them in a specific arrangement, and finally adding a delicate lace-and-bead border to connect everything beautifully.
Part 1: Small Circle Motif (Make 25-30)
Round 1: Create a MR. Ch 1 (does not count as st), make 6 sc into MR. Pull tail to close ring. Join with sl st to first sc. (6 sts)
Round 2: Ch 1, 2 sc in each st around. Join with sl st to first sc. (12 sts)
Fasten off, leaving a 4-inch tail. Weave in the beginning tail securely. Do NOT weave in the fastening-off tail yet, as it might be used for small joins.
Part 2: Assembling the Necklace Body
Lay out your motifs to visualize the ‘V’ shape of the necklace. The design typically involves building rows, with each row containing more motifs than the last to create the widening effect. For a necklace of similar size to the image, consider the following layout (this is a guide, adjust as desired):
Row 1 (Bottom Tip): 1 Motif
Row 2: 2 Motifs, placed on either side of Row 1’s motif.
Row 3: 3 Motifs, placed along Row 2.
Row 4: 4 Motifs, placed along Row 3.
Row 5: 4 Motifs, placed along Row 4.
Row 6: 3 Motifs, decreasing slightly at the ends, forming the top sides.
Use stitch markers or pins to hold your layout in place on a blocking mat or soft surface before joining.
Part 3: Joining with Lace and Beads
Before you begin this section, thread ALL your silver seed beads onto your working yarn. This will allow you to slide them into place as needed.
You will be working a continuous joining round, attaching motifs and creating delicate lace bridges simultaneously. This method allows for a fluid, organic look.
Step 1: Start Joining. Begin at one top corner of your laid-out design. Sl st into an outer sc of the first motif (let’s call this Motif A).
Step 2: Connecting Two Motifs. Ch 3, sl st into an outer sc of the adjacent motif (Motif B). Ch 3, sl st back into Motif A, a few sc away from the first sl st. This creates a small arch.
Step 3: Creating Lace Bridges. When creating a longer connection or filling a gap between motifs (or even within a row to create the ‘webbing’): Ch 5, sl st into an outer sc of a nearby motif, or into a previous chain space.
Step 4: Incorporating Beads. To add a bead, wherever you want a focal point in a chain arch (typically a longer chain space like ch 5 or ch 7): Ch 2, slide one bead down your yarn to your hook, ch 1 (this secures the bead), ch 2, then sl st into the next joining point (another motif or chain space).
Step 5: Continue. Systematically work your way across the entire necklace layout. Join motifs along their adjacent edges with ch 3-5 arches. Fill the larger triangular or irregular gaps with ch 5-7 arches, incorporating beads at the center of these arches. Ensure the ‘V’ shape is maintained and the fabric lies flat.
Step 6: Edging the Top. Once all inner motifs are joined, work a final continuous border along the top edge of the necklace (the straight part that goes behind the neck). This can be a simple row of (sc, ch 3, sk 2 sts) or (ch 5, sl st into every 3rd sc of the top-most motifs) to create a neat, consistent top line.
Part 4: Neck Straps and Finishing
Step 1: Straps. From each top corner of the finished lace necklace, ch a long strand (approx. 10-12 inches, or to desired length). Alternatively, you can crochet a strip of sc for a more sturdy strap (e.g., ch 5, sc in 2nd ch from hook and across, turn, ch 1, sc in each st across, rep for desired length).
Step 2: Clasp. Attach your jewelry clasp (e.g., lobster clasp) to one strap end and a jump ring or small button to the other strap end for closure.
Step 3: Weave in Ends. Securely weave in all remaining yarn tails using your tapestry needle. Block the necklace gently to shape if needed.