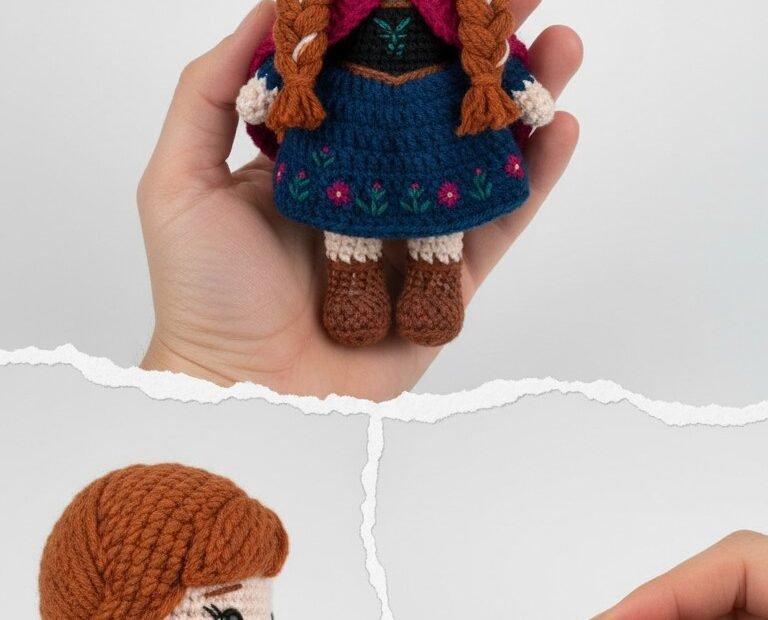
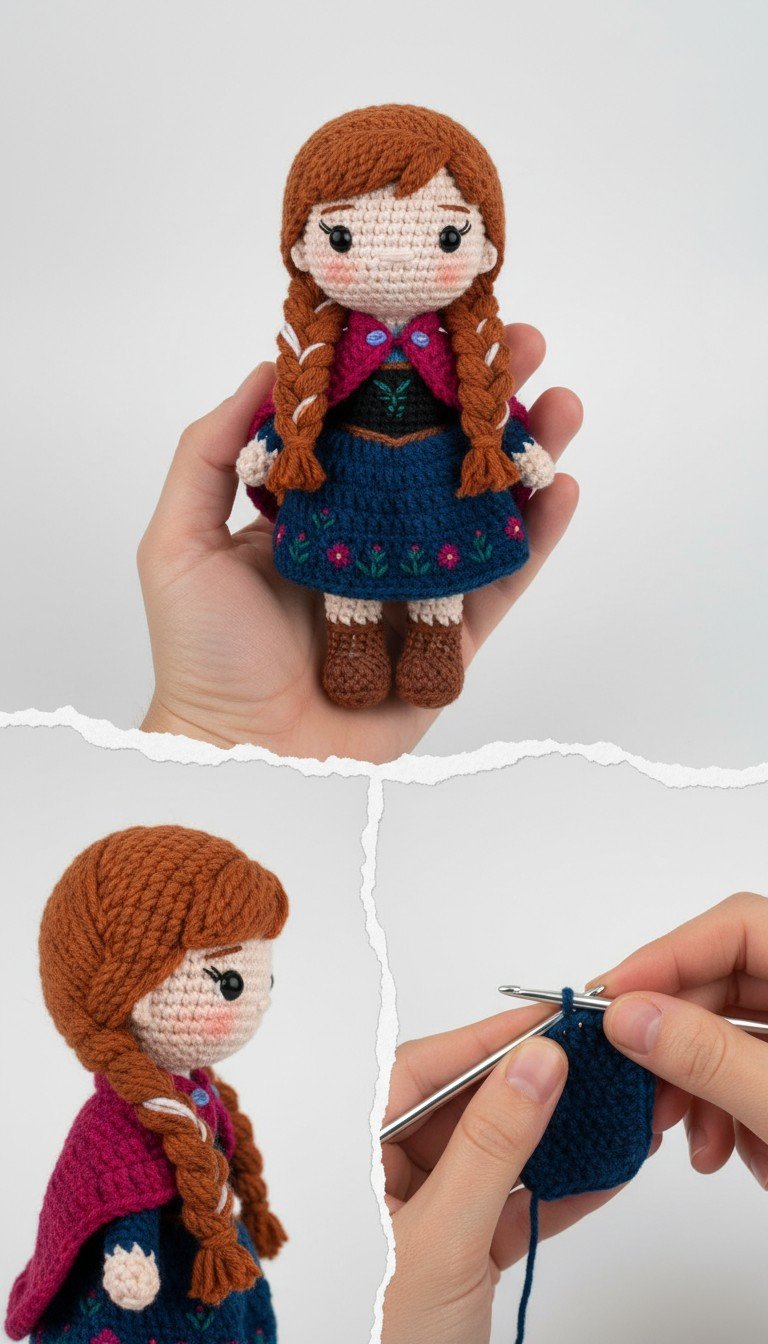
Step into the magical world of Arendelle with this charming Princess Anna Amigurumi doll! Perfect for fans of all ages, this detailed crochet pattern allows you to create your very own beloved character. With her signature braids, vibrant cape, and embroidered dress, this Anna doll makes a heartwarming gift or a delightful addition to your collection.
Bring Arendelle to Life with Your Own Hand-Crocheted Princess Anna!
Crafting a character like Princess Anna brings immense joy and a sense of accomplishment. This pattern guides you through every step, ensuring a beautiful, handmade treasure. Imagine the delight on a child’s face, or the pride you’ll feel displaying your creation. Dive into the magic of crochet and create a lasting memory with this special doll.
Crochet Pattern: Enchanting Crochet Princess Anna Doll Amigurumi Pattern
Materials
Worsted weight yarn in: Skin Tone (e.g., Light Peach), Burnt Orange (Hair), Dark Blue (Dress), Magenta (Cape), Black (Eyes), White (Braids/Dress detail), Dark Green (Bodice detail), Light Pink (Dress flowers/Blush), Brown (Boots)
2.5mm or 3.0mm crochet hook (adjust to achieve tight fabric)
6mm safety eyes
Polyester fiberfill for stuffing
Tapestry needle
Stitch markers
Embroidery floss in coordinating colors (optional, for finer details)
Abbreviations
MR: Magic Ring
ch: chain
sc: single crochet
inc: increase (2 sc in one stitch)
dec: decrease (sc 2 together)
sl st: slip stitch
FO: Fasten Off
FLO: Front Loop Only
BLO: Back Loop Only
Rnd: Round
st(s): stitch(es)
Instructions
Gauge: Not crucial for this project, but ensure your stitches are tight enough so stuffing does not show through.
Head (Skin Tone Yarn)
Rnd 1: 6 sc in a MR. (6)
Rnd 2: [Inc] x6. (12)
Rnd 3: [Sc 1, inc] x6. (18)
Rnd 4: [Sc 2, inc] x6. (24)
Rnd 5: [Sc 3, inc] x6. (30)
Rnd 6: [Sc 4, inc] x6. (36)
Rnd 7-13: Sc around. (36)
Insert safety eyes between Rnd 9 and 10, about 6-7 stitches apart.
Rnd 14: [Sc 4, dec] x6. (30)
Rnd 15: [Sc 3, dec] x6. (24)
Stuff head firmly.
Rnd 16: [Sc 2, dec] x6. (18)
Rnd 17: [Sc 1, dec] x6. (12)
Rnd 18: [Dec] x6. (6)
FO, leaving a long tail for sewing. Close the opening.
Body (Starting with Skin Tone Yarn)
Rnd 1: 6 sc in a MR. (6)
Rnd 2: [Inc] x6. (12)
Rnd 3: [Sc 1, inc] x6. (18)
Rnd 4: [Sc 2, inc] x6. (24)
Rnd 5-8: Sc around. (24)
Change to Dark Blue yarn.
Rnd 9: Sc in FLO around. (24)
Rnd 10-15: Sc around. (24)
Rnd 16: [Sc 2, dec] x6. (18)
Rnd 17: [Sc 1, dec] x6. (12)
Stuff body firmly.
Rnd 18: [Dec] x6. (6)
FO, leaving a long tail for sewing. Close the opening. Sew head to body.
Legs (Make 2 – Starting with Brown Yarn for Boots)
Rnd 1: 6 sc in a MR. (6)
Rnd 2: [Inc] x6. (12)
Rnd 3: Sc in BLO around. (12)
Rnd 4-5: Sc around. (12)
Change to Skin Tone yarn.
Rnd 6: Sc around. (12)
Rnd 7: [Sc 1, dec] x4. (8)
Rnd 8-10: Sc around. (8)
Stuff lightly. FO, leaving a long tail for sewing to the body.
Arms (Make 2 – Skin Tone Yarn)
Rnd 1: 6 sc in a MR. (6)
Rnd 2-10: Sc around. (6)
Stuff lightly at the end. FO, leaving a long tail for sewing to the body.
Hair Wig Cap (Burnt Orange Yarn)
Rnd 1: 6 sc in a MR. (6)
Rnd 2: [Inc] x6. (12)
Rnd 3: [Sc 1, inc] x6. (18)
Rnd 4: [Sc 2, inc] x6. (24)
Rnd 5: [Sc 3, inc] x6. (30)
Rnd 6: [Sc 4, inc] x6. (36)
Rnd 7-10: Sc around. (36)
FO, leaving a long tail for sewing to the head.
Braids (Make 2 – Burnt Orange and White Yarn)
Cut many strands of Burnt Orange yarn, about 10-12 inches long.
Cut fewer strands of White yarn, about 10-12 inches long.
Attach a bunch of Burnt Orange strands (approx. 15-20) to the wig cap at the side of the head using a latch hook or by folding them in half and looping. Add 2-3 strands of White yarn among them.
Divide the strands into three sections and braid tightly. Secure the end with a small piece of yarn. Repeat for the other side.
Trim braids to desired length.
Cape (Magenta Yarn)
Ch 21.
Row 1: Sc in 2nd ch from hook and across. (20)
Row 2: Ch 1, turn, [Sc 3, inc] x5. (25)
Row 3: Ch 1, turn, sc across. (25)
Row 4: Ch 1, turn, [Sc 4, inc] x5. (30)
Row 5: Ch 1, turn, sc across. (30)
FO, weave in ends.
Crochet a small chain (approx. 15-20 ch) and attach it to the top corners of the cape to create ties.
Assembly and Details
Sew legs firmly to the bottom of the body.
Sew arms to the sides of the body, just below the neck.
Sew the wig cap onto the head.
Embroider eyebrows above the eyes with black yarn or embroidery floss.
Using light pink yarn or embroidery floss, embroider small lines or French knots for blush on the cheeks.
Using white and dark green yarn, embroider the bodice details as seen in the image (the ‘v’ shape and small leaves).
Using light pink and white yarn, embroider small flowers and leaves around the bottom edge of the dark blue dress.