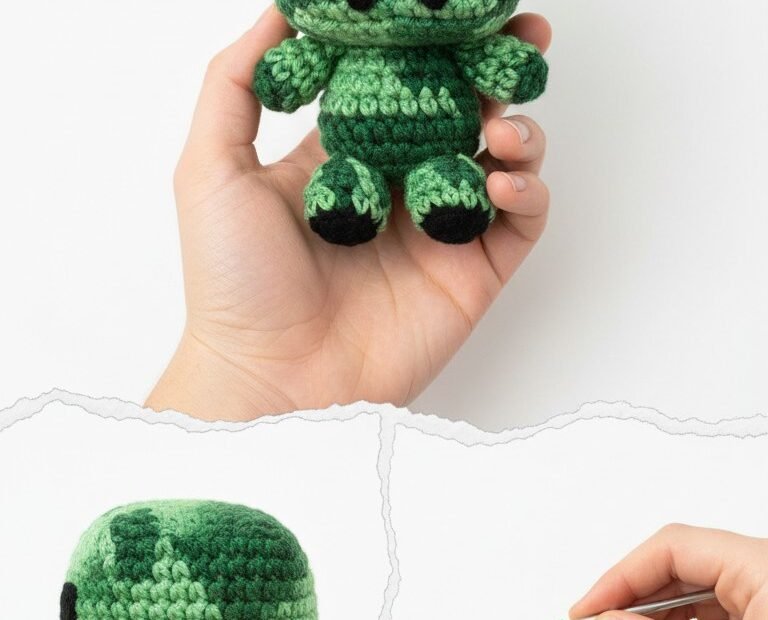
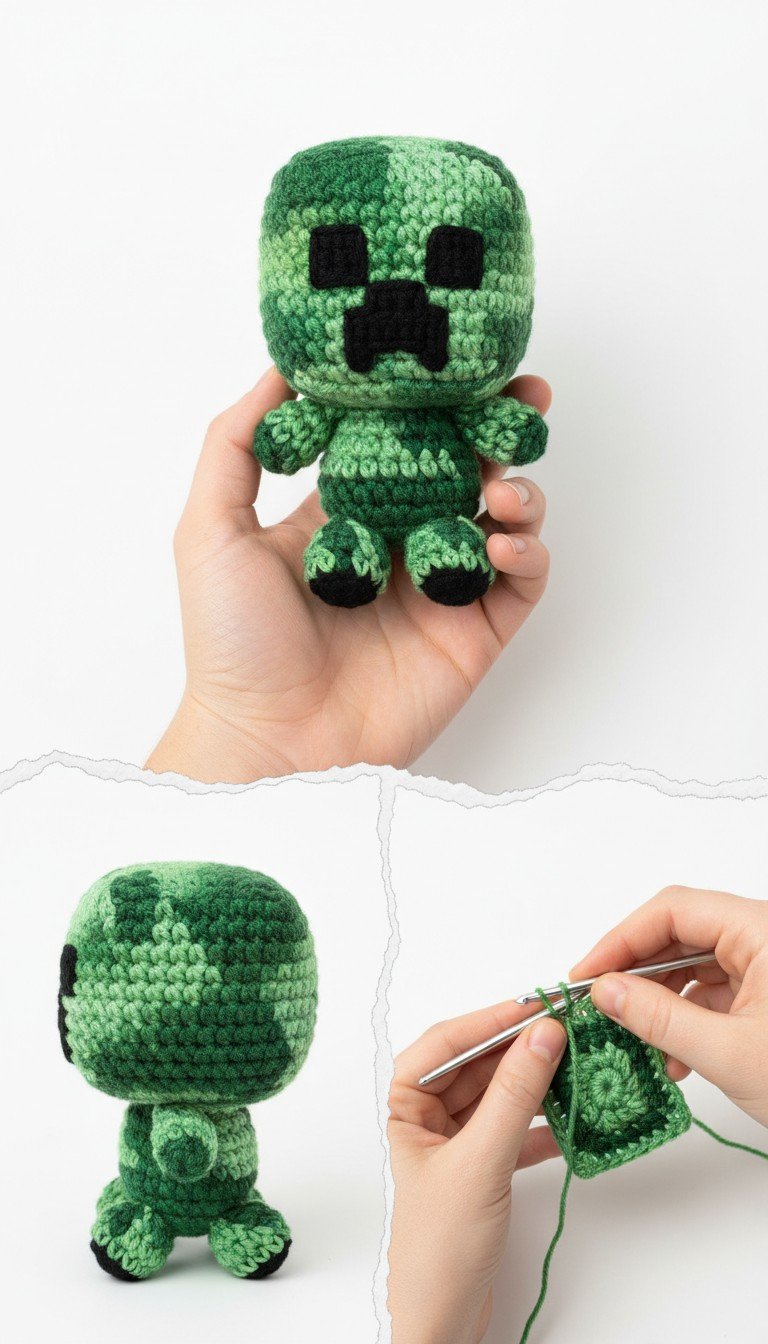
Bring the iconic pixelated charm of Minecraft into the real world with this adorable crochet Creeper amigurumi! Perfect for gamers and crafters alike, this pattern guides you step-by-step to create a huggable version of the beloved, if sometimes startling, character. Get ready to crochet your very own blocky companion!
Craft Your Own Blocky Companion: Why This Creeper Amigurumi is a Must-Make!
There’s nothing quite like the satisfaction of creating a handmade item inspired by your favorite game. This Creeper amigurumi pattern is designed to be straightforward and fun, making it an ideal project for intermediate crocheters or enthusiastic beginners. It makes a fantastic gift for any Minecraft fan or a quirky addition to your own collection of video game memorabilia.
3.5mm crochet hook (or size suitable for your yarn to achieve tight stitches)
Polyester fiberfill for stuffing
Tapestry needle
Stitch marker
Scissors
Abbreviations
MR: Magic Ring
ch: chain
sc: single crochet
inc: increase (2 sc in one st)
dec: decrease (sc 2 together)
sl st: slip stitch
st(s): stitch(es)
FO: Fasten Off
R: Round
Instructions
Notes: This pattern is worked in continuous rounds unless otherwise specified. Use a stitch marker to keep track of your first stitch in each round. Stuff pieces firmly as you go. When changing colors for the head, carry the unused yarn loosely behind your work to maintain tension and avoid large gaps.
Head (Light Green & Dark Green)
Start with Light Green yarn.
R1: 6 sc in magic ring. (6)
R2: Inc in each st around. (12)
R3: (sc, inc) x 6. (18)
R4: (2 sc, inc) x 6. (24)
R5: (3 sc, inc) x 6. (30)
R6: (4 sc, inc) x 6. (36)
R7-R8: Sc in each st around with Light Green. (36)
R9-R16: Alternate between Light Green and Dark Green yarn, changing colors every 1-2 stitches to create a pixelated, checkerboard effect. Sc in each st around. (36)
R17: (4 sc, dec) x 6. (30)
R18: (3 sc, dec) x 6. (24)
R19: (2 sc, dec) x 6. (18)
Start stuffing the head firmly.
R20: (sc, dec) x 6. (12)
R21: Dec x 6. (6)
Fasten off, weave in end, and close the opening securely.
Body (Light Green & Dark Green)
Start with Light Green yarn.
R1: 6 sc in magic ring. (6)
R2: Inc in each st around. (12)
R3: (sc, inc) x 6. (18)
R4: (2 sc, inc) x 6. (24)
R5-R6: Sc in each st around with Light Green. (24)
R7-R8: Sc in each st around with Dark Green. (24)
R9-R10: Sc in each st around with Light Green. (24)
R11-R12: Sc in each st around with Dark Green. (24)
R13-R14: Sc in each st around with Light Green. (24)
Stuff firmly. Fasten off, leaving a long tail for sewing.
Arms (Make 2 – Dark Green)
Start with Dark Green yarn.
R1: 6 sc in magic ring. (6)
R2: (sc, inc) x 3. (9)
R3-R7: Sc in each st around. (9)
Stuff lightly. Flatten opening and sc through both sides to close (4 sc).
Fasten off, leaving a long tail for sewing.
Legs (Make 2 – Dark Green & Black)
Start with Black yarn.
R1: 6 sc in magic ring. (6)
R2: Inc in each st around. (12)
R3: Sc in each st around. (12)
Change to Dark Green yarn.
R4-R7: Sc in each st around. (12)
Stuff lightly. Flatten opening and sc through both sides to close (6 sc).
Fasten off, leaving a long tail for sewing.
Assembly
Sew the head to the top of the body, centering it.
Sew the arms to the sides of the body, just below the head.
Sew the legs to the bottom of the body, spaced evenly.
Using Black yarn and a tapestry needle, embroider two square eyes and a rectangular mouth onto the front of the head, referencing the image for placement.