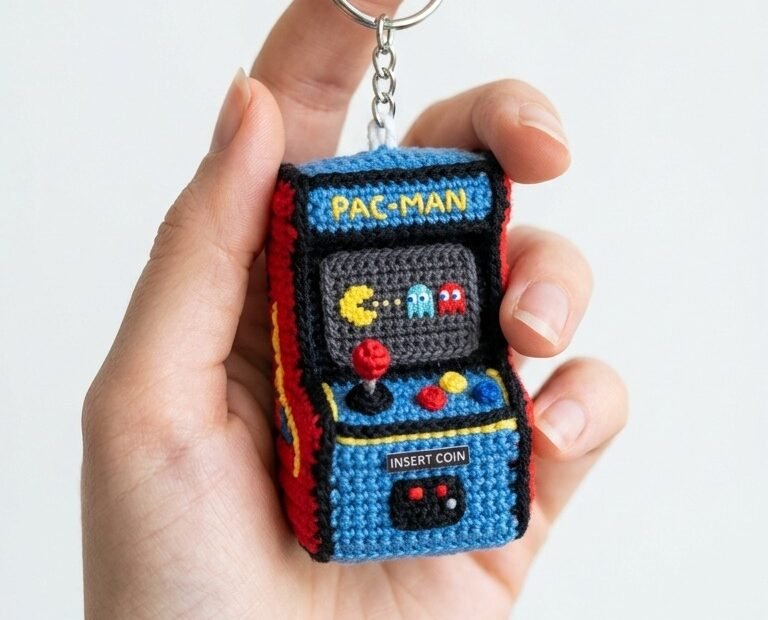
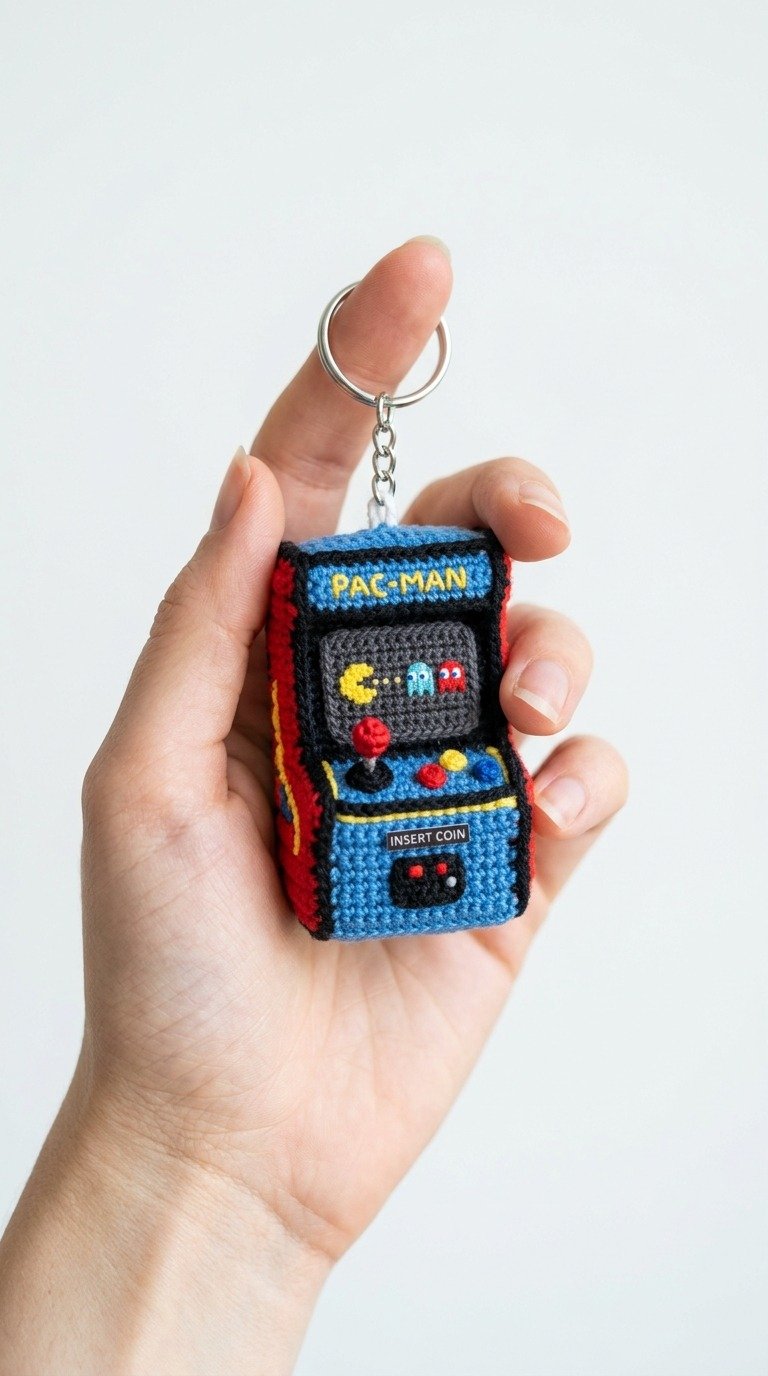
Gamers and crochet enthusiasts alike will fall in love with this adorable retro arcade machine crochet pattern! Inspired by classic 80s cabinets, this miniature masterpiece makes the perfect keychain or desk accessory. Featuring detailed embroidery and vibrant colors, you can easily handcraft your own tiny Pac-Man machine. Grab your hook, some scrap yarn, and let’s level up your crochet skills today!
Why You’ll Love Crafting This Miniature Retro Arcade Cabinet
This project is an absolute joy for anyone who loves nostalgia, retro gaming, or detailed micro-crochet. Working in small, structured panels allows you to master clean color changes and basic embroidery techniques. It makes an incredibly unique, heartfelt gift for the gamers in your life, or a conversation-starting keychain for your own keys or backpack.
DK weight yarn in Blue, Red, Black, Yellow, and Grey
Embroidery floss in Yellow, Red, Blue, and White
2.5 mm crochet hook
Firm sponge, foam block, or plastic canvas (for internal structure)
Polyester fiberfill stuffing
Yarn needle and embroidery needle
Metal keychain ring and chain
Abbreviations
ch – chain
sc – single crochet
st(s) – stitch(es)
sl st – slip stitch
inc – increase
dec – decrease
Instructions
Side Panels (Make 2 – Red Yarn):
We will construct the classic profile of an arcade cabinet.
Row 1: Ch 8, starting in the second ch from hook, sc in each ch across (7 sc), turn.
Row 2-8: Ch 1, sc in each st across (7 sc), turn.
Row 9 (Control panel lip): Ch 4, sc in second ch from hook and next 2 ch, then sc in the remaining 7 sc of the row (10 sc), turn.
Row 10-12: Ch 1, sc in each st across (10 sc), turn.
Row 13: Sl st in first 3 sts, sc in next 7 sts (leaving the lip unworked) (7 sc), turn.
Row 14-20: Ch 1, sc in each st across (7 sc), turn.
Row 21 (Marquee overhang): Ch 2, sc in second ch from hook, sc in next 7 sts (8 sc), turn.
Row 22-24: Ch 1, sc in each st across (8 sc), turn. Fasten off Red. Join Black yarn and sc evenly around the entire perimeter of the panel to create a clean border. Fasten off and leave a long tail for sewing.
Front, Screen & Back Panel (Worked in one continuous strip):
Using Blue Yarn, Ch 9.
Row 1-8 (Bottom Front): Starting in second ch from hook, sc across (8 sc), turn.
Row 12-20 (Screen – change to Grey Yarn): Ch 1, sc across (8 sc), turn.
Row 21-24 (Marquee – change to Blue Yarn): Ch 1, sc across (8 sc), turn.
Row 25-32 (Top Canopy – continue in Blue Yarn): Ch 1, sc across (8 sc), turn.
Row 33-45 (Back Panel – continue in Blue Yarn): Ch 1, sc across (8 sc), turn. Fasten off and weave in loose ends.
Embroidery & Details:
Using Yellow embroidery floss, stitch ‘PAC-MAN’ on the blue Marquee section (Rows 21-24).
On the Grey screen section, stitch a small yellow crescent circle for Pac-Man, and small blue and red squares for the ghosts. Add tiny white and blue French knots for eyes.
On the Control Deck section, make a small joystick by sewing a tiny red bead or making a red French knot on a black stitched line. Add yellow and blue French knots for buttons.
Using Black yarn, stitch ‘INSERT COIN’ text detailing onto the bottom front section.
Assembly:
Cut a small piece of foam block or stiff plastic canvas to match the internal 3D shape of your cabinet. This prevents the arcade machine from losing its iconic sharp edges.
Align the long strip over the foam block, wrapping it around.
Position the two Red side panels on either side.
Using a tapestry needle and the black yarn tails, whipstitch the edges of the side panels to the front/back/top strip, keeping your stitches tight and even.
Before closing completely, add a bit of fiberfill stuffing if needed to fill any hollow spaces.
Securely sew a keychain ring to the top center of the cabinet.