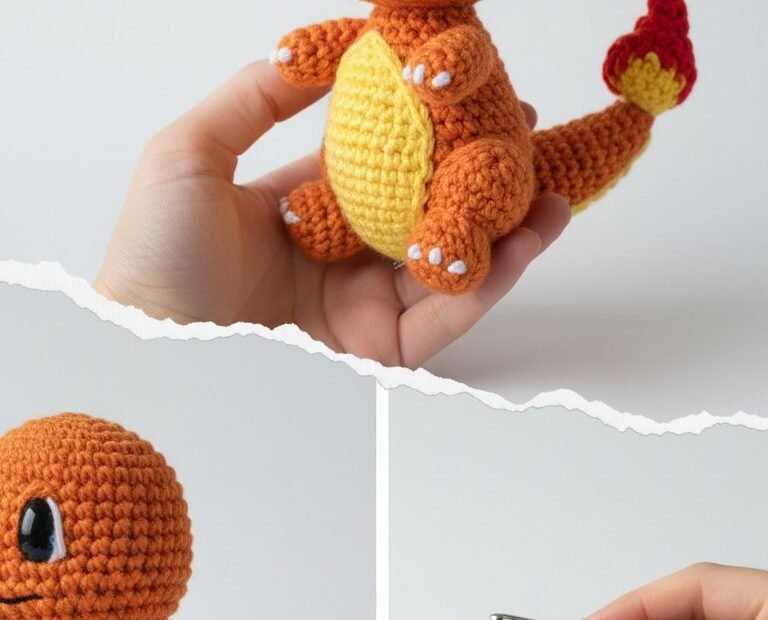
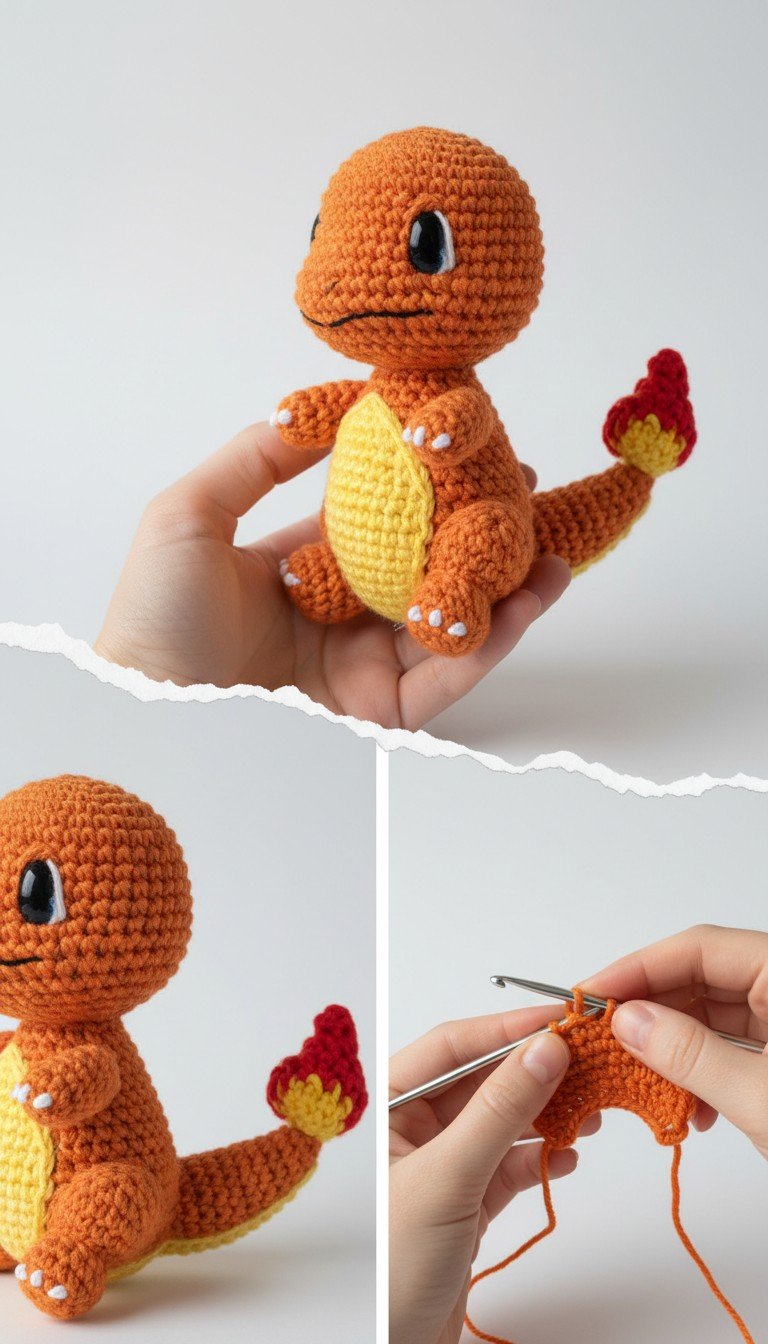
Bring one of Kanto’s beloved starter Pokémon to life with this detailed Charmander Amigurumi pattern! Perfect for fans of the fiery lizard, this crochet project captures all his iconic features, from his sweet smile to his burning tail tip. Whether for play or display, this little guy makes a fantastic gift or a charming addition to your own collection. Get ready to embark on a fun crafting adventure!
Craft a Fiery Friend: Why You’ll Love This Charmander Project
There’s something incredibly rewarding about creating a cherished character with your own hands. This Charmander pattern is designed to be enjoyable for intermediate crocheters, offering clear instructions to help you achieve a professional-looking result. Imagine the joy of holding your very own handmade Pokémon, a testament to your crafting skill and dedication. It’s more than a toy; it’s a piece of your passion brought to life.
Crochet Pattern: Ignite Your Creativity: Crochet Your Own Adorable Charmander Amigurumi
Materials
Worsted weight yarn in Orange (main color)
Worsted weight yarn in Yellow (belly, tail base, flame highlight)
Worsted weight yarn in Red (flame tip)
Worsted weight yarn in White (claws, eye highlight)
Worsted weight yarn in Black (mouth embroidery)
2.5mm or 3.0mm crochet hook (or size suitable for your yarn)
6mm black safety eyes
Fiberfill stuffing
Yarn needle
Stitch markers
Scissors
Abbreviations
MR: Magic Ring
ch: chain
sc: single crochet
inc: increase (2 sc in one stitch)
dec: decrease (sc two stitches together)
sl st: slip stitch
BLO: back loop only
FO: Fasten off
(X) around: number of stitches in the round
Instructions
Head (Orange Yarn)
R1: 6 sc in MR (6)
R2: inc in each st around (12)
R3: (sc, inc) x6 (18)
R4: (2 sc, inc) x6 (24)
R5: (3 sc, inc) x6 (30)
R6-R10: sc in each st around (30)
Insert safety eyes between R7 and R8, about 6-7 stitches apart.
R11: (3 sc, dec) x6 (24)
R12: (2 sc, dec) x6 (18)
Start stuffing firmly.
R13: (sc, dec) x6 (12)
R14: dec x6 (6)
FO, leave a long tail for sewing. Close the hole.
Body (Orange Yarn)
R1: 6 sc in MR (6)
R2: inc in each st around (12)
R3: (sc, inc) x6 (18)
R4: (2 sc, inc) x6 (24)
R5: (3 sc, inc) x6 (30)
R6-R9: sc in each st around (30)
R10: (3 sc, dec) x6 (24)
R11: sc in each st around (24)
R12: (2 sc, dec) x6 (18)
Stuff firmly.
FO, leave a long tail for sewing.
Belly Patch (Yellow Yarn)
Ch 6
R1: sc in 2nd ch from hook, 3 sc, 3 sc in last ch. Continue on other side of chain: 3 sc, 2 sc in last st (this closes the oval). (12)
R2: inc, 3 sc, inc x3, 3 sc, inc x2 (18)
R3: sc in each st around (18)
FO, leave a long tail for sewing.
Arms (Make 2, Orange Yarn)
R1: 6 sc in MR (6)
R2: (sc, inc) x3 (9)
R3-R5: sc in each st around (9)
Lightly stuff the end of the arm.
R6: (sc, dec) x3 (6)
FO, leave a long tail for sewing.
Legs (Make 2, Orange Yarn)
R1: 6 sc in MR (6)
R2: inc in each st around (12)
R3-R5: sc in each st around (12)
Stuff firmly.
R6: (sc, dec) x4 (8)
FO, leave a long tail for sewing.
Tail (Orange, Yellow, Red Yarn)
Orange:
R1: 4 sc in MR (4)
R2: (sc, inc) x2 (6)
R3: sc in each st around (6)
R4: (2 sc, inc) x2 (8)
R5: sc in each st around (8)
R6: (3 sc, inc) x2 (10)
R7-R8: sc in each st around (10)
R9: (4 sc, inc) x2 (12)
R10-R11: sc in each st around (12)
Change to Yellow Yarn:
R12: sc in each st around (12)
R13: (dec, 4 sc) x2 (10)
Change to Red Yarn:
R14: (dec, 3 sc) x2 (8)
R15: (dec, 2 sc) x2 (6)
Stuff the tail as you go.
FO, leave a long tail for sewing.
Flame on Tail (Red and Yellow Yarn)
Small Yellow Flame (Make 2)
Ch 4.
R1: sc in 2nd ch from hook, hdc, sc. Ch 1, turn. (3)
R2: dec, sc. Ch 1, turn. (2)
R3: dec. (1)
FO, leave a tail.
Medium Red Flame (Make 2)
Ch 5.
R1: sc in 2nd ch from hook, 2 hdc, sc. Ch 1, turn. (4)
R2: sc, dec, sc. Ch 1, turn. (3)
R3: dec, sc. Ch 1, turn. (2)
R4: dec. (1)
FO, leave a tail.
Large Red Flame (Make 1)
Ch 6.
R1: sc in 2nd ch from hook, 3 hdc, sc. Ch 1, turn. (5)
R2: sc, hdc, dec, sc. Ch 1, turn. (4)
R3: sc, dec, sc. Ch 1, turn. (3)
R4: dec, sc. Ch 1, turn. (2)
R5: dec. (1)
FO, leave a tail.
Assembly
Attach the head to the body: Sew the open end of the head to the open end of the body using the remaining yarn tails. Stuff firmly before closing.
Attach the belly patch: Sew the yellow belly patch onto the front of the body.
Attach the arms: Sew the arms to the sides of the body, just below the neck.
Attach the legs: Sew the legs to the bottom of the body, allowing Charmander to sit.
Attach the tail: Sew the orange base of the tail to the back of the body, making sure it curves naturally.
Assemble the flame:
Sew the larger red flame piece to the very end of the tail.
Layer the medium red flame pieces slightly behind the large one, sewing them on.
Layer the small yellow flame pieces slightly behind the red ones, sewing them onto the yellow section of the tail. Arrange them to look like flickering flames.
Embroider details:
Using black yarn, embroider a small “V” shape or line for the mouth just below the eyes.
Using white yarn, embroider small lines on the front of each hand and foot for the claws.
For the eye highlights, embroider a small white dot or line on each safety eye.